LEXUS RX 450HL (2019 year). Instruction - part 40
640
7-3. Do-it-yourself maintenance
RX450h_RX450hL_U
■
Front side marker lights (vehicles with single-beam headlights)
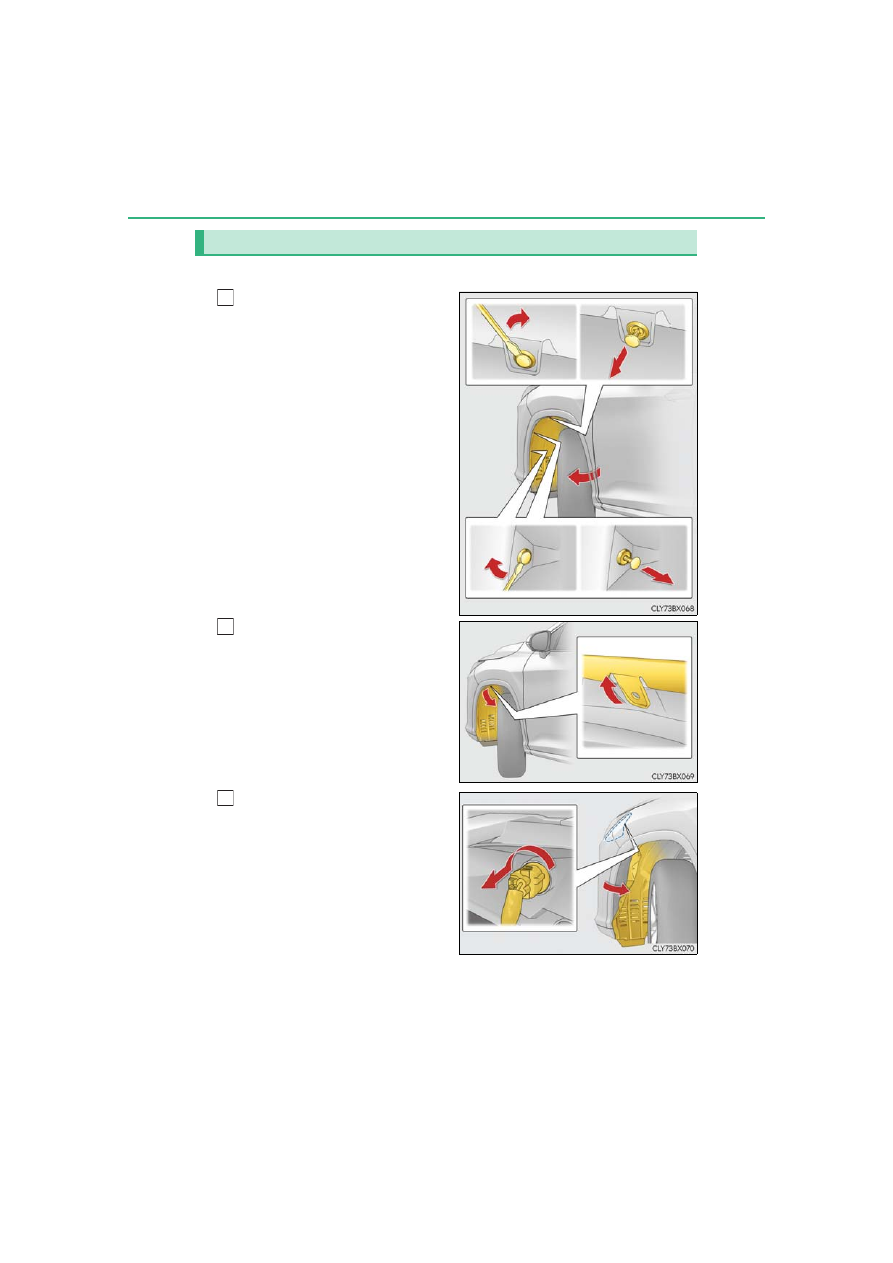
To ensure enough space to per-
form work, turn the steering
wheel to rotate the front wheel
away from the bulb to be
replaced.
Remove the 3 fender liner clips.
Turn the steering wheel to the left
when replacing the right side light
bulb, and turn the steering wheel to
the right when replacing the left side
light bulb.
When removing a fender liner clip,
use a flathead screwdriver to pry the
center portion out and then remove
the whole clip.
Pull back the fender liner until the
connector is visible.
Partially remove the fender liner
and turn the bulb base counter-
clockwise and remove it.
Replacing light bulbs
1
82
3