Lexus SC300 / Lexus SC400. Manual - part 130
 

  Index      Lexus     Lexus SC300 / Lexus SC400 - service repair manual


Search            


Content   ..  128  129  130  131   ..


Lexus SC300 / Lexus SC400. Manual - part 130


Hood Hinge
REMOVAL AND INSTALLATION

(See page 

BO–22

)

HINT:

Install the hinge by following removal sequence in

reverse.

1. REMOVE 

HOOD

Removal: 

(See steps 1 to 2 on page 

BO–20

)

Installation:  (See steps 1 to 2 on page 

BO–20

)

2. 

REMOVE FRONT BUMPER
Removal: 

(See steps 1 to 6 on page 

BO–12

 to 13)

Installation: (See 

page 

BO–14

)

3. 

REMOVE FRONT FENDER
Removal: 

(See steps 1 to 4 on page 

BO–92

)

Installation:  (See steps 1 to 4 on page 

BO–92

 to 93)

4. 

REMOVE COWL LOUVER

5. 

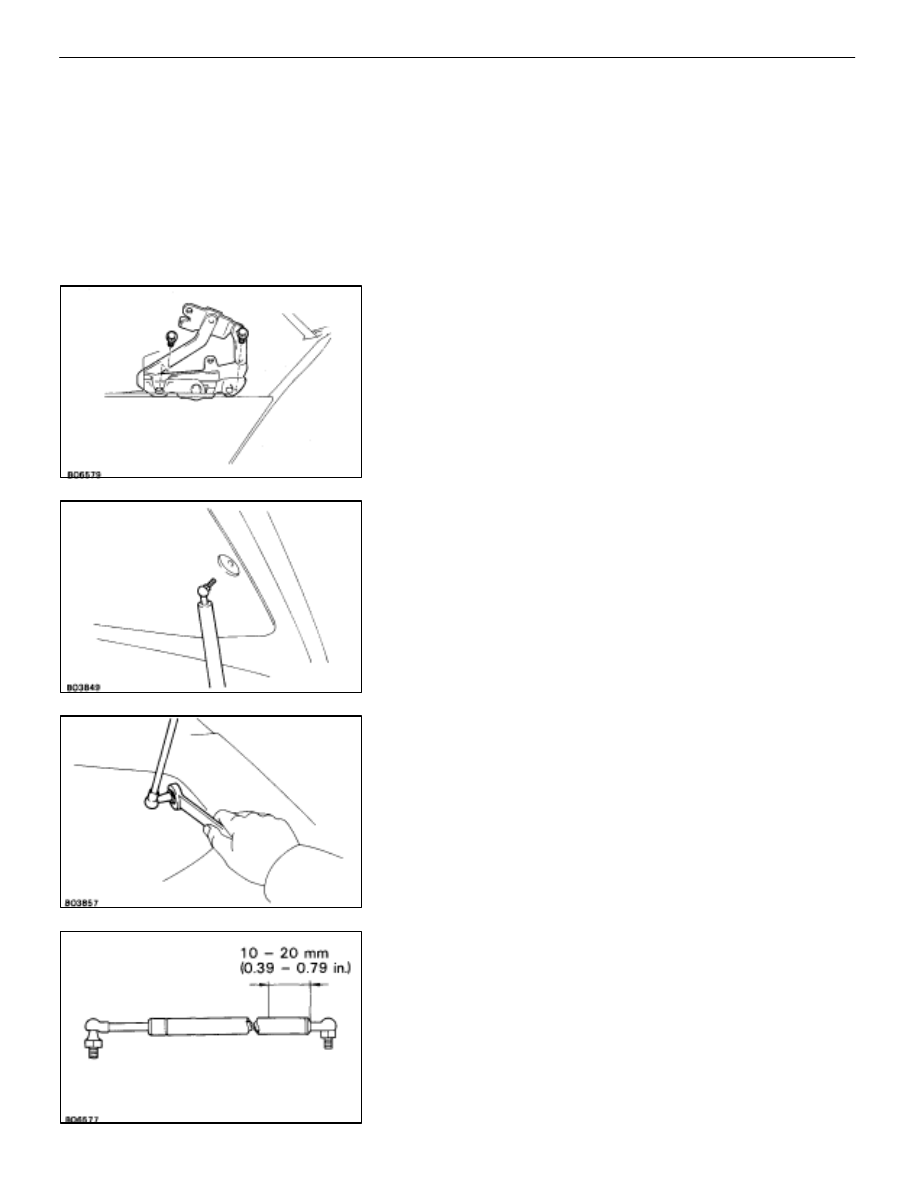
REMOVE HOOD HINGE
Remove two bolts and the hinge.

Hood Support
REMOVAL AND INSTALLATION

(See page 

BO–22

)

1. 

REMOVE SUPPORT FROM HOOD
Remove the bolt and the support from hood.
HINT:

While supporting the hood with your hand, remove

the hood.

2. 

REMOVE SUPPORT FROM BODY
Remove the bolt and the support.

3. 

IF NECESSARY, REPLACE HOOD SUPPORT
NOTICE: Handling the damper.

(a)  Do not disassemble the damper as the cylinder is filled

with pressurized gas.

(b) If 

the 

damper 

is 

to 

be 

replaced, drill a 2.0 – 3.0 mm

(0.079–0.118 in.) hole in the bottom of the removed

damper cylinder to completely release the high–pressure

gas before disposing of it.

(c)  When drilling, chips may fly out so work carefully.

(d)  The gas is colorless, odorless and non–toxic.

(e)  When working, handle the damper carefully. Never score

or scratch the exposed part of the piston rod, and never

allow paint or oil to get on it.

(f) 

Do not turn the piston rod and cylinder with the damper

fully extended.

4. 

INSTALL HOOD SUPPORT
Install the support.

Torque:

22 N

m (225 kgf

cm 16 ft

lbf)

BODY

Hood (Hood–Related Parts)

BO–23

Hood Lock Control

COMPONENTS

Front Bumper

BO–24

BODY

Hood (Hood Lock Control)

REMOVAL OF HOOD LOCK CONTROL

(See page 

BO–24

)

1. 

REMOVE FOLLOWING PARTS:
(a) Front 

bumper

(b)  LH front fender wheel opening moulding
(c)  LH fender liner
(d)  Fender splash shield
(e)  Hood release lever

2. 

REMOVE HOOD LOCK
(a)  Remove two bolts, the nut and the hood lock.
(b)  Disconnect the link from the lock.

3. 

REMOVE HOOD LOCK CONTROL CABLE
(a)  Disconnect the cable from clamps.

(b)  Using the screwdriver, pry out the cable stopper from

grommet.

HINT:

Do not damage the grommet with the screwdriver.

BODY

Hood (Hood Lock Control)

BO–25

(c)  Pull the cable from front wheel housing to remove it.

INSTALLATION OF HOOD LOCK
CONTROL

(See page 

BO–24

)

1.  BEFORE INSTALLING PARTS, COAT LOCK WITH MP

GREASE
Apply MP grease to the sliding surface of the lock.

2. 

INSTALL HOOD LOCK CONTROL CABLE
(a)  Push the rear side cable through the grommet.
(b)  Using the screwdriver, push the cable stopper into the

grommet.

HINT:

Do not damage the grommet with the screwdriver.

(c)  Clamp the cable to the junction block.
(d)  Pass the front side cable through the upper radiator

support.

3. 

INSTALL HOOD RELEASE LEVER

4. 

INSTALL HOOD LOCK TEMPORARILY

5.  CHECK HOOD LOCK CONTROL FOR PROPER

OPERATION
After checking for proper operation, tighten the nut and two
bolts to install the lock.

6. 

INSTALL FOLLOWING PARTS:
(a)  Hood release lever
(b)  Fender splash shield
(c)  LH fender liner
(d)  LH front fender wheel opening moulding
(e) Front 

bumper

BO–26

BODY

Hood (Hood Lock Control)


Content   ..  128  129  130  131   ..