Range Rover Classic. Manual - part 56


  Index      Land Rover     Range Rover Classic - service manual 1995 year


Search            


Content   ..  54  55  56  57   ..


Range Rover Classic. Manual - part 56


V8i

3

REPAIR

Test

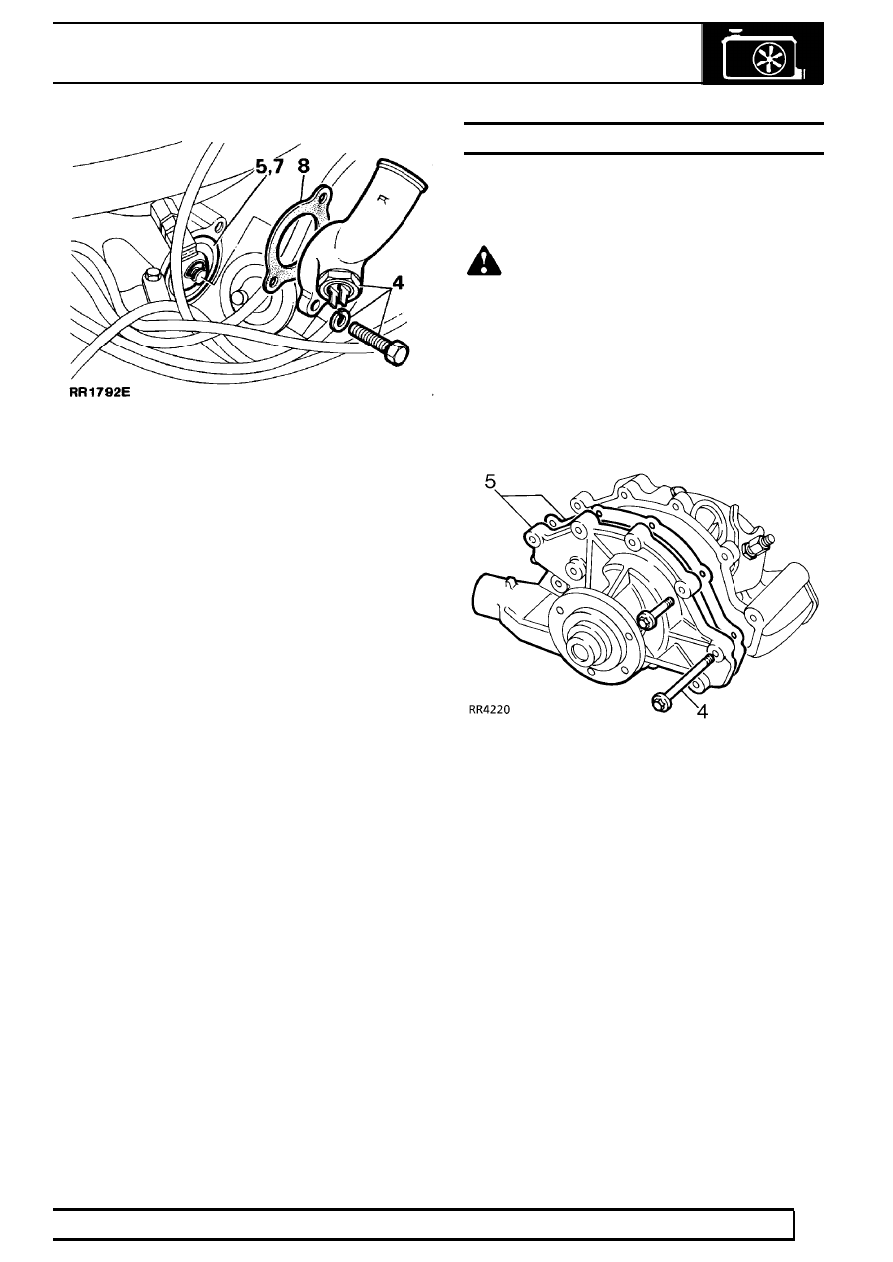
6. Note rating of thermostat is 88˚C. Place

thermostat in a container half full of water. Heat
water, observe temperature at which thermostat
opens. Thermostat is satisfactory if it opens
between 85˚C and 89˚C.

Refit

7. Insert thermostat with jiggle pin/vent hole

uppermost (12 o’clock position).

8. Fit the outlet elbow and new joint washer.

Tighten to

28 Nm.

9. Reverse removal procedure. 1 to 3.

10. Check for coolant leaks around all connections

and joint faces.

WATER PUMP

Service repair no - 26.50.01

Remove

WARNING: Disconnect battery negative
terminal to prevent engine being started
before removing or adjusting drive belts.

1. Drain engine cooling system.

See Adjustment,

Coolant

2. Remove fan blades and pulley.

See Viscous

Coupling, Fan Blades, Pulley and Fan Cowl

3. Disconnect inlet hose from water pump.
4. Remove water pump bolts.
5. Remove water pump and joint washer.

Refit

6. Lightly grease new joint washer, position on

timing cover.

7. Clean threads of all long bolts and coat with

Loctite 572 thread lubricant-sealant.

8. Locate water pump in position. Tighten

remaining water pump housing bolts evenly to
28 Nm.

9. Reverse removal procedure. 1 to 3.

10. Check for coolant leaks around all hose

connections and joint faces.

26

COOLING SYSTEM

RANGE ROVER

4

REPAIR

RADIATOR

Service repair no - 26.40.01

Remove

1. Drain cooling system.
2. Remove fan blade assembly.
3. Remove fan cowl.
4. Disconnect radiator top hoses.
5. Disconnect four transmission and engine oil

cooler connections to radiator end tanks. Note oil
spillage will occur when connections are
loosened. Blank off exposed oil connections.

6. Disconnect transmission oil temperature sensor.

7. Remove radiator securing brackets from each

side.

8. Remove radiator unit by lifting from its location.

Check condition of rubber mounting pads.

Refit

9. Check radiator sealing strips are securely

located.

10. Transfer oil cooler adaptors if fitting new radiator.
11. Reverse removal procedure. Ensure that oil

cooler connections are tightened to

30 Nm.

before fitting fan blades and cowl.

12. Clean coolant/oil spillage from vehicle.
13. Check all connections for coolant/oil leaks.

V8i

5

REPAIR

V8i

1

SPECIFICATIONS, TORQUE

TORQUE VALUES

NOTE: Torque wrenches should be regularly checked for accuracy to ensure that all fixings are
tightened to the correct torque.

Nm

Oil cooler pipes

30

..........................................................................................

Radiator filler plug (plastic)

6

.........................................................................


Content   ..  54  55  56  57   ..