Frelander 2. Manual - part 646
14. Cut through the adhesive to separate the reinforcements
from the roof panel.
15. Separate the remaining joints and remove the old panel.
Installation
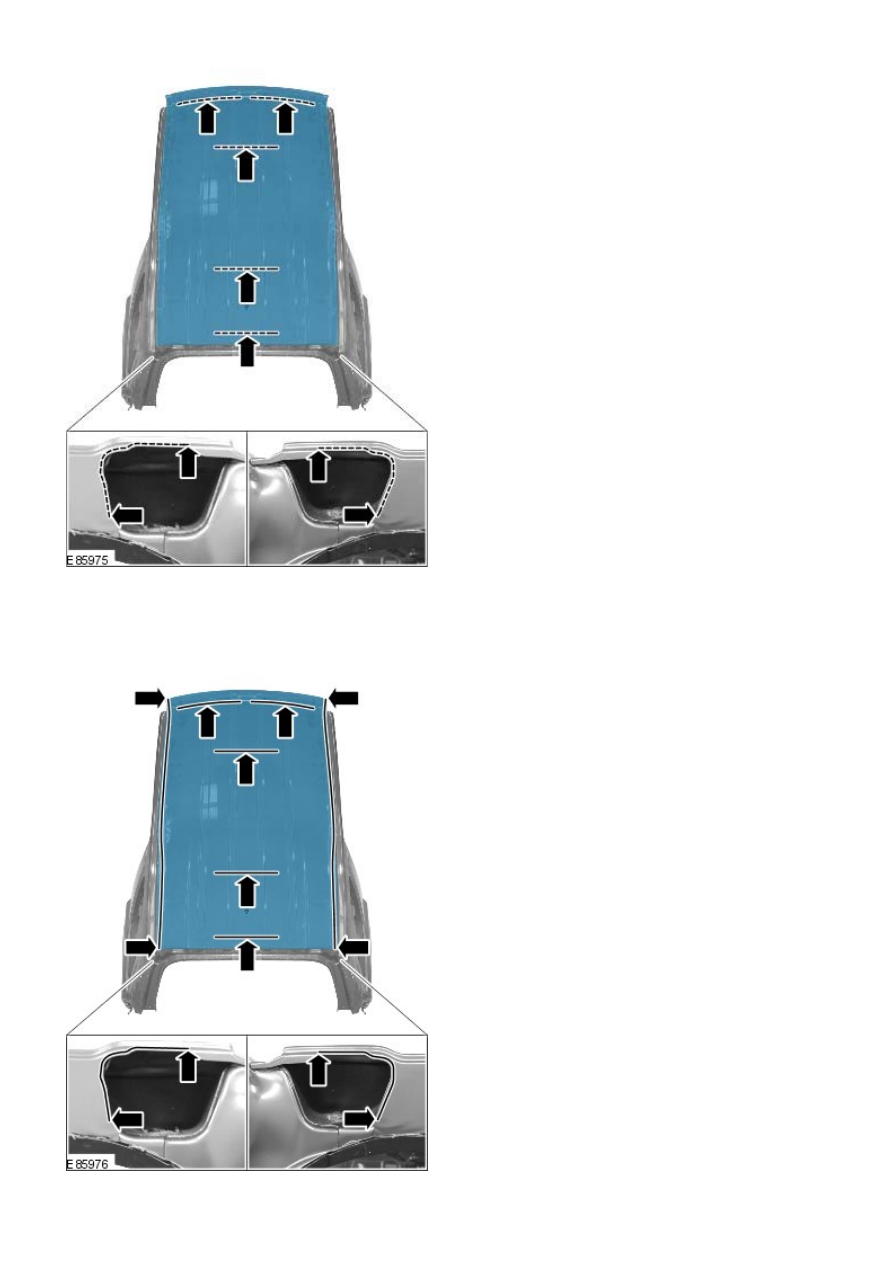
1. Prepare the old and new panel joint surfaces.
2. Apply adhesive, in the areas illustrated.
3. Offer up the new panel and clamp into position. Check