Freelander 1. Manual - part 271
WIPERS AND WASHERS
REPAIRS
84-1
WIPERS AND WASHERS
REPAIRS
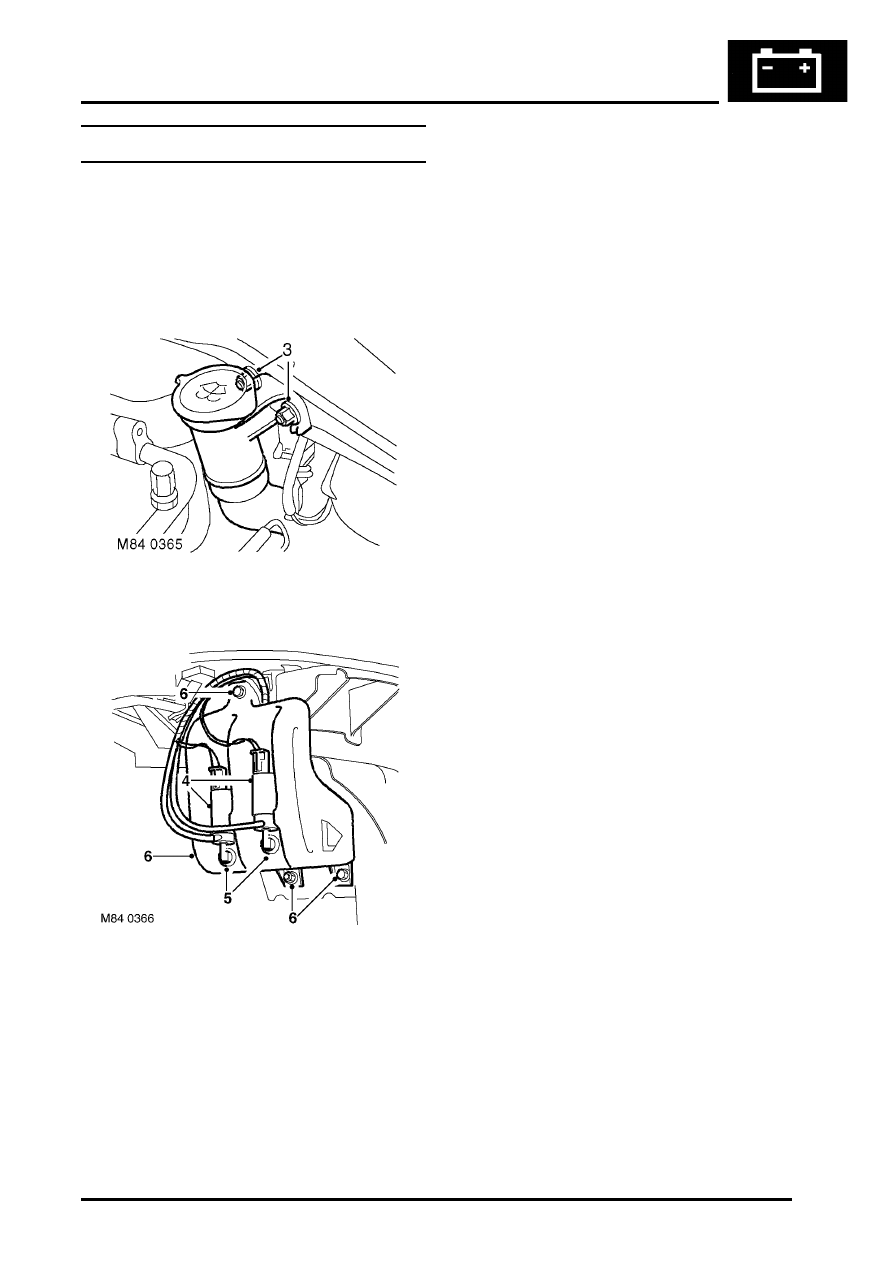
Reservoir - washer
$% 84.10.01
Remove
1. Remove front bumper.
2. Position container to collect fluid loss.
3. Remove 2 nuts securing reservoir filler neck
and remove filler neck.
4. Release both washer pumps from reservoir.
5. Remove and discard pump sealing grommets.
6. Remove 3 bolts securing washer reservoir and
remove.
Refit
1. Fit reservoir and secure with bolts.
2. Fit new pump sealing grommets to reservoir.
3. Fit pumps to reservoir.
4. Fit filler neck and secure with nuts.
5. Fit front bumper.