Freelander 1. Manual - part 204


  Index      Land Rover     Freelander 1 - service manual 2002 year


Search            


Content   ..  202  203  204  205   ..


Freelander 1. Manual - part 204


DOORS

REPAIRS

76-1-9

Refit

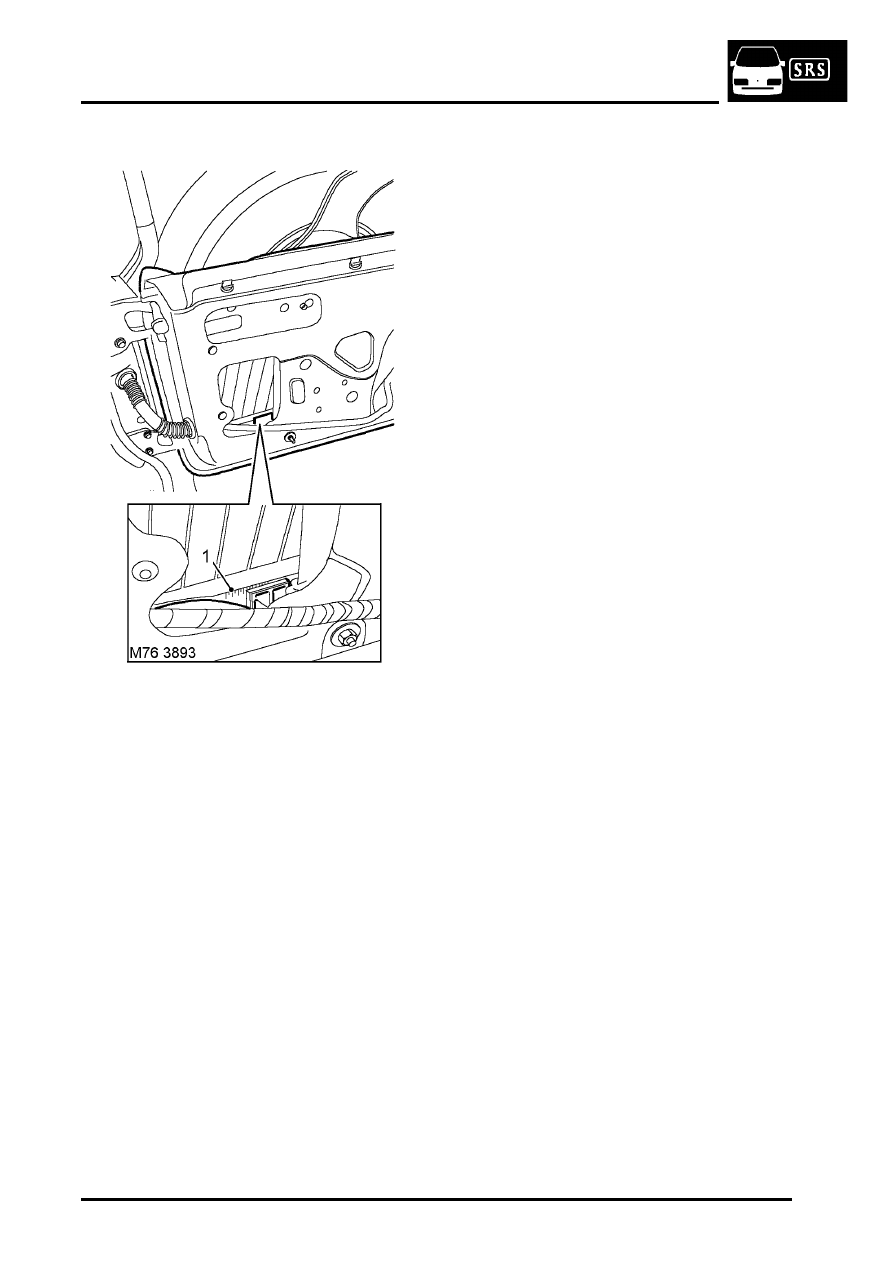
1. Position screen to door and align in clamps 

using timing marks on screen.

2. Ensure glass is fully pushed down in clamp 

closest to door hinge, then tighten clamp bolt.

3. Position screen horizontally by lifting clamp 

closest to door latch so that screen heater 
element is aligned with waist seal.

4. Tighten clamp bolts to 8 Nm (6 lbf.ft).
5. Raise screen and connect Lucars to screen 

heater element.

6. Ensure a 5mm equal gap exists between 

screen and both 'E' post finishers. If required, 
adjust screen again using timing marks.

7. Loosen lower adjuster lock nuts.
8. Loosen pre-load screws so screen clears seal.
9. Adjust pre-load screws until screen is just in 

contact with seal.

10. Adjust pre-load screws until screen applies a 

1mm pre-load on seal.

11. Ensure there is full screen to seal contact.
12. Lower glass and tighten lock nuts to 14 Nm (10 

lbf.ft).

13. Recheck pre-load.
14. Raise and lower screen to confirm correct 

alignment.

15. Fit tail door plastic sheet.


 + 

 DOORS, REPAIRS, Plastic sheet - 

tail door.

DOORS

76-1-10 REPAIRS

Quarter light - rear door

$% 76.31.31

Remove

1. The procedure for renewing the quarter light is 

identical to renewing the rear door glass 
channel seal. 
 

 + 

 DOORS, REPAIRS, Rubber/felt - 

glass channel - rear door.

1.

Glass regulator - tail door 

$% 76.31.65

Remove

1. Remove rear screen.


 + 

 DOORS, REPAIRS, Glass - tail door.

2. Disconnect multiplug from regulator motor.

3. Loosen 3 nuts securing regulator motor and 

rotate motor to release from door.

4. Loosen 4 nuts securing top of cable guides and 

release guides from door.

5. Remove 2 nuts securing pre-load adjusters and 

rotate adjusters fully clockwise to improve 
access.

6. Release regulator from door and detach 

electrical harness from LH glass clamp.

7. Remove regulator from door.

DOORS

REPAIRS 76-1-11

Refit

1. Position regulator to door and unclip motor 

transit package from rail.

2. Connect multiplug to regulator motor.
3. Connect harness clip and align regulator to 

door.

4. Fit nuts to pre-load adjusters, but do not tighten 

at this stage.

5. Position tops of cable guides to door, leaving 

fixings finger tight.

6. Tighten regulator motor fixings.
7. Fit rear screen.


 + 

 DOORS, REPAIRS, Glass - tail door.

Seal - waist inner - tail door

$% 76.31.67

Remove

1. Lower rear screen.

2. Raise wiper blade away from seal.
3. Remove 2 bolts from ends of seal.
4. Release seal from door flanges.
5. Remove waist seal.

Refit

1. Position seal to door flanges and secure with 

bolts.

2. Lower wiper blade onto seal.
3. Raise rear screen.

DOORS

76-1-12 REPAIRS

Trim casing - front door - 3 door 

$% 76.34.01

Remove

1. Release cheater panel from front door.
2. Disconnect Lucars and remove cheater panel.

3. Remove door pull centre trim.
4. Remove 2 screws securing door pull and 

remove door pull.

5. Remove screw securing door handle 

escutcheon to door and remove escutcheon.

6. Remove 6 Torx screws securing door casing, 

release casing from 3 studs and sill button and 
remove casing.

7. Remove 6 speed nuts securing speaker grill 

and remove speaker grill.

NOTE: Do not carry out further dismantling if 
component is removed for access only.

8. Remove 3 casing studs.
9. Remove sill button guide.

Refit

1. Position speaker grill and secure with speed 

nuts.

2. Fit sill button guide.
3. Fit casing studs.
4. Position casing to door, locate sill button and 

secure in studs.

5. Fit and tighten Torx screws.
6. Fit escutcheon to door handle and secure with 

screw.

7. Fit door pull and secure with screws.
8. Fit door pull centre trim.
9. Connect Lucars to cheater panel and fit cheater 

panel.


Content   ..  202  203  204  205   ..