Discovery 2. Manual - part 330


  Index      Land Rover     Land Rover Discovery 2 - service manual 1999 year


Search            


Content   ..  328  329  330  331   ..


Discovery 2. Manual - part 330


ALARM SYSTEM AND HORN

REPAIR 86-4-25

REPAIR

Switch - central door locking  

$% 86.26.30 

Remove

1. Carefully remove clock assembly from  louvre 

panel. 

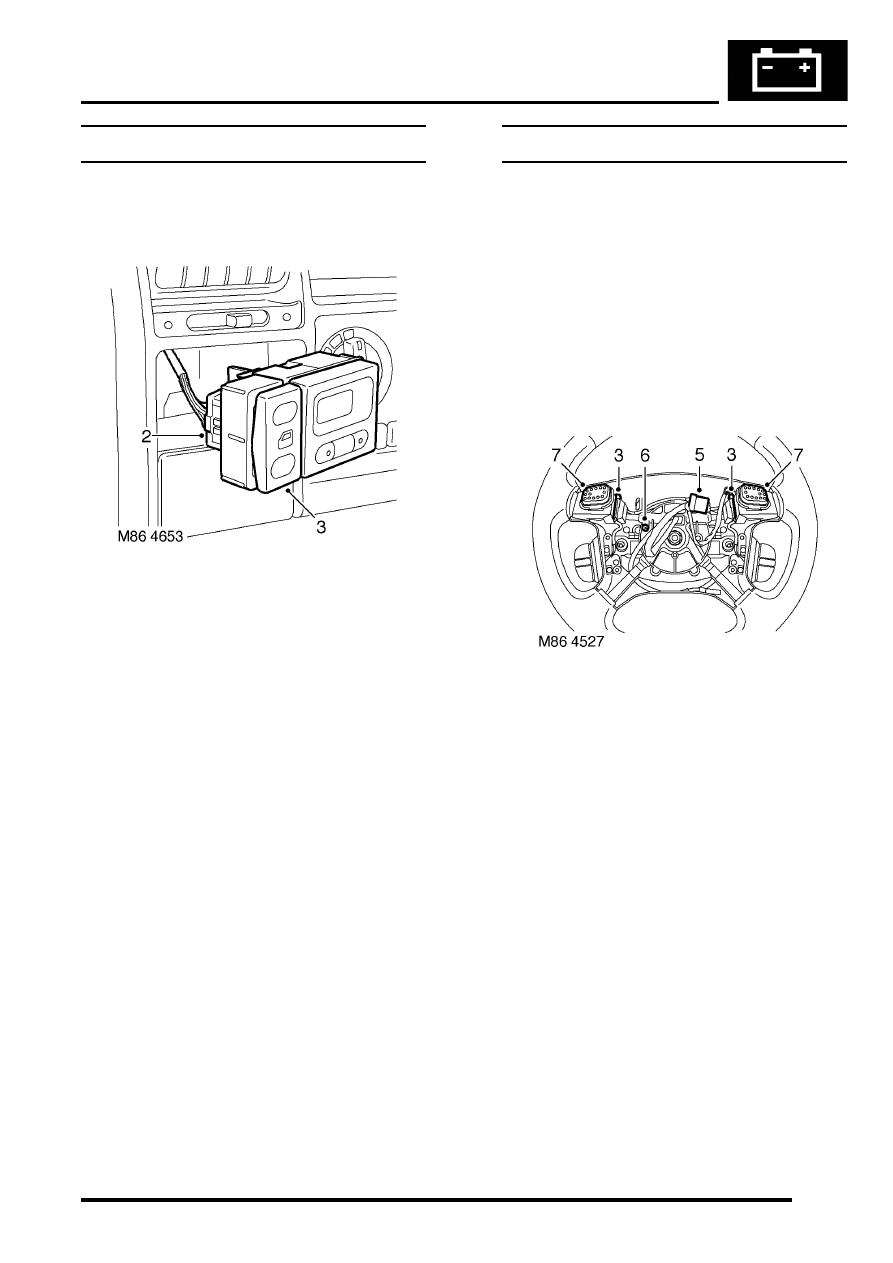
2. Disconnect multiplug from door lock  switch. 
3. Remove door lock switch from clock. 

Refit

1. Fit door lock switch to clock assembly. 
2. Connect multiplug to door  lock switch. 
3. Position clock assembly and push to  secure in 

position. 

Switches - horn  

$% 86.30.01 

Remove

WARNING: It is imperative that before any 
work is undertaken on the SRS system the 
appropriate information is read thoroughly.

1. Disconnect both battery leads, negative lead 

first, and wait 10 minutes.

2. Remove driver's airbag module.


 + 

 RESTRAINT SYSTEMS, REPAIRS, 

Airbag module - drivers.

3. Release horn switch multiplugs and  leads from 

steering wheel base. 

4. Disconnect horn switch multiplugs from  

harness. 

5. Disconnect horn switch multiplug from  rotary 

coupler harness. 

6. Remove screw securing earth leads to steering 

wheel. 

7. Using a broad round edged tool, carefully prise 

horn switches from steering  wheel. 

Refit

1. Fit to steering wheel and connect multiplugs. 
2. Fit earth leads and secure with screw. 
3. Secure leads and multiplugs to base of steering 

wheel. 

4. Fit driver's airbag module.


 + 

 RESTRAINT SYSTEMS, REPAIRS, 

Airbag module - drivers.

ALARM SYSTEM AND HORN

86-4-26 REPAIR

Vehicle horn  

$% 86.30.10 

Remove

1. Remove front grille.


 + 

 EXTERIOR FITTINGS, REPAIRS, 

Grille - front - up to 03MY. 

2. Disconnect multiplug from horn. 
3. Remove nut securing horn to body and remove 

horn. 

Refit

1. Fit horn to body and tighten  nut to 13 Nm (10 

lbf.ft). 

2. Connect multiplug to horn. 
3. Fit front grille. 


 + 

 EXTERIOR FITTINGS, REPAIRS, 

Grille - front - up to 03MY.

Sounder - alarm  

$% 86.77.10 

Remove

1. Remove nut securing sounder to mounting  

bracket. 

2. Release sounder from mounting bracket,  

disconnect multiplug and remove sounder. 

Refit

1. Position sounder and connect multiplug. 
2. Fit sounder to bracket and secure with  nut. 

ALARM SYSTEM AND HORN

REPAIR 86-4-27

Sounder - battery backed-up (BBUS)

$% 86.77.13

Remove

1. Remove rear quarter lower casing.  


 + 

 INTERIOR TRIM COMPONENTS, 

REPAIRS, Trim casing - side - loadspace.

2. Remove nut securing BBUS to RH rear body 

panel. 

3. Disconnect multiplug and remove BBUS. 

Refit

1. Position BBUS, connect multiplug and tighten 

securing nut. 

2. Fit rear quarter lower casing.


 + 

 INTERIOR TRIM COMPONENTS, 

REPAIRS, Trim casing - side - loadspace.

Switch - bonnet  

$% 86.77.20 

Remove

1. Remove rubber cover from bonnet switch. 
2. Disconnect multiplug, release switch  retainers 

and remove switch. 

Refit

1. Position switch and connect multiplug. 
2. Fit rubber cover to switch, 

ALARM SYSTEM AND HORN

86-4-28 REPAIR

Receiver - alarm system - models with 
sunroof 

$% 86.77.31

Remove

1. Remove trim seal from rear sunroof.
2. Release sunroof switch and remove screw 

securing headlining.

3. Remove 2 nuts securing receiver to roof panel, 

disconnect multiplug and remove receiver.

Refit

1. Connect multiplug to receiver, fit to roof panel, 

tighten nuts to 10 Nm (7 lbf.ft).

2. Fit and tighten screw securing headlining.
3. Fit sunroof switch
4. Fit sunroof trim seal.
5. Connect multiplug to receiver, fit to roof panel 

and secure with nuts tighten to 10 Nm (7 lbf.ft).

Receiver - alarm system - models 
without sunroof

$% 86.77.31

Remove

1. Remove rear headrest. Repeat operation on 

opposite side.
 

 + 

 SEATS, REPAIRS, Head restraint - 

third row seat.

2. Remove 'D' post trim casing. Repeat operation 

on opposite side.
 

 + 

 INTERIOR TRIM COMPONENTS, 

REPAIRS, Trim casing - 'D' post.

3. Remove rear interior light. 


 + 

 LIGHTING, REPAIRS, Lamp - interior 

- rear.

4. Release 2 studs securing rear headlining, 

carefully lower lining.

5. Remove 2 studs securing alarm receiver.
6. Disconnect multiplug from alarm receiver and 

remove receiver.

Refit

1. Connect multiplug to receiver.
2. Position receiver and secure with studs.
3. Position rear end of headlining, secure with 

studs.

4. Fit rear interior light. 


 + 

 LIGHTING, REPAIRS, Lamp - interior 

- rear.

5. Fit both 'D' post trim casings. Repeat operation 

on opposite side.
 

 + 

 INTERIOR TRIM COMPONENTS, 

REPAIRS, Trim casing - 'D' post.

6.  Fit rear headrests. Repeat operation on 

opposite side. 
 

 + 

 SEATS, REPAIRS, Head restraint - 

third row seat.

M86 5632

M86 5761


Content   ..  328  329  330  331   ..