Defender 90 NAS. Manual - part 13


  Index      Land Rover     Defender 90 NAS - service manual 1997 year


Search            


Content   ..  11  12  13  14   ..


Defender 90 NAS. Manual - part 13


MAINTENANCE

11

MAINTENANCE

CHECK/TOP-UP TRANSFER GEARBOX OIL

1. Ensure vehicle is level.
2. Disconnect battery negative lead.
3. Clean area around filler/level plug.
4. Remove plug and fill gearbox with recommended

grade of oil, until oil starts to seep from filler/level
hole.

See LUBRICANTS, FLUIDS AND

CAPACITIES, Information, recommended
lubricants and fluids

5. Clean any previously applied sealant from

filler/level plug.

6. Apply Hylomar sealant to threads of plug and

refit plug. Tighten to

30 Nm, 22 lbf ft.

7. Wipe away any surplus oil.
8. Reconnect battery negative lead.

RENEW TRANSFER GEARBOX OIL

1. Ensure vehicle is level.
2. Disconnect battery negative lead.
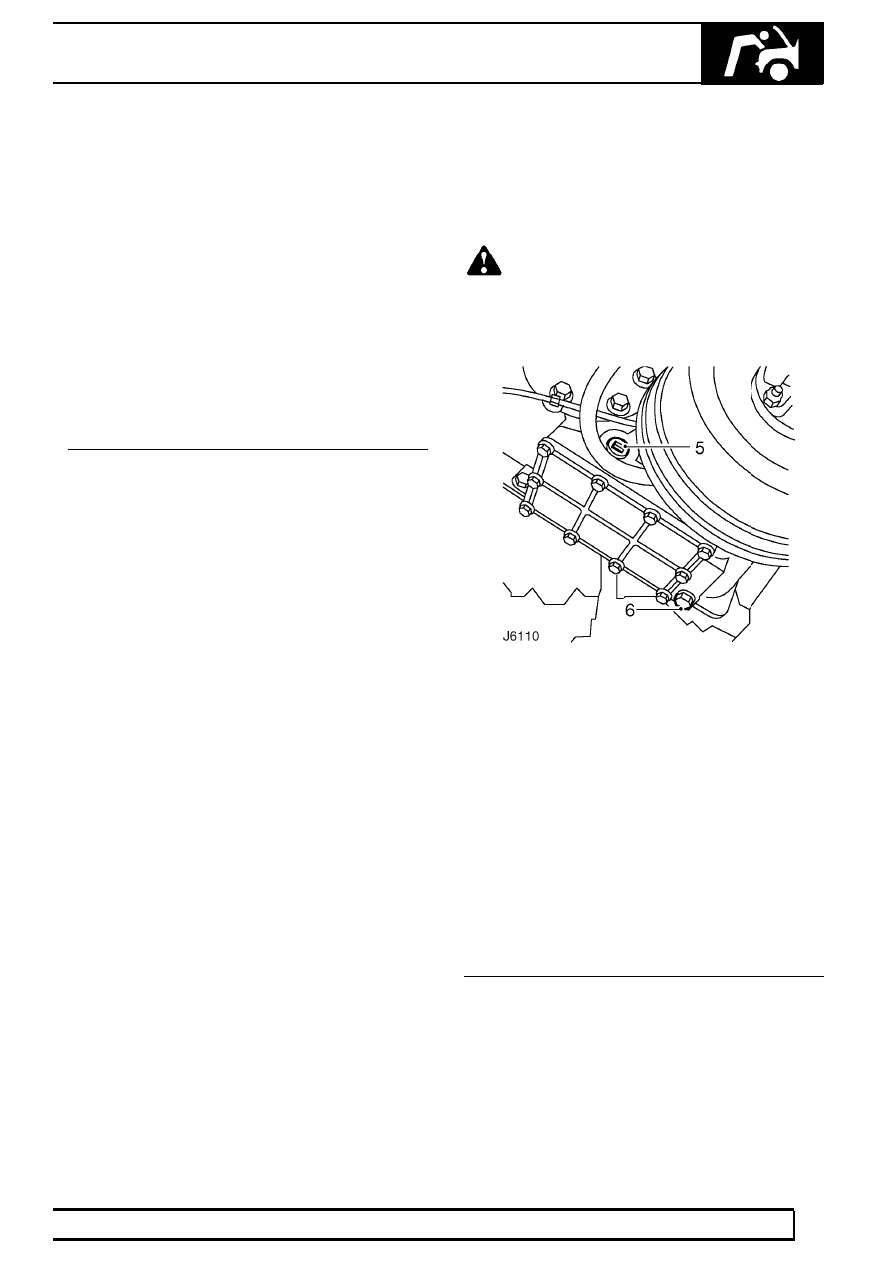
3. Clean area around filler/level and drain plugs.

WARNING: When draining gearbox care
should be taken to ensure that oil is not
hot as personal scalding could result.

4. Place a suitable container under transfer

gearbox.

5. Remove filler/level plug to vent gearbox and

assist draining.

6. Remove drain plug and allow oil to drain.
7. Thoroughly clean drain plug threads prior to

applying fresh ’Hylomar’ sealant. Fit plug
Tighten to

30 Nm, 22 lbf ft.

8. Fill gearbox with correct quantity and grade of oil

until oil seeps from filler level hole. Wipe away
any surplus oil.

See LUBRICANTS, FLUIDS

AND CAPACITIES, Information,
Recommended lubricants and fluids

9. Thoroughly clean filler/level plug threads prior to

applying fresh ’Hylomar’ sealant. Fit plug
Tighten to

30 Nm, 22 lbf ft.

10. Reconnect battery negative lead.

10

MAINTENANCE

12

MAINTENANCE

CHECK/TOP-UP FRONT AND REAR AXLE OIL

1. Ensure vehicle is level.
2. Using a 13mm, 0.5 in square drive wrench,

remove filler/level plug from axle.

3. If necessary inject oil of recommended grade

until it reaches level hole.

See LUBRICANTS,

FLUIDS AND CAPACITIES, Information,
recommended lubricants and fluids

4. Clean and refit filler/level plug and wipe away

surplus oil.

RENEW FRONT AND REAR AXLE OIL

1. Site vehicle on lift or level ground. Place

container under axle to be drained.

2. Using a 13mm, 0.5 in square drive wrench,

remove drain and filler/level plugs from axle.
Allow oil to drain completely. Clean and refit
drain plug.

3. Inject new oil of recommended make and grade

until it reaches level hole.

See LUBRICANTS,

FLUIDS AND CAPACITIES, Information,
recommended lubricants and fluids

4. Clean and refit filler/level plug and wipe away

surplus oil.

CHECK/TOP-UP SWIVEL PIN HOUSING OIL

CAUTION: Housings with filler plug only
are filled with grease which does not
require top-up or renewing.

1. Site vehicle on lift or level ground. Clean area of

filler/level plug.

2. Remove filler/level plug and inject recommended

grade of oil until it seeps from level hole.

3. Refit filler/level plug, wipe away any surplus oil.

RENEW SWIVEL PIN HOUSING OIL

1. Site vehicle on lift or level ground. Place

container under swivel to be drained.

2. Remove drain and level plugs, allow oil to drain

completely, clean and refit drain plug.

3. Remove filler plug and inject recommended

grade of oil it reaches level hole.

4. Clean and refit level and filler plugs, wipe away

any surplus oil.

NOTE: On later vehicles, the level and
drain plugs have been deleted. The swivel
pin housing is filled with grease for life

service and maintenance is not required.

MAINTENANCE

13

MAINTENANCE

LUBRICATE PROPELLER SHAFT SLIDING AND
UNIVERSAL JOINTS

1. Clean all grease nipples on front and rear

propeller shafts.

2. Using a low pressure hand grease gun, apply

recommended grease, to grease nipples at front
and rear propeller shaft universal and sliding
joints.

CHECK VISUALLY BRAKE, FUEL PIPES/UNIONS
FOR CHAFING LEAKS AND CORROSION

CHECK EXHAUST SYSTEM FOR LEAKS,
SECURITY AND DAMAGE

CHECK FOR FLUID LEAKS FROM POWER
STEERING AND SUSPENSION SYSTEMS,
HYDRAULIC PIPES AND UNIONS FOR CHAFING
AND CORROSION

CHECK/TIGHTEN STEERING UNIT AND STEERING
ROD BALL JOINT FIXINGS, CHECK CONDITION
OF OF BALL JOINTS AND DUST COVERS

Ball joints are lubricated for their normal life during
manufacture and require no further lubrication. This
applies ONLY if rubber boot has not been dislodged
or damaged. Joints should be checked at specified
mileage intervals but more frequently if vehicle is used
under arduous conditions.

1. Check for wear in joints by moving ball joint up

and down vigorously. If free movement is
apparent fit a new joint assembly.

CHECK/TIGHTEN FRONT AND REAR AXLE
SUSPENSION LINK FIXINGS, CHECK CONDITION
OF MOUNTING RUBBERS.

CHECK/TIGHTEN TOWING BRACKET FIXINGS.

10

MAINTENANCE

14

MAINTENANCE

RENEW FUEL FILTER

WARNING: Ensure that fuel handling
precautions given in Section 01 -
Introduction are strictly adhered to when

carrying out following instructions.

See

INTRODUCTION, Information, Fuel Handling
Precautions

WARNING: The spilling of fuel is
unavoidable during this operation. Ensure
that all necessary precautions are taken to

prevent fire and explosion.

The fuel line filter is located on RH chassis side
member forward of the rear wheel arch.

1. Disconnect battery negative lead.

2. Thoroughly clean area around hose

connections.

3. Position cloth around relevant union on fuel filter

to protect against fuel spray as fuel line pressure
is released.

See FUEL SYSTEM, Repair, Fuel

filter

4. Loosen 2 fuel unions and disconnect hoses from

filter canister.

5. Loosen bolt securing bracket to chassis side

member and remove filter.

Fit new filter

6. Fit a new filter and tighten bracket bolt. Ensure

direction of flow ARROW on canister faces
forward.

7. Fit inlet and outlet hoses.

30 Nm, 22 lbf ft.

8. Reconnect battery negative lead.
9. Start engine and inspect hose connections for

fuel leaks.

RENEW HEATED OXYGEN SENSORS (HO2S)

See FUEL SYSTEM, Repair, Heated Oxygen

Sensor (HO2S) - Front
and

See FUEL SYSTEM, Repair, Heated Oxygen

Sensor (HO2S) - Rear

RENEW CATALYTIC CONVERTERS

See EMISSION CONTROL, Repair, front pipe /

catalytic converter

REPORT ANY UNUSUAL FEATURES OF VEHICLE
CONDITION AND ADDITIONAL WORK REQUIRED


Content   ..  11  12  13  14   ..