Defender. Manual - part 211


  Index      Land Rover     Land Rover Defender - service manual 2007 year


Search            


Content   ..  209  210  211  212   ..


Defender. Manual - part 211


1. NOTE: If a new compressor is being installed, the required

amount of refrigerant oil must be drained from it.

To install, reverse the removal procedure.

Tighten to 23 Nm (17 lb.ft).

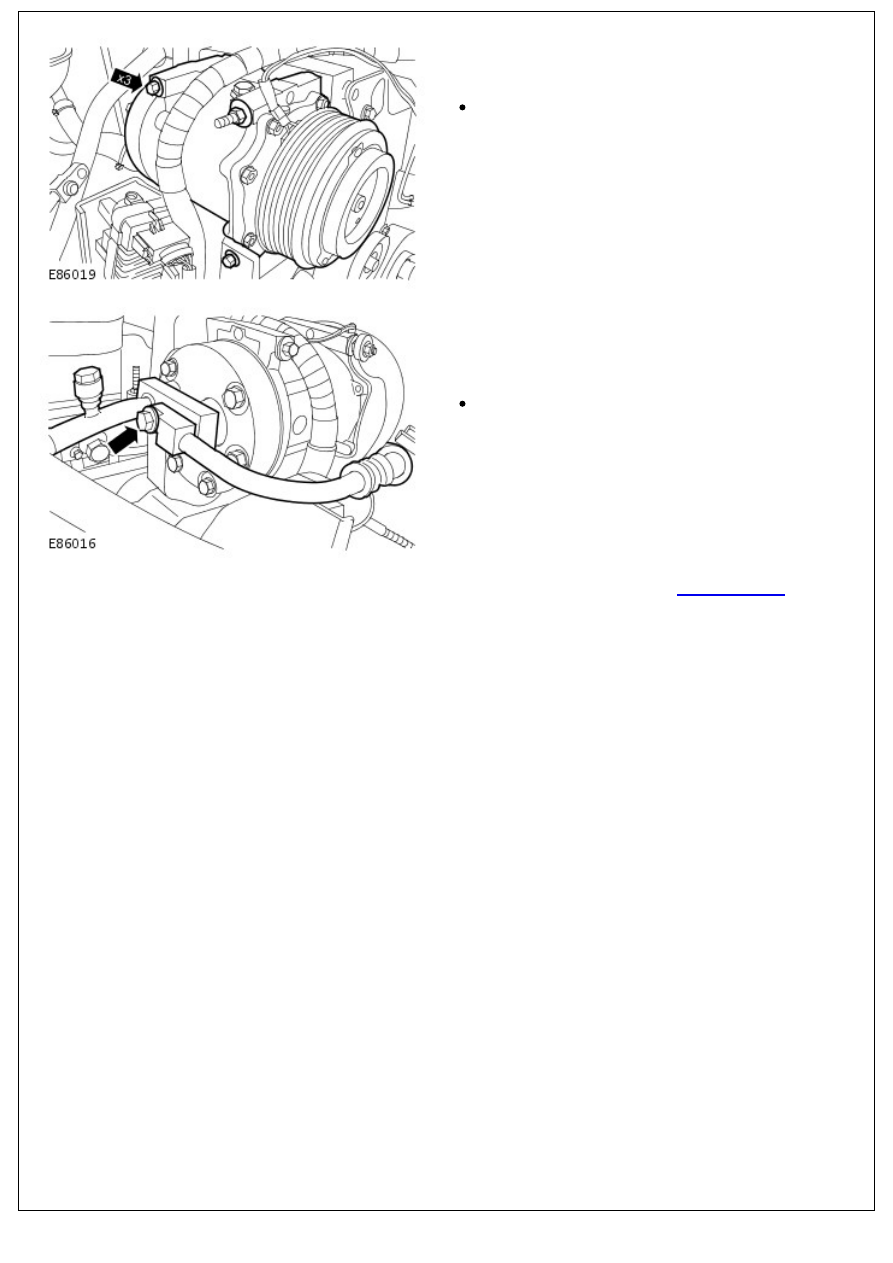
2. NOTE: Coat the compressor O-ring seals in clean

refrigerant oil prior to installation.

• NOTE: Remove and discard the blanking caps.

Tighten to 30 Nm (22 lb.ft).

Install new O-ring seals.

3. Connect the battery ground cable. 

For additional information, refer to: 

Battery Connect

 (414-01

Battery, Mounting and Cables, General Procedures).

Air Conditioning - 2.4L Duratorq-TDCi HPCR (103kW/140PS) - Puma - Air

Conditioning (A/C) Switch

Removal and Installation

Removal

1. Disconnect the battery ground cable. 

For additional information, refer to: 

Battery Disconnect and

Connect

 (414-01 Battery, Mounting and Cables, General

Procedures).

2. Remove the audio unit. 

For additional information, refer to: 

Audio Unit

 (415-01A

Audio Unit, Removal and Installation).

3. Release the instrument panel console.

4. Release the air conditioning (A/C) switch.

5. Remove the A/C switch.

Disconnect the electrical connector.

Installation

1. To install, reverse the removal procedure.
2. Connect the battery ground cable. 

For additional information, refer to: 

Battery Connect

 (414-01

Battery, Mounting and Cables, General Procedures).

Air Conditioning - 2.4L Duratorq-TDCi HPCR (103kW/140PS) - Puma -

Condenser Core

Removal and Installation

Removal

1. Disconnect the battery ground cable. 

For additional information, refer to: 

Battery Disconnect and

Connect

 (414-01 Battery, Mounting and Cables, General

Procedures).

2. Recover the air conditioning (A/C) refrigerant. 

For additional information, refer to: 

Air Conditioning (A/C)

System Recovery, Evacuation and Charging

 (412-00 Climate

Control System - General Information, General Procedures).

3. Remove the radiator grille. 

For additional information, refer to: 

Radiator Grille

 (501-08

Exterior Trim and Ornamentation, Removal and Installation).

4. Disconnect the condenser fan electrical connector.

5. Disconnect the A/C condenser core low-pressure and high-

pressure refrigerant lines.

Remove the 2 bolts.

Remove and discard the O-ring seals.

6. Release the condenser fan electrical connector.

7. Remove the condenser core and condenser fan assembly.

7. Remove the condenser core and condenser fan assembly.

Remove the 3 bolts.

8. Remove the condenser fan.

Remove the 4 bolts.

9. Remove the condenser core.

Remove the 8 nuts.

Installation

1. To install, reverse the removal procedure.

Tighten to 8 Nm (6 lb.ft).

2. Tighten to 2 Nm (1 lb.ft).


Content   ..  209  210  211  212   ..