Jeep Grand Cherokee WJ. Manual - part 534
INSTALLATION
(1) Position fender on body.
(2) Right fender only:
(a) If equipped, install radio antenna.
(3) Install all screws finger-tight.
(4) Align fender with adjacent body panels and
wax crayon reference marks.
(5) Tighten all screws.
(6) Install inner fender liner.
FRONT DOOR TRIM PANEL
REMOVAL
(1) Remove trim plug from mirror flag bezel.
(2) Remove screws attaching trim panel to door
(Fig. 14).
(3) Using trim remover (C-4829 or equivalent),
detach trim panel perimeter push-in fasteners from
door inner panel.
(4) Lift trim panel upward and separate from door.
(5) If equipped, disconnect harness connectors for
power accessories.
(6) Disconnect latch rods from inside handle actua-
tor.
(7) Separate trim panel from vehicle.
INSTALLATION
(1) Connect latch rods to inside handle actuator.
(2) If equipped, connect harness connectors to
power accessories.
(3) Position trim panel on door inner panel.
(4) Press trim panel push-in fasteners inward
around perimeter of door.
(5) Install screws attaching trim panel to door.
(6) Install trim plug in mirror flag bezel.
FRONT DOOR WATERDAM
REMOVAL
(1) Remove door trim panel.
(2) Peel the waterdam from door.
(3) Route all harnesses and linkage rods through
waterdam as necessary.
(4) Separate waterdam from door (Fig. 15).
INSTALLATION
(1) Waterdam contact surface must be free of con-
taminants. Clean as necessary.
(2) Route all harnesses and linkage rods through
waterdam as necessary.
(3) Position waterdam on door and align all holes.
(4) Press waterdam on door.
(5) Install door trim panel.
FRONT DOOR CHECK
REMOVAL
(1) Remove trim panel.
(2) Remove waterdam.
(3) Remove speaker.
(4) Remove screws attaching door check to A-pillar.
(5) Remove nuts attaching door check to door (Fig.
16).
(6) Remove door check through speaker location
hole.
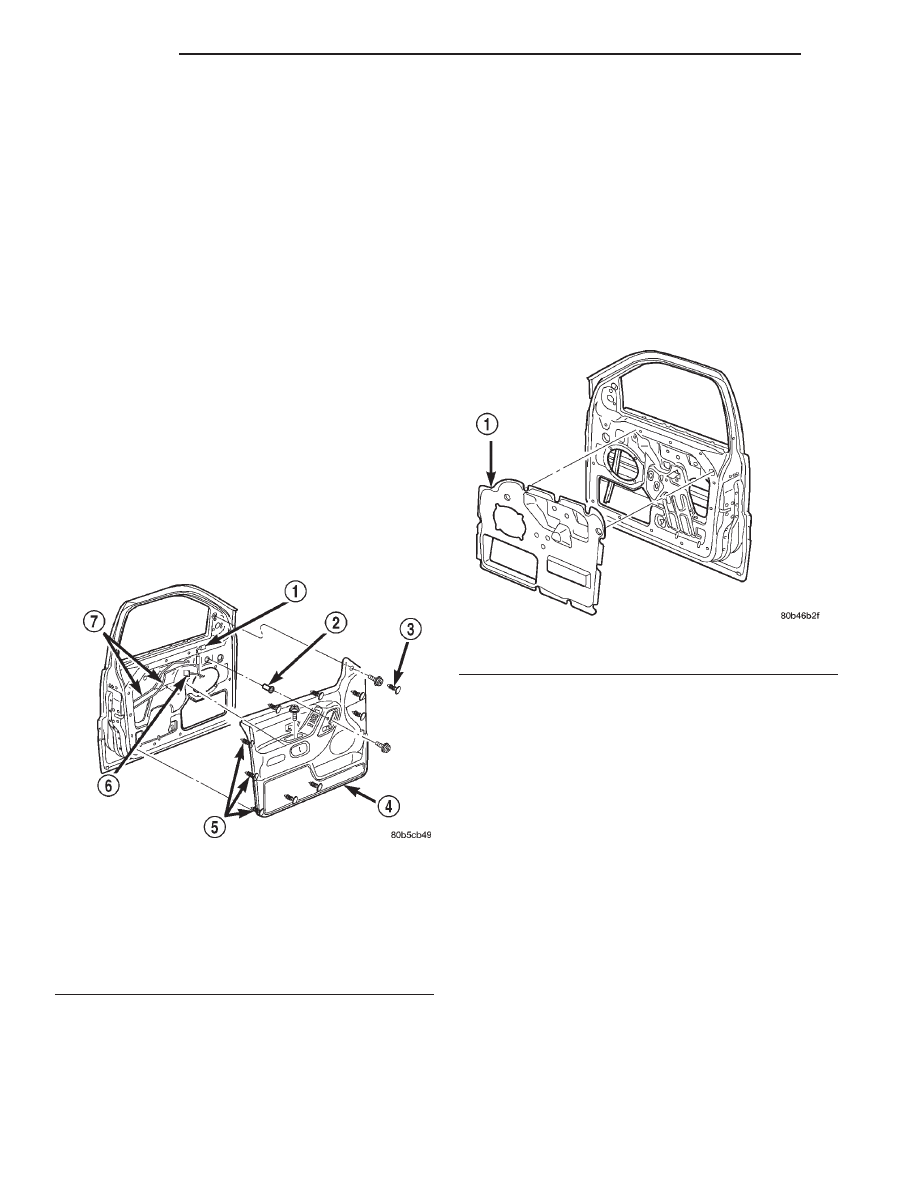
Fig. 14 Front Door Trim Panel
1 – HARNESS CONNECTOR
2 – NUTSERT
3 – TRIM PLUG
4 – TRIM PANEL
5 – PUSH-IN FASTENER
6 – HARNESS CONNECTOR
7 – LATCH RODS
Fig. 15 Front Door Waterdam
1 – INSULATOR PAD
23 - 34
BODY
WJ
REMOVAL AND INSTALLATION (Continued)