Jeep Grand Cherokee WJ. Manual - part 474
(12) Lower vehicle and verify transfer case shift
operation.
FRONT OUTPUT SHAFT SEAL
REMOVAL
(1) Raise vehicle.
(2) Remove front propeller shaft. Refer to Group 3,
Differential and Driveline, for proper procedure.
(3) Remove front output shaft companion flange.
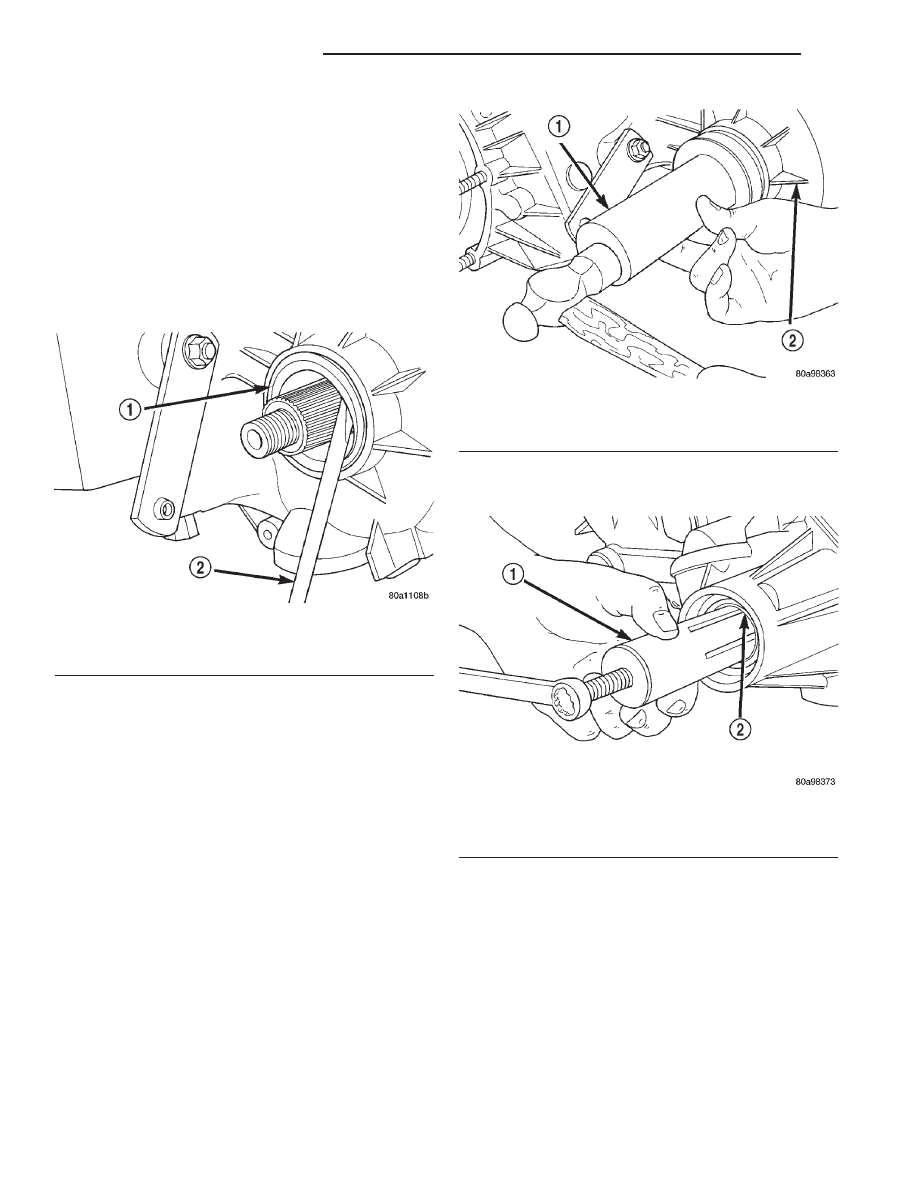
(4) Remove seal from front case with pry tool
(Fig. 6).
INSTALLATION
(1) Install new front output seal in front case with
Installer Tool 6952-A as follows:
(a) Place new seal on tool. Garter spring on seal
goes toward interior of case.
(b) Start seal in bore with light taps from ham-
mer (Fig. 7). Once seal is started, continue tapping
seal into bore until installer tool seats against case.
(2) Install companion flange and tighten nut to
122–176 (90–130 ft. lbs.) torque.
(3) Install front propeller shaft. Refer to Group 3,
Differential and Driveline for the correct procedure
and torque specification.
NV242HD REAR RETAINER BUSHING AND
SEAL
REMOVAL
(1) Raise vehicle.
(2) Remove rear propeller shaft. Refer to Group 3,
Differential and Driveline, for proper procedure.
(3) Using a suitable pry tool or slide-hammer
mounted screw, remove the rear retainer seal.
(4) Using Remover 6957, remove bushing from
rear retainer (Fig. 8).
INSTALLATION
(1) Clean fluid residue from sealing surface and
inspect for defects.
(2) Position replacement bushing in rear retainer
with fluid port in bushing aligned with slot in
retainer.
(3) Using
Installer
8160,
drive
bushing
into
retainer until installer seats against case (Fig. 9).
(4) Using Installer C-3995-A, install seal in rear
retainer (Fig. 10).
(5) Install propeller shaft.
(6) Verify proper fluid level.
(7) Lower vehicle.
Fig. 6 Remove Front Output Shaft Seal
1 – OUTPUT SHAFT SEAL
2 – PRYBAR
Fig. 7 Front Output Seal Installation
1 – INSTALLER 6952–A
2 – TRANSFER CASE
Fig. 8 Rear Retainer Bushing Removal
1 – REMOVER 6957
2 – REAR RETAINER BUSHING
21 - 278
NV242 TRANSFER CASE
WJ
REMOVAL AND INSTALLATION (Continued)