Jaguar XJ (X350). Manual - part 107


  Index      Jaguar     Jaguar XJ (X350) - service repair manual 2003-2009 year


Search            


Content   ..  105  106  107  108   ..


Jaguar XJ (X350). Manual - part 107


20 
.  

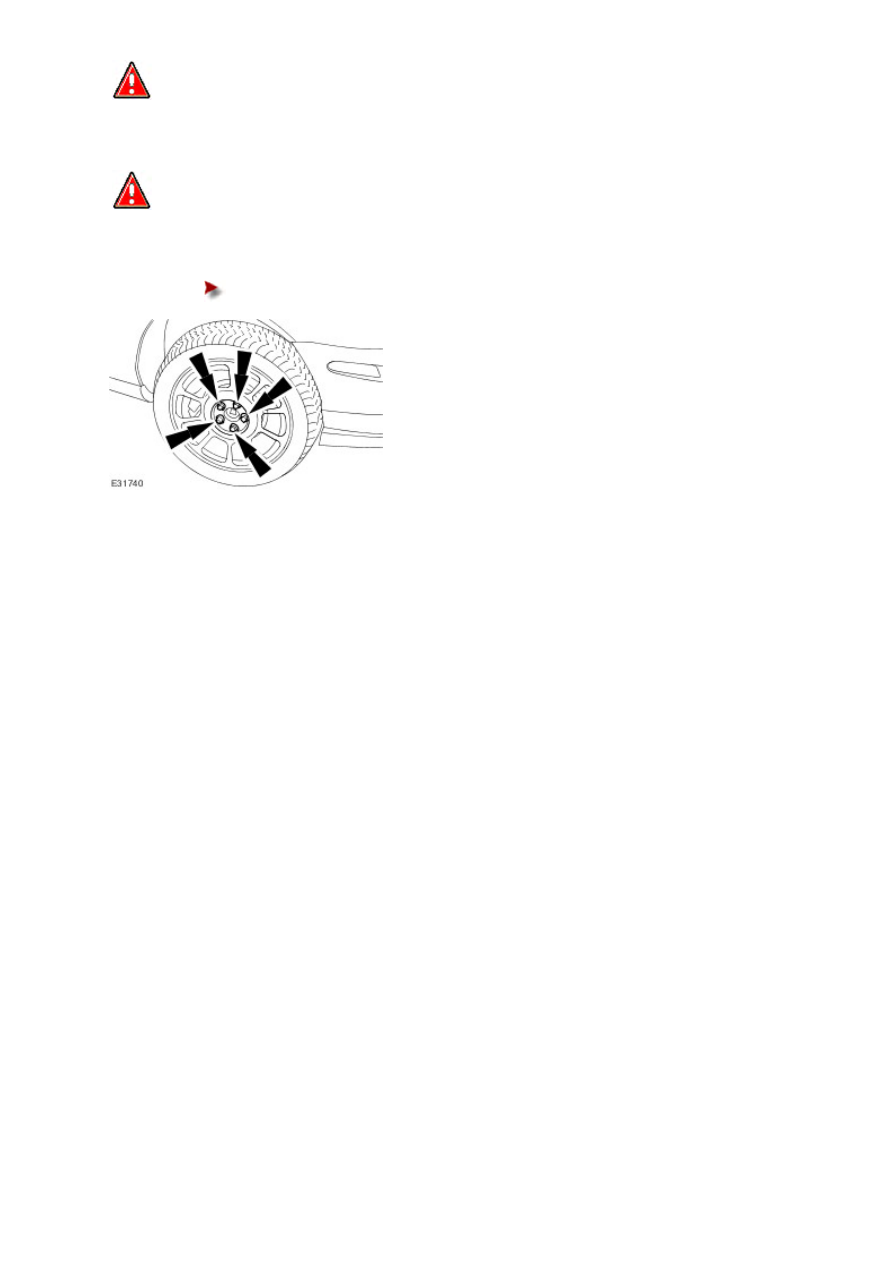
 WARNING: Make sure there is no contamination of the wheel, hub or brake disc contact surfaces. 

Installation without metal to metal contact at the mounting surfaces may cause the wheel nuts to loosen and 
allow the wheel to detach with the vehicle in motion. Failure to follow these instructions may result in personal 
injury. 


 WARNING: Apply a small amount of grease to the hub and wheel mating surfaces before installation. 

Make sure the grease does not come into contact with the vehicles braking components and the wheel stud 
threads. Failure to follow these instructions may result in personal injury. 


Install the wheel and tire assembly.  


Tighten to 125 Nm. 


204-05 : Vehicle Dynamic Suspension


Specifications


Specifications  

Torque Specifications  

Description  

Nm  lb-ft  lb-in 

Compressor to body retaining nuts  

20   15   -  

Reservoir to body retaining nuts  

7  

-  

62  

Solenoid valve block to reservoir retaining nuts  

5  

-  

44  

Air pipes  

5  

-  

44  

Air suspension module to body retaining nuts  

4  

-  

35  

Front height sensors retaining bolts  

20   15   -  

Front height sensor to bracket retaining bolts  

5  

-  

44  

Rear height sensors retaining bolts  

20   15   -  

Front vertical accelerometer to body retaining nuts   4  

-  

35  

Rear vertical accelerometer to body retaining nuts  

4  

-  

35  

Front air spring to body upper retaining nuts  

25   18   -  

Front suspension upper arm retaining nut  

90   66   -  

Front air spring assembly to lower arm retaining bolt  175  129   -  

Rear air spring to body upper retaining nuts  

25   18   -  

Rear air spring assembly to lower arm retaining bolt   133  98   -  

Compressor air pipe retaining nut  

2  

-  

18  


www.

General procedures


Air Leaks   

1.   

  CAUTION: Any spray used must have a corrosion inhibitor, and must not cause 

damage to paintwork, plastics, metals or plastic pipes.  
 
NOTE:  
  

The recommended leak detection spray is GOTEC LDS, Jaguar part number C2C 22398. 

 
The recommended leak detection spray should be used to identify any suspected leaks. This 
procedure should also be used where any of the air suspension components have been 
disturbed.  
 
 
2.  Clean around the area of the suspected air leak.  
 
 
3.  Using the recommended leak detection spray, spray around all of the air suspension 
components, working systematically until the source of the air leak has been found.  
 
 
4.  NOTE:  


If a new air suspension component is to be fitted, and no air leak has been detected at the 
pipe connectors, remove and discard the new air pipe connections supplied with the 
component.  

 
If any of the air suspension components are found to be leaking e.g. air spring, compressor, 
reservoir or the solenoid valve block repair is effected by replacement only. If an air leak from 
the pipe connector has also been identified, a new air pipe connector, supplied with the air 
suspension component, must be installed.  
 
 
5.  NOTE:  


Only Jaguar approved connectors have been tested to the correct pressure and temperature 
specifications. 

 
NOTE:  


Air pipes must only be cut using either Hose cutter 204-494, available from SPX LTD or 
Hose cutter YA1000A, available from Snap-On Tools.  

 
NOTE:  


If the color coded markings adjacent to the pipe connections are removed when cutting air 
pipes, the cut end of the air pipe must be clearly marked with a suitable colored tape or 

paint mark. 

 
If the source of the air leak is found to be a pipe connection cut 5 mm (0.2 in) off the end of 
the air pipe and fit a new connector.  
 
 
6.  NOTE:  


Air pipes must only be cut using either Hose cutter 204-494, available from SPX LTD or 
Hose cutter YA1000A, available from Snap-On Tools.  

 
NOTE:  


Only Jaguar approved air pipes have been tested to the correct pressure and temperature 
specifications. 

 
If the source of the air leak is found to be in a section of pipe cut out the damaged section of 
air pipe and replace with new air pipe and air pipe connectors as required.  
 
 
7.  NOTE:  
  

If the repair has been unsuccessful repeat the above steps until the air leak is rectified. 

 
Using the Jaguar approved diagnostic system ensure that the system is fully pressurized.  
 
 
8.  Using the recommended leak detection spray, spray around all of the air suspension 
components, working systematically to make sure that the source of the air leak has been 
found.  


www.


Content   ..  105  106  107  108   ..