Isuzu N-Series. Manual - part 527
6C-16 Fuel System
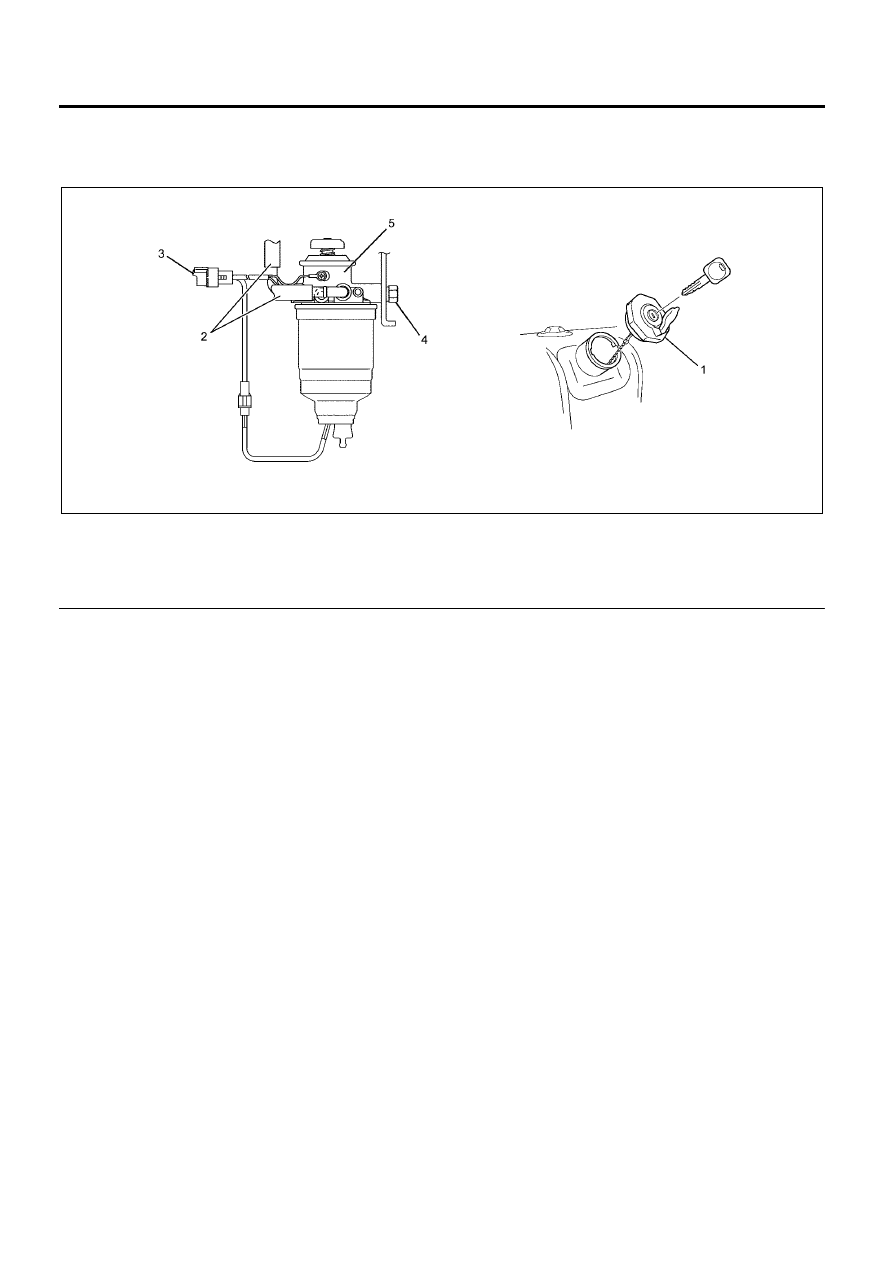
Fuel Filter Assembly
Components
Legend
1. Filler Cap
2. Fuel Hose
3. Fuel Sedimenter Connector
4. Bolt
5. Fuel Filter Assembly
Removal
1. Remove the filler cap.
2. Remove the fuel sedimenter connector and the clip
on the bracket.
3. Remove the feed hose and the return hose from
the fuel filter and plug it so that the fuel does not
flow out.
4. Remove the bolts for mounting the fuel filter.
5. Remove the fuel filter assembly.
Installation
1. Install the fuel filter assembly.
2. Install the bolts for mounting the fuel filter.
3. Install the inlet hose and the outlet hose.
4. Install the fuel sedimenter and clip the cable to the
bracket.
5. Install the filler cap.
6. Bleed out the air.
• Refer to “Fuel System/Air bleeding”.
N6A6364E