Infiniti QX56 (Z62). Manual - part 764
GW-24
< REMOVAL AND INSTALLATION >
REAR DOOR GLASS
8.
Operate the power window switch to raise or lower the door win-
dow until the glass mounting bolts can be seen.
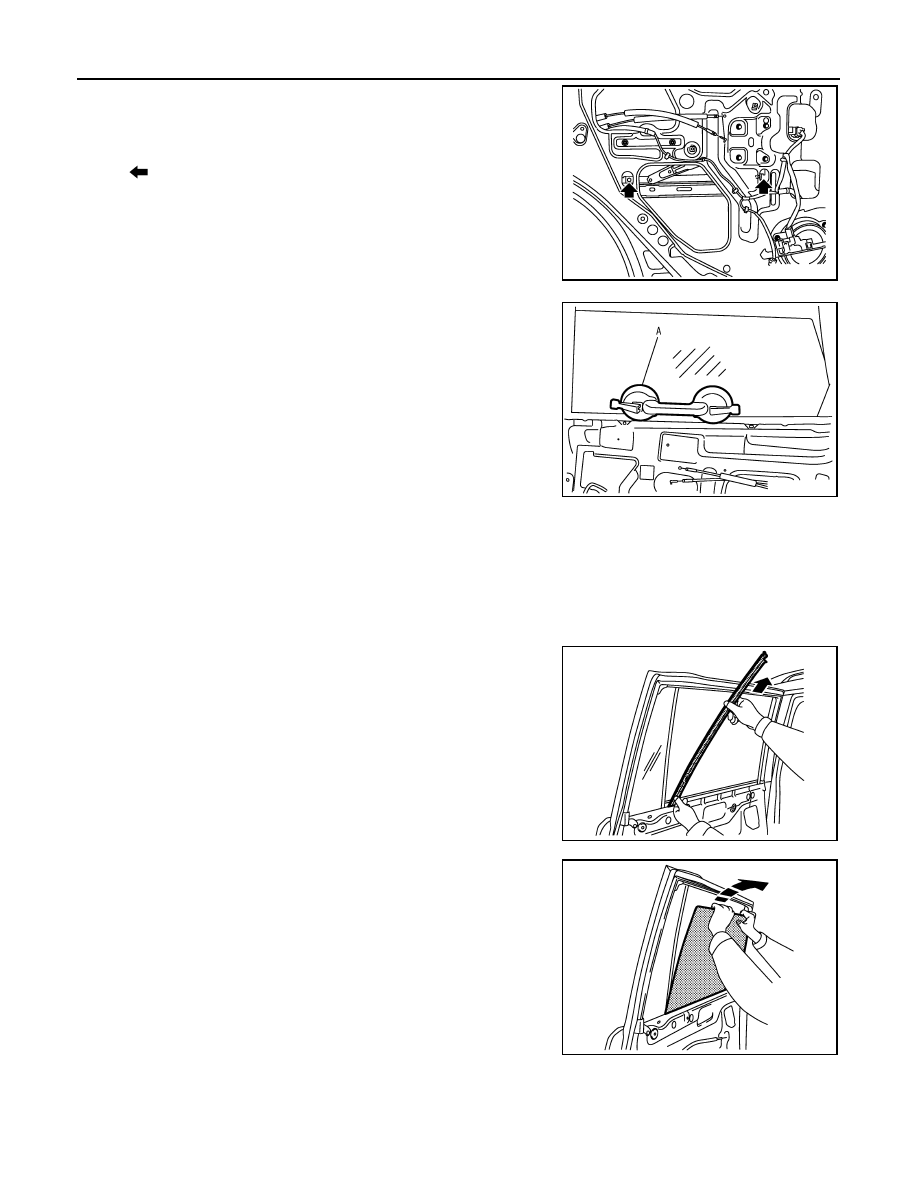
9.
Remove the rear door glass mounting bolts.
10. Raise rear door glass up and hold it with a suction lifter (A).
11. Disconnect rear door power window motor harness connector.
12. Remove rear door regulator mounting nuts.
13. Remove rear door power window motors mounting bolts.
14. Remove rear door regulator from rear door panel.
15. Securely place rear door glass down inside rear door panel.
16. Remove rear door glass run.
17. Remove rear door sash mounting bolts and screw, and then pull
it up to remove.
CAUTION:
Be careful not to scratch or damage rear door glass with
rear door sash.
18. Remove rear door glass from rear door panel as shown by the
figure.
: Bolt
JMKIA1789ZZ
PIIB3511J
JMKIA5272ZZ
JMKIA5273ZZ