Infiniti Q45 (FY33). Manual - part 106
 

  Index      Infiniti     Infiniti Q45 (FY33) - service repair manual 2001 year


Search            copyright infringement  


Content   ..  104  105  106  107   ..


Infiniti Q45 (FY33). Manual - part 106


Body Front End

I

When removing or installing hood, place a cloth or other padding on the front fender panels and cowl top.
This prevents vehicle body from being scratched.

I

Bumper fascia is made of plastic. Do not use excessive force and be sure to keep oil away from it.

I

Hood adjustment: Adjust at hinge portion.

I

Hood lock adjustment: After adjusting, check hood lock control operation. Apply a coat of grease to hood
locks engaging mechanism.

I

Hood opener: Do not attempt to bend cable forcibly. Doing so increases effort required to unlock hood.

WARNING:

I

Be careful not to scratch hood stay when installing hood. A scratched stay may cause gas leak-
age.

I

The contents of the hood stay are under pressure. Do not take apart, puncture, apply heat or allow
fire near it.

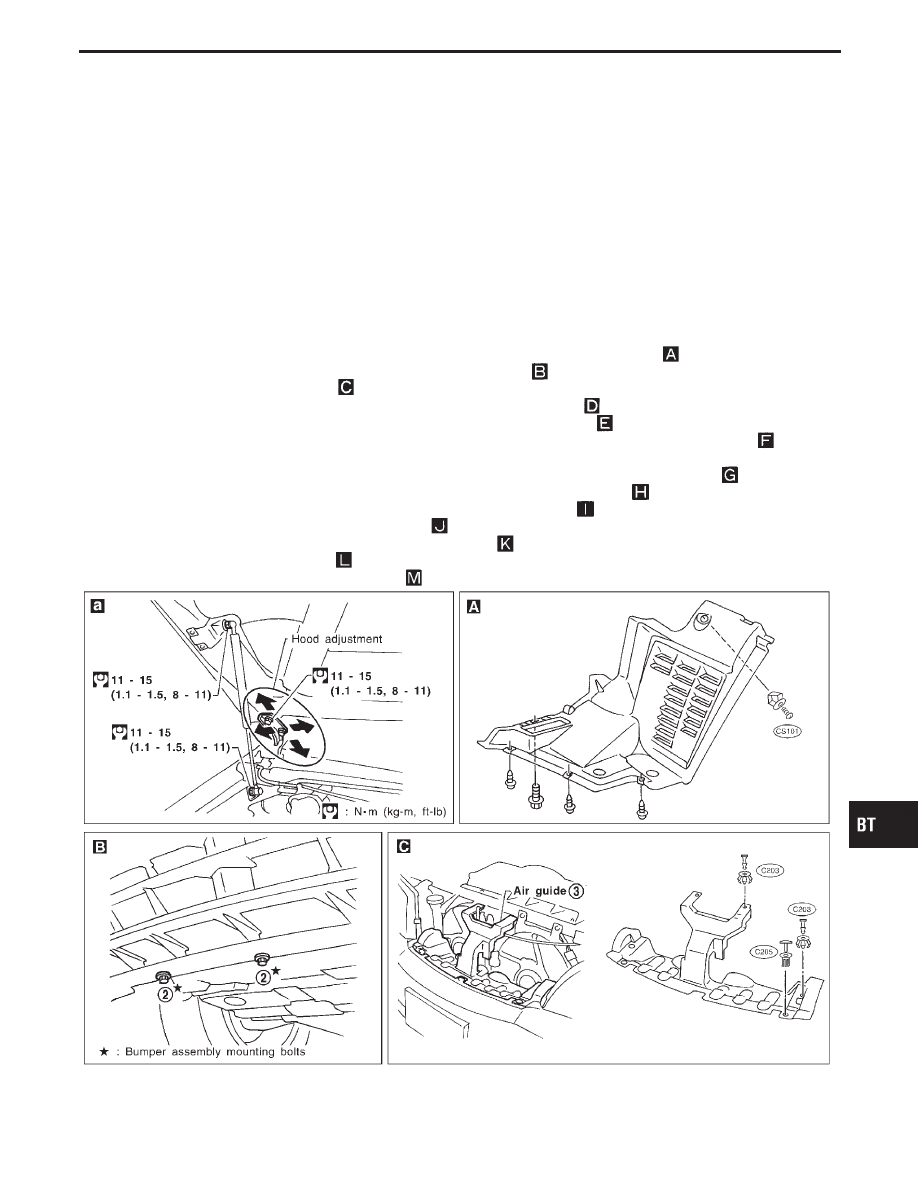
REMOVAL — Front bumper assembly

q

1

Remove screws and clips securing left and right sides of front fender protector.

q

2

Remove bolts securing bumper fascia to engine undercover.

q

3

Remove clips securing air guide.

q

4

Remove bolts securing left and right front fenders to bumper fascia.

q

5

Remove clip securing bumper fascia to upper center bumper retainer.

q

6

Remove bolts securing upper center bumper retainer to left and right upper bumper retainer.

q

7

Extract bumper fascia assembly. Then disconnect fog lamp connector.

q

8

Remove bolts securing upper center bumper retainer to left and right bumper side stay.

q

9

Remove nuts securing bumper reinforcement to left and right bumper stay.

q

10

Remove bolts and clips securing bumper side stay to bumper stay.

q

11

Remove bolts and nuts securing bumper stay.

q

12

Remove bolts securing bumper bracket to bumper stay.

q

13

Remove fog lamp bracket cover.

q

14

Remove nuts securing fog lamp assembly.

SBT324

GI

MA

EM

LC

EC

FE

AT

PD

FA

RA

BR

ST

RS

HA

EL

IDX

BODY END

BT-13

SBT279-B

BODY END

Body Front End (Cont’d)

BT-14

SBT280-B

GI

MA

EM

LC

EC

FE

AT

PD

FA

RA

BR

ST

RS

HA

EL

IDX

BODY END

Body Front End (Cont’d)

BT-15

Body Rear End and Opener

I

When removing or installing trunk lid, place a cloth or other padding on the rear fender panels. This pre-
vents vehicle body from being scratched.

I

Bumper fascia is made of plastic. Do not use excessive force and be sure to keep oil away from it.

I

Trunk lid adjustment: Adjust at hinge-trunk lid portion for proper trunk lid fit.

I

Trunk lid lock system adjustment: Adjust striker so that it is in the center of the lock. After adjustment,
check trunk lid lock operation.

I

After installation, make sure that trunk lid and fuel filler lid open smoothly.

For Wiring Diagram, refer to “TRUNK LID AND FUEL FILLER LID OPENER” in EL section.

REMOVAL — Rear bumper assembly

q

1

Remove clips securing left and right chipping protectors.

q

2

Remove bolts securing left and right rear fenders to bumper fascia.

q

3

Remove bolts securing bumper side stay to bumper fascia.

q

4

Remove clips securing bumper fascia bracket to bumper fascia.

q

5

Remove trunk room trim. Refer to “Trunk Room Trim” in “INTERIOR TRIM” for details, BT-32.

q

6

Working from inside trunk, remove bolts and nuts securing left and right rear fenders to bumper fascia.

,

q

7

Remove bumper sight shield assembly.

q

8

Remove clips securing bumper fascia.

q

9

Extract bumper fascia assembly.

q

10

Working from inside trunk, remove left and right plugs from floor and then remove bumper reinforcement
mounting bolts.

q

11

Extract bumper reinforcement.

REMOVAL — Back up lamp assembly

a. Remove trunk lid trim. Refer to “Trunk Room Trim” in “INTERIOR TRIM” for details, BT-32.
b. Remove trunk lid finisher. Refer to “Trunk lid finisher” in “EXTERIOR” for details, BT-40.
c.

Remove license plate finisher. Refer to “License plate finisher” in “EXTERIOR” for details, BT-38.

d. Remove back up lamp assembly.

BODY END

BT-16


Content   ..  104  105  106  107   ..