Infiniti M45 (Y34). Manual - part 515
 

  Index      Infiniti     Infiniti M45 (Y34) - service repair manual 2004 year


Search            copyright infringement  


Content   ..  513  514  515  516   ..


Infiniti M45 (Y34). Manual - part 515


HEADLINING

EI-41

C

D

E

F

G

H

J

K

L

M

A

B

EI

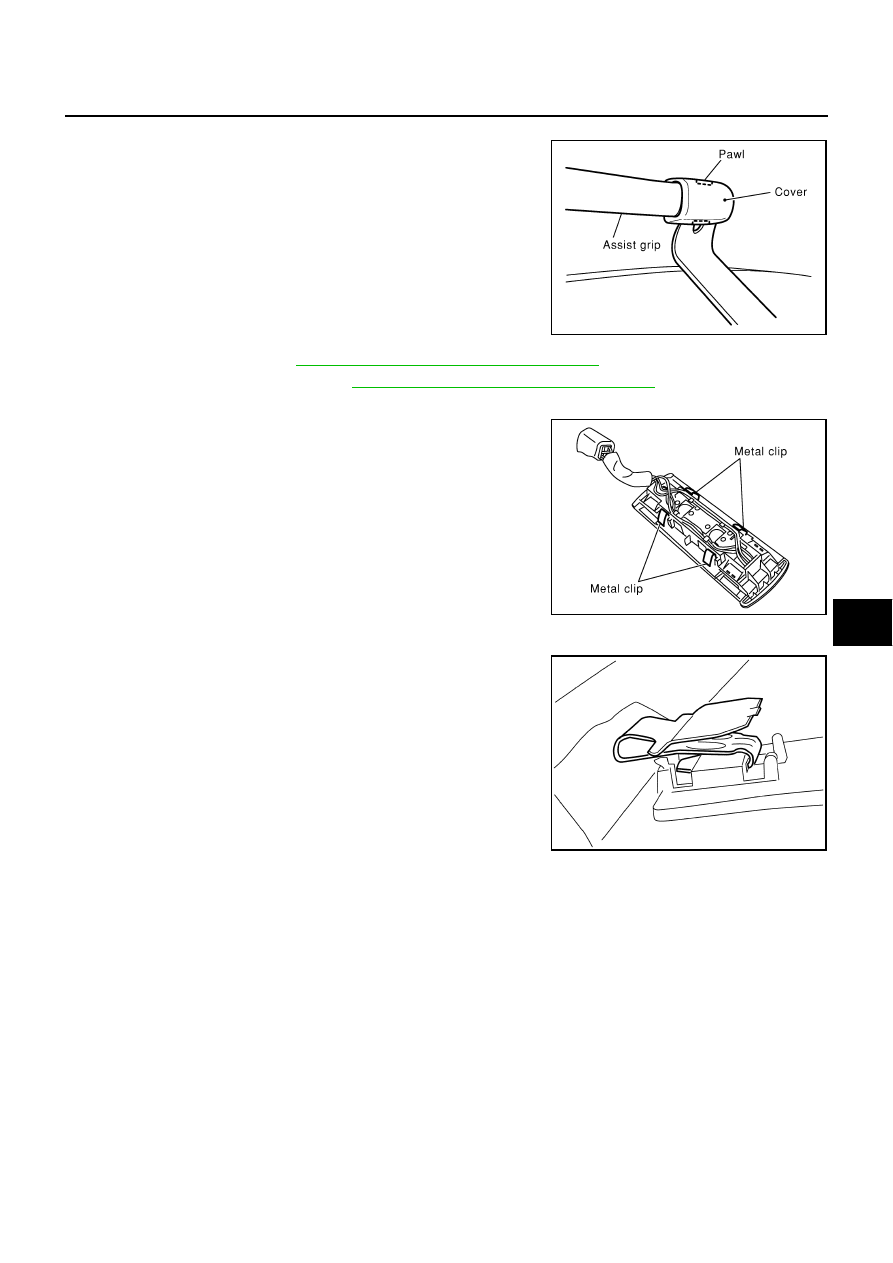
NOTE:
To remove assist grip cover of sunroof and standard, disconnect
pawls both on upper and lower parts, insert screw driver rolled
with cloth, slide cover inward, and remove screws (one each for
left and right).

5.

Remove glove box. Refer to 

IP-10, "INSTRUMENT PANEL ASSEMBLY"

 .

6.

Remove center consul box. Refer to 

IP-10, "INSTRUMENT PANEL ASSEMBLY"

 .

7.

Remove map lamp, disconnect harness connector.

8.

Remove personal lamp, disconnect harness connector.

9.

Remove sun-visor.

10. Slide headlining to front of vehicle, and disconnect hooks (if

equipped with sunroof). 

11. Disconnect clips at rear of head lining, and dual-lock fastener.

12. Slide front seat to the front, and set its seatback down backward. 
13. Disconnect headlining, turn and remove from right front door.

CAUTION:

Always remove or install in a pair. 

Cover surroundings with waste to avoid scratches or damages. 

Do not bend head lining too hard. 

INSTALLATION

Install in the reverse order of removal. 

SIIA0824E

SIIA0825E

SIIA0390J

EI-42

TRUNK ROOM TRIM & TRUNK LID FINISHER

TRUNK ROOM TRIM & TRUNK LID FINISHER

PFP:84920

Removal and Installation

AIS004VL

REMOVAL

1.

Remove trunk floor carpet.

2.

Remove trunk lid welt.

3.

Remove clips of trunk rear plate and remove trunk rear plate.

4.

Remove clips of trunk rear finisher and remove trunk rear finisher.

5.

Remove clips of trunk front finisher, and disconnect pawl to pull.

6.

Remove clip and hook of trunk side finisher, and remove trunk side finisher (left/right).

7.

Remove trunk floor board and remove trunk floor spacer (right/center/left).

8.

Remove tool box.

PIIB1539E

1.

Trunk front finisher

2.

Trunk side finisher (left)

3.

Trunk floor spacer (left)

4.

Trunk rear finisher

5.

Trunk rear plate

6.

Trunk floor board

7.

Trunk floor carpet

8.

Trunk side finisher (right)

9.

Trunk floor spacer (right)

10. Trunk floor spacer (center)

11. Tool box

12. Net

TRUNK ROOM TRIM & TRUNK LID FINISHER

EI-43

C

D

E

F

G

H

J

K

L

M

A

B

EI

INSTALLATION

Install in the reverse order of removal.

REMOVAL OF TRUNK LID FINISHER INNER

1.

Remove clips of trunk lid finisher inner.

2.

Remove trunk lid finisher inner.

INSTALLATION OF TRUNK LID FINISHER INNER

Install in the reverse order of removal.

PIIA2725E

EI-44

TRUNK ROOM TRIM & TRUNK LID FINISHER


Content   ..  513  514  515  516   ..