Infiniti M35/M45 Y50. Manual - part 76
SHIFT CONTROL SYSTEM
AT-227
D
E
F
G
H
I
J
K
L
M
A
B
AT
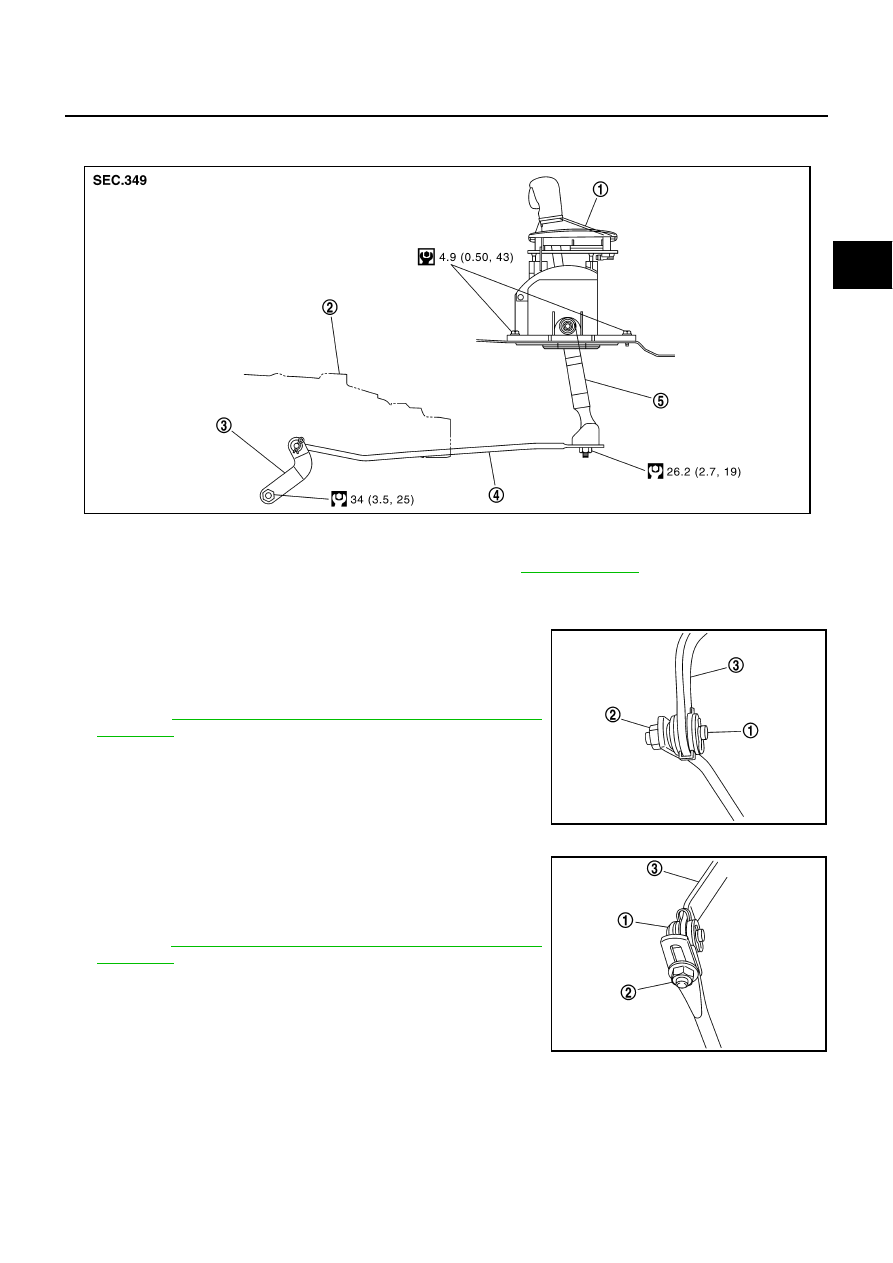
CONTROL ROD COMPONENTS (AWD MODELS)
Refer to the figure below for control rod removal and installation procedure.
Adjustment of A/T Position
NCS001QN
2WD MODELS
1.
Loosen nut (2) of pivot pin (1).
2.
Place PNP switch and selector lever in “P” position.
3.
While pressing lower lever (3) toward rear of vehicle (in “P” posi-
tion direction), tighten nut (2) to specified torque.
Refer to
AT-226, "CONTROL ROD COMPONENTS (2WD
.
AWD MODELS
1.
Loosen nut (2) of bracket (1).
2.
Place PNP switch and selector lever in “P” position.
3.
While pressing lower lever (3) toward rear of vehicle (in “P” posi-
tion direction), tighten nut (2) to specified torque.
Refer to
AT-227, "CONTROL ROD COMPONENTS (AWD
.
1.
Control device assembly
2.
A/T assembly
3.
Manual lever
4.
Control rod
5.
Lower lever
Refer to GI section to make sure icons (symbol marks) in the figure. Refer to
.
SCIA7055E
SCIA6354J
SCIA6353J