Hyundai Tiburon (2003 year). Manual - part 190


  Index      Hyundai     Hyundai Tiburon - service repair manual 2003 year


Search            


Content   ..  188  189  190  191   ..


Hyundai Tiburon (2003 year). Manual - part 190


REAR SEAT BELT BUCKLE

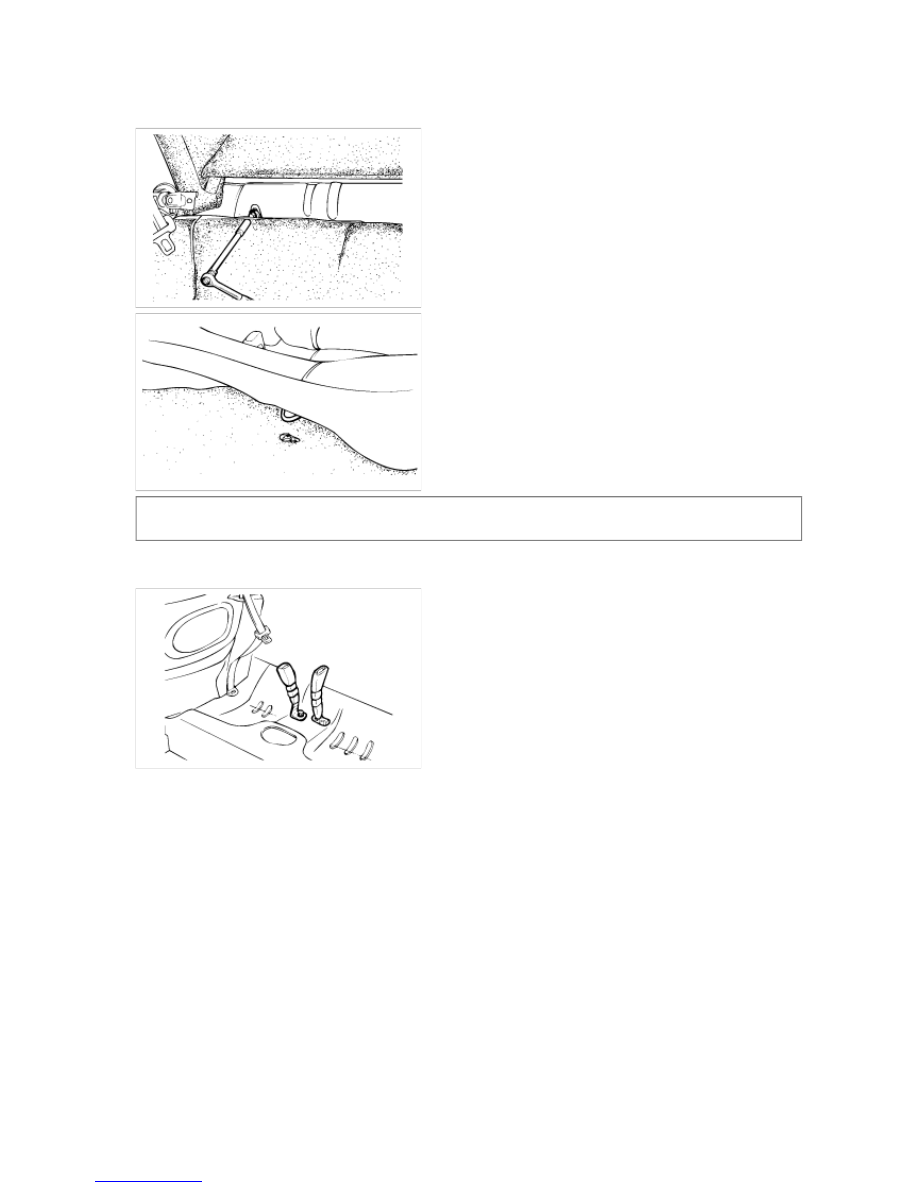
1. Remove the mounting bolts from the rear seat cushion. 


Tightening torque: 
17~26 Nm (170~260 kg·cm, 12~19 lb·ft) 

2. Remove the rear seat belt buckle. 


3. Installation is the reverse of removal. 


TIBURON(GK) > 2003 > G 2.7 V6 DOHC > Body Electrical System > General Information > General 
Information, TIBURON(GK) > 2003 > G 2.7 V6 DOHC > Body Electrical System > General Information > 
General Information

GENERAL TROUBLESHOOTING INFORMATION

BEFORE TROUBLESHOOTING

1. Check applicable fuses in the appropriate fuse/relay box. 

2. Check the battery for damage, state of charge, and clean and tight connections. 

• Do not quick-charge a battery unless the battery ground cable has been disconnected, otherwise you 

will damage the alternator diodes. 

• Do not attempt to crank the engine with the battery ground cable loosely connected or you will 

severely damage the wiring. 

3. Check the alternator belt tension. 

HANDLING CONNECTORS

1. Make sure the connectors are clean and have no loose wire terminals. 

2. Make sure multiple cavity connectors are packed with grease (except watertight connectors). 

3. All connectors have push-down release type locks (A). 


4. Some connectors have a clip on their side used to attach them to a mount bracket on the body or on another 

component. This clip has a pull type lock. 

5. Some mounted connectors cannot be disconnected unless you first release the lock and remove the 

connector from its mount bracket (A). 


6. Never try to disconnect connectors by pulling on their wires; pull on the connector halves instead. 

7. Always reinstall plastic covers. 


8. Before connecting connectors, make sure the terminals (A) are in place and not bent. 


9. Check for loose retainer (A) and rubber seals (B). 


10. The backs of some connectors are packed with grease. Add grease if necessary. If the grease is 

contaminated, replace it. 


11. Insert the connector all the way and make sure it is securely locked. 

12. Position wires so that the open end of the cover faces down. 


HANDLING WIRES AND HARNESSES

1. Secure wires and wire harnesses to the frame with their respective wire ties at the designated locations. 

2. Remove clips carefully; don't damage their locks (A). 


3. Slip pliers(A) under the clip base and through the hole at an angle, then squeeze the expansion tabs to 

release the clip. 


4. After installing harness clips, make sure the harness doesn't interfere with any moving parts. 

5. Keep wire harnesses away from exhaust pipes and other hot parts, from sharp edges of brackets and holes, 

and from exposed screws and bolts. 

6. Seat grommets in their grooves properly (A). Do not leave grommets distorted (B). 


TESTING AND REPAIRS

1. Do not use wires or harnesses with broken insulation. 


Content   ..  188  189  190  191   ..