Hummer H2. Manual - part 2192


  Index      Hummer     Hummer H2 - service repair manual 2004 year


Search            


Content   ..  2190  2191  2192  2193   ..


Hummer H2. Manual - part 2192


Tire and Wheel Removal and Installation 

1. Tighten all wheel nuts on the affected wheel.  

2. Loosen each wheel nut two turns.  

3. Rock the vehicle from side to side in order to loosen the wheel. If this does not loosen the wheel, rock the 

vehicle front to back applying quick hard jabs to the brake pedal to loosen the wheel.  

4. Repeat this procedure if the wheel does not break free.  

Removal Procedure 

1. Raise the vehicle. Support the vehicle with suitable safety stands. Refer to Lifting and Jacking the 

Vehicle in General Information.  

2. Remove the wheel center cap. 

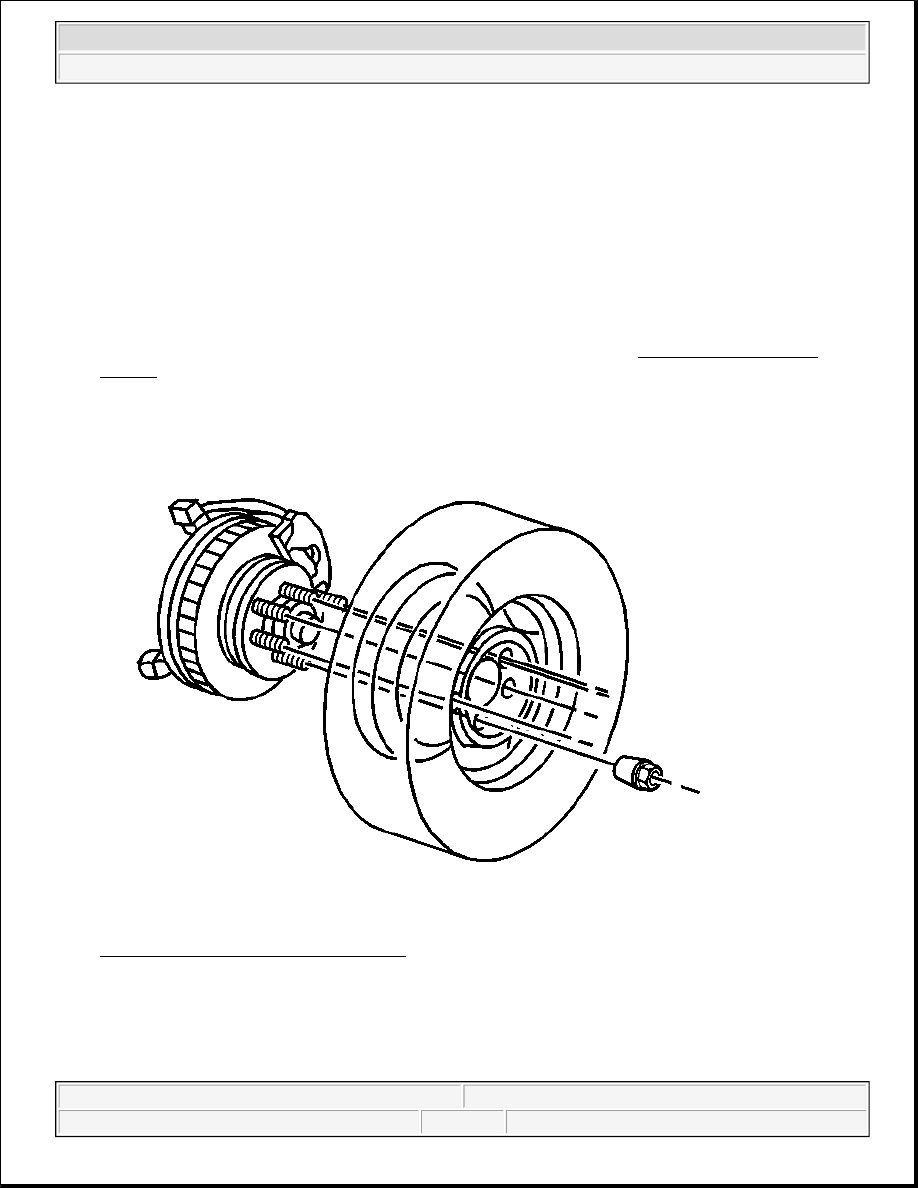
Fig. 6: View Of Tire & Wheel Assembly 
Courtesy of GENERAL MOTORS CORP. 

3. Remove the wheel nuts from the tire and wheel.  

4. Mark the location of the tire and wheel to the hub assembly.  

5. Remove the tire and wheel from the vehicle. 


2004 Hummer H2 

2004 SUSPENSION Tires and Wheels - Hummer H2


6. Clean the wheel nuts, studs and the wheel and rotor mounting surfaces.  

Installation Procedure 

Fig. 7: View Of Tire & Wheel Assembly 
Courtesy of GENERAL MOTORS CORP.

CAUTION: Before installing the wheels, remove any buildup of corrosion on the 

wheel mounting surface and brake drum or disc mounting surface by 
scraping and wire brushing. Installing wheels with poor metal-to-metal 
contact at the mounting surfaces can cause wheel nuts to loosen. This 
can cause a wheel to come off when the vehicle is moving, causing loss of 
control and possibly personal injury.

NOTE:

A torque wrench or J 39544 must be used to ensure that wheel nuts are 
tightened to specification. Never use lubricants or penetrating fluids on wheel 
stud, nuts, or mounting surfaces, as this can raise the actual torque on the nut 
without a corresponding torque reading on the torque wrench. Wheel nuts, 
studs, and mounting surfaces must be clean and dry. Failure to follow these 
instructions could result in wheel, nut, and/or stud damage.


2004 Hummer H2 

2004 SUSPENSION Tires and Wheels - Hummer H2


1. Install the tire and wheel. Align the locating mark of the tire and wheel to the hub. 

Fig. 8: Installing Wheel Nuts 
Courtesy of GENERAL MOTORS CORP. 

2. Install the wheel nuts. 

Tighten: Tighten the wheel nuts as shown to 190 N.m (140 lb ft). 

3. Install the wheel center cap.  

4. Remove the safety stands.  

5. Lower the vehicle.  

TIRE REPAIR 

NOTE:

Refer to Fastener Notice in Cautions and Notices.

IMPORTANT: Tighten the nuts evenly and alternately in order to avoid excessive runout.


2004 Hummer H2 

2004 SUSPENSION Tires and Wheels - Hummer H2


Many different materials and techniques are available on the market in order to repair tires. Not all of the 
materials and techniques work on some types of tires. Tire manufacturers have published detailed instructions 
on how and when to repair tires. Obtain the instructions from the manufacturer. If the vehicle is equipped with a 
compact spare tire, do not repair the compact spare. 

TIRE MOUNTING AND DISMOUNTING 

1. Deflate the tire completely. 

2. Use the tire changer in order to remove the tire from the wheel.  

3. Use a wire brush or coarse steel wool in order to remove any rubber, light rust or corrosion from the 

wheel bead seats. 

4. Apply GM P/N 12345884 (Canadian P/N 5728223) or equivalent to the tire bead and the wheel rim.  

5. Use the tire changer in order to install the tire to the wheel. 

NOTE:

Use a tire changing machine in order to dismount tires. Do not use hand tools 
or tire irons alone in order to remove the tire from the wheel. Damage to the tire 
beads or the wheel rim could result.

NOTE:

Do not scratch or damage the clear coating on aluminum wheels with the tire 
changing equipment. Scratching the clear coating could cause the aluminum 
wheel to corrode and the clear coating to peel from the wheel.

NOTE:

Damage to either the tire bead or the wheel mounting holes can result 
from the use of improper wheel attachment or tire mounting procedures. It 
takes up to 70 seconds for all of the air to completely exhaust from a large 
tire. Failure to follow the proper procedures could cause the tire changer 
to put enough force on the tire to bend the wheel at the mounting surface. 
Such damage may result in vibration and/or shimmy, and under severe 
usage lead to wheel cracking.

IMPORTANT: Rim-clamp, sometimes called-European-type tire changers are 

recommended.

NOTE:

When mounting the tires, use an approved tire mounting lubricant. DO 
NOT use silicon or corrosive base compounds to lubricate the tire bead 
and the wheel rim. A silicon base compound can cause the tire to slip on 
the rim. A corrosive type compound can cause tire or rim deterioration.

CAUTION: To avoid serious personal injury, do not stand over tire when 

inflating. The bead may break when the bead snaps over the safety 
hump. Do not exceed 275 kPa (40 psi) pressure when inflating any 
tire if beads are not seated. If 275 kPa (40 psi) pressure will not seat 


2004 Hummer H2 

2004 SUSPENSION Tires and Wheels - Hummer H2


Content   ..  2190  2191  2192  2193   ..