Hummer H1 (2006+). Manual - part 416
13-38
Accessories
_____________________________________________________________
BRUSHGUARD ASSEMBLY REPLACEMENT
NOTE: Brushguard assemblies may be used on vehicles with or without a winch assembly. The following procedure applies to ve-
hicles with a winch assembly.
Removal
1.
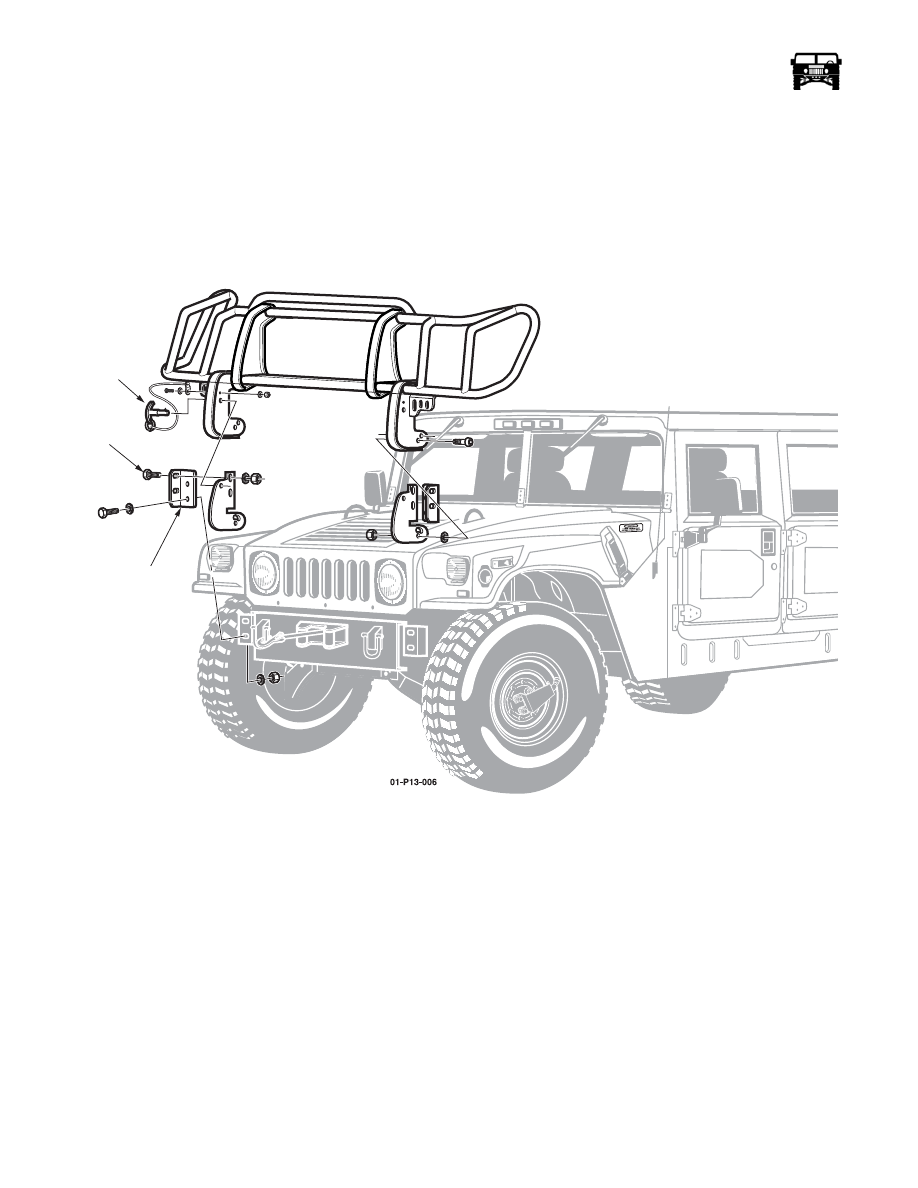
Have an assistant hold the brushguard while removing the four bolts, nuts and eight washers securing the brushguard mount
brackets to the frame brackets13-52.
2.
Remove the brushguard assembly.
Figure 13-52: Brushguard Installation (Vehicle w/Winch Shown)
Installation
1.
Using an assistant, place the brushguard on the frame brackets or bumper if the vehicle does not have a winch, and install four
bolts, nuts and washers. Torque the hardware to 81-99 lb-ft (110-134 N•m).
2.
Check the brushguard for level and equal, side to side, spacing from the hood. If adjustment is necessary, loosen the four
alignment bolts and move the brushguard accordingly. Tighten the alignment hardware to 81-99 lb-ft (110-134 N•m).
3.
Remove the lock pins and check for free movement and clearance to the roller fairlead if equipped. Adjust as needed and
reinstall the lock pins.
BRUSHGUARD ASSEMBLY REPLACEMENT
NOTE: Brushguard assemblies may be used on vehicles with or without a winch assembly. The following procedure applies to ve-
hicles with a winch assembly.
Removal
1.
Have an assistant hold the brushguard while removing the four bolts, nuts and eight washers securing the brushguard mount
MOUNT
BRACKET
ALIGNMENT
HARDWARE
LOCK
PIN