Hummer H1 (2006+). Manual - part 278
9-90 Axles, Suspension and Frame
__________________________________________
4.
Lower the front of the vehicle.
5.
Install the battery tray.
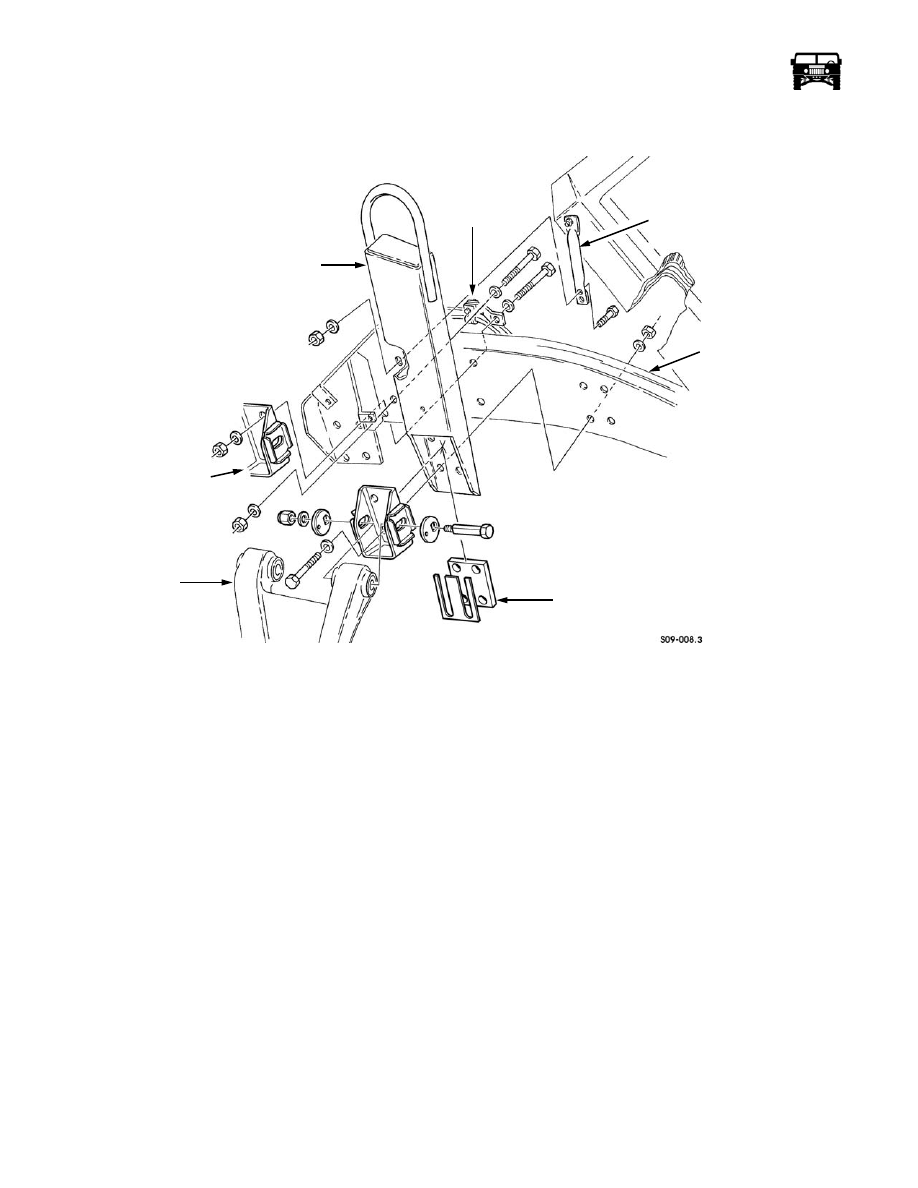
Figure 9-136: Right Airlift Bracket and Front Upper Control Arm Bracket Replacement
Front Suspension Brace Replacement (Vehicles Without Winch)
Removal
WARNING: To avoid personal injury or equipment damage, support the lower control arm during removal and in-
stallation.
1.
Remove the locknut, washer, bolt and the washer securing the brace to the frame rail (Figure 9-137).
2.
Remove the locknut, washer, bolt, washer and the brace from the crossmember and the lower control arm.
Installation
1.
Install the brace on the crossmember and the lower control arm with the washer, bolt, washer and the locknut. Do not tighten
the locknuts (Figure 9-137).
2.
Install the brace on the frame rail with the washer, bolt, washer and the locknut.
3.
Tighten the crossmember locknut to 261 lb-ft. (354 N•m) and the frame rail locknut to 178 lb-ft. (241 N•m).
CONTROL ARM
UPPER
AIRLIFT BRACKET
FRAME RAIL
RADIATOR SUPPORT
COOLER LINE
BRACKET
BRACKET
CONTROL ARM
SHIM(S)