Hummer H1 (2006+). Manual - part 258
9-10 Axles, Suspension and Frame
__________________________________________
Rear Axle Removal
CAUTION: Due to a torque bias ratio change, axle assemblies from previous model year vehicles must not be mixed with the cur-
rent assemblies.
1.
Remove the service brake rotors (Section 7).
2.
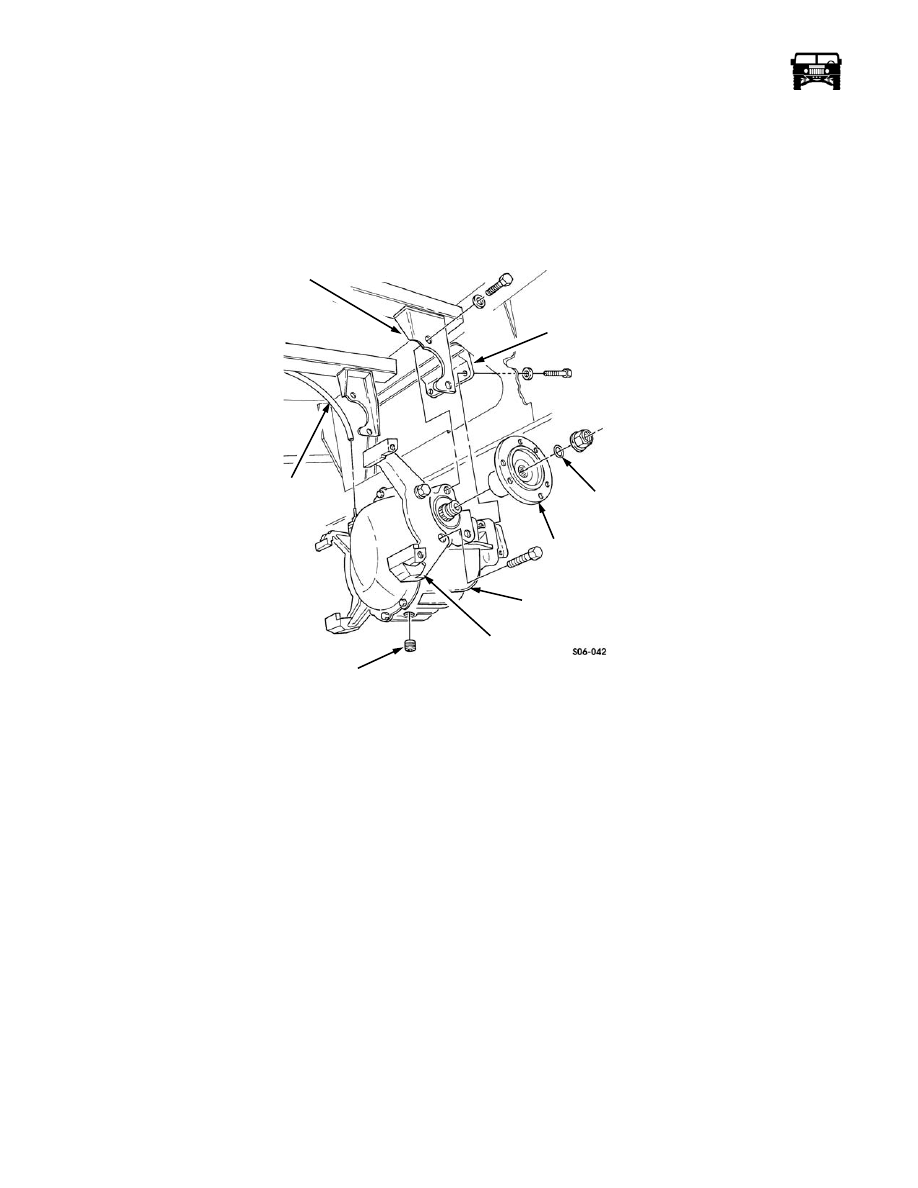
Remove the drainplug from the axle assembly. Allow the oil to drain and install the drainplug (Figure 9-8).
Figure 9-8: Rear Axle Assembly Mounting
3.
Remove the four bolts, two straps, and the rear propeller shaft from the pinion yoke.
4.
Remove the rear propeller shaft from the transfer case ( Figure 9-9).
5.
Remove the two bolts and washers securing the axle assembly to the mounting bracket (Figure 9-8).
NOTE: If the axle assembly is being reused and not replaced it is NOT necessary to remove the output flanges or the caliper sup-
port bracket assemblies.
6.
Remove the two locknuts, four O-ring seals and the two output flanges from the axle assembly. Discard the locknuts and the
O-ring seals.
WARNING: Axle assembly must be supported during removal and installation. Failure to do this may cause per-
sonal injury or damage to equipment.
7.
Support the axle assembly.
8.
Remove the four bolts and washers securing the axle assembly to the side mounting brackets.
9.
Lower the axle assembly slightly and disconnect the vent line from the axle assembly.
10. Remove the axle assembly.
11. Remove the four bolts and the two brake caliper adapters from the axle assembly.
VENT LINE
MOUNTING
RUBBER
OUTPUT
AXLE ASSEMBLY
BRAKE
DRAINPLUG
CALIPER
ADAPTER
FLANGE
WASHER
BRACKET
AXLE ASSEMBLY
SUPPORT BRACKET