Hummer H1 (2006+). Manual - part 227
6-58
Wheels and Tires/Central Tire Inflation System (CTIS)
_______________
Removal
1.
Raise and secure the hood.
2.
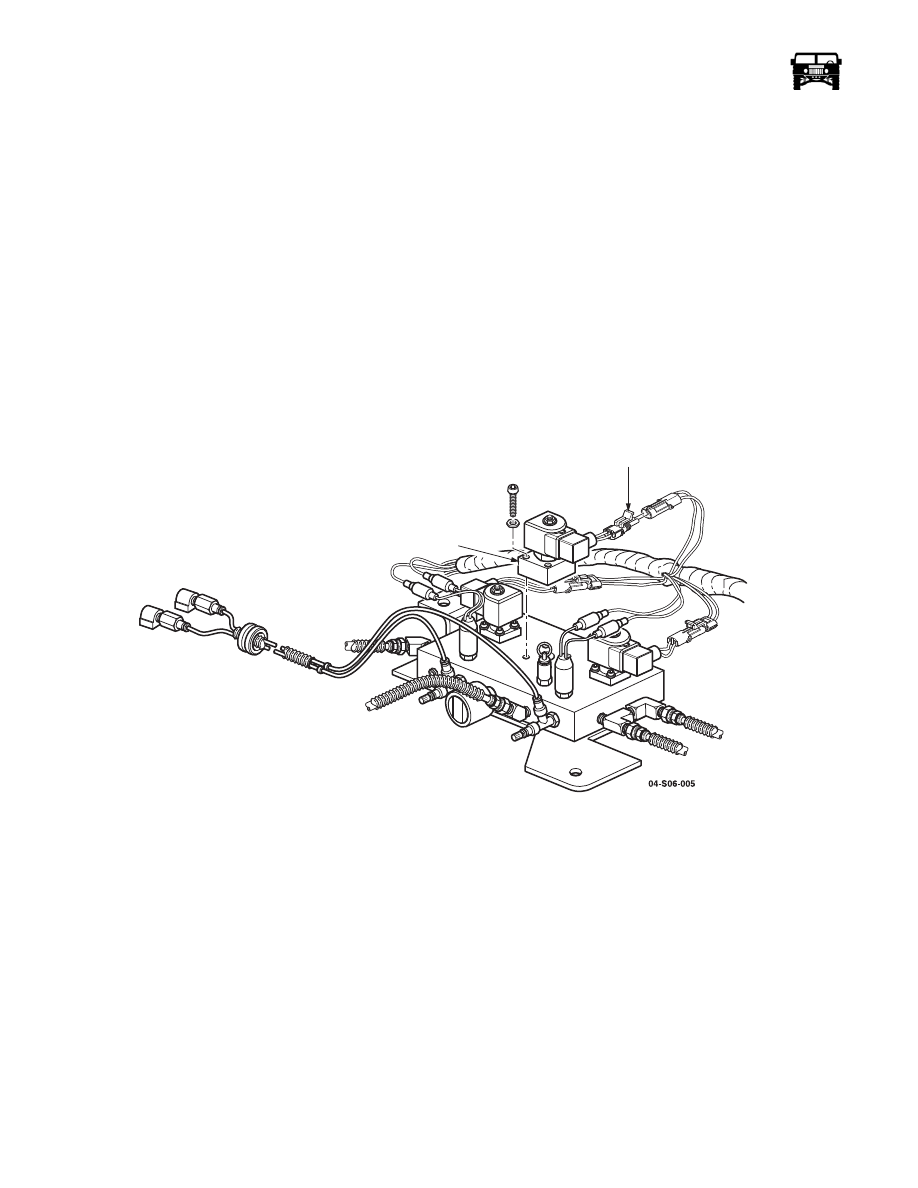
Disconnect the deflate valve electrical connector (Figure 6-62).
3.
Remove the screws and the deflate valve from the manifold.
Cleaning and Inspection
Clean and inspect the deflate valve and bracket. Check for cracks and stripped threads. Replace if defective.
Installation
CAUTION: Do not allow sealant into the air system. Sealant will damage the CTIS components.
NOTE: Apply sealant to the threads prior to installation.
1.
Secure the deflate valve to the manifold with the screws (Figure 6-62).
2.
Connect the deflate valve electrical connector.
3.
Lower and secure the hood.
Figure 6-62: Deflate Valve Assembly Mounting
DUST EXCLUDER REPLACEMENT
WARNING: The CTIS components are subject to high air pressure. Always relieve the air pressure before loosen-
ing or removing air system components by disconnecting quick-disconnect valve assemblies. Failure to follow this
warning may result in serious injury.
Removal
1.
Raise and secure the hood.
2.
Remove dust excluder from the manifold (Figure 6-63).
Cleaning and Inspection
Clean and inspect the dust excluder. Check for cracks and stripped threads. Replace if defective.
Installation
ELECTRICAL
CONNECTOR
DEFLATE
VALVE