Hummer H1 (2002+). Manual - part 186
_____________________
Heating/Ventilation/Air Conditioning (HVAC) 11-23
®
05745159
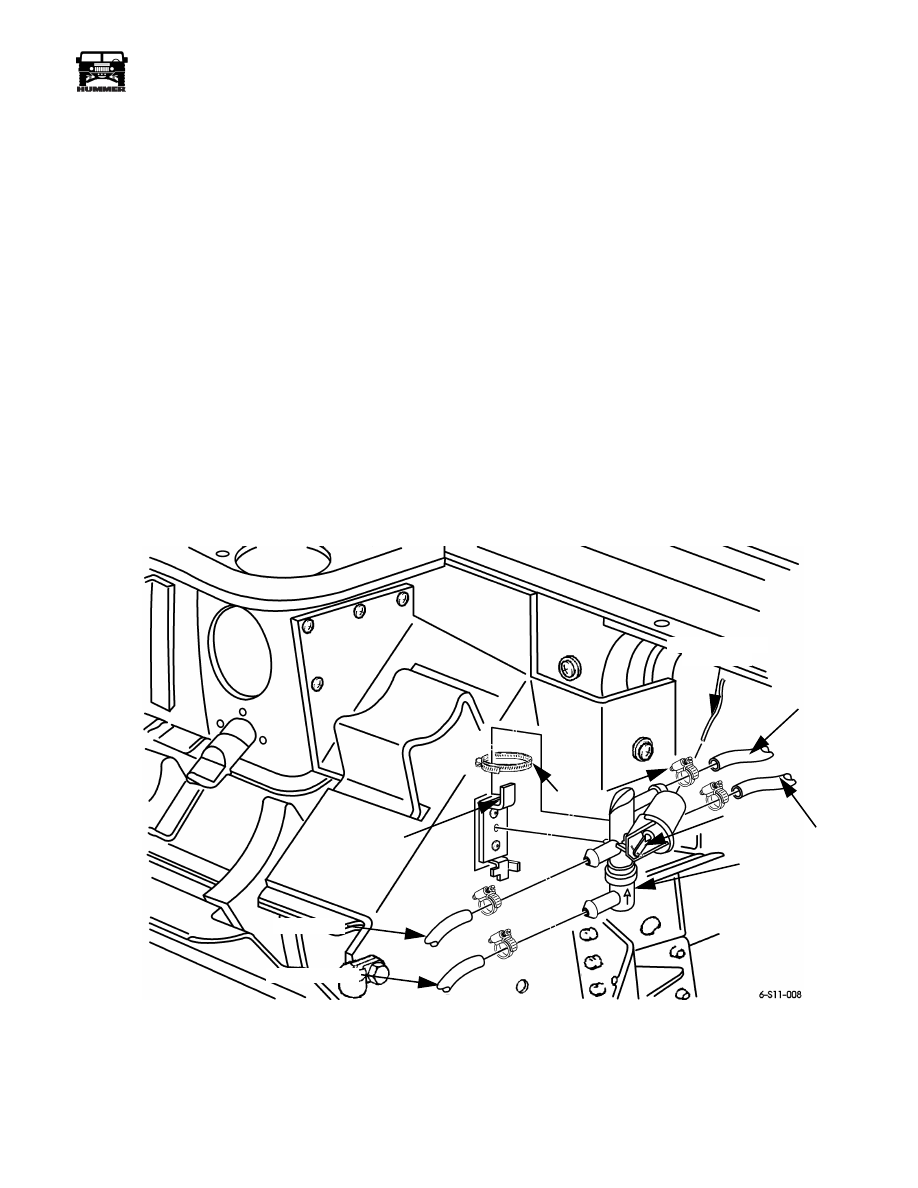
WATER CONTROL VALVE REPLACEMENT
Removal
1.
Place a drain container under the vehicle directly below
the control valve (Figure 11-19).
NOTE: Use extreme caution when working on a hot engine.
Let the engine cool down before proceeding.
2.
Relieve pressure from cooling system by loosening
coolant pressure cap.
3.
Remove the air intake hoses.
4.
Disconnect the vacuum hose from the control valve
diaphragm.
5.
Clamp control valve hoses with heater hose clamp pliers
or equivalent tool.
6.
Remove hoses from valve.
7.
Remove clamp and valve from mounting bracket.
Installation
CAUTION: Do not overtighten the clamp that secures the con-
trol valve to the mounting bracket. Overtightening the clamp
can deform the valve housing and cause binding. After tighten-
ing, push the plunger in and out of the vacuum diaphragm to
ensure the valve is moving freely.
1.
Gently secure control valve to mounting bracket with
clamp (Figure 11-19).
2.
Secure hoses to valve with clamps.
3.
Release and remove hose clamp pliers or equivalent tools
from valve hoses.
4.
Connect the valve vacuum hose (Figure 11-19).
5.
Check the coolant level and add coolant if necessary.
6.
Tighten coolant pressure cap.
7.
Check the valve for proper operation and leaks.
Figure 11-19: Water Control Valve Installation
TO HEATER
FROM HEATER
TO ENGINE
FROM ENGINE
FROM VACUUM
SOLENOID
WATER CONTROL
VALVE
MOUNTING
BRACKET
CLAMP
PLUNGER