Honda Element. Manual - part 242
 

  Index      Honda     Honda Element - service repair manual 2007-2008 year


Search            


Content   ..  240  241  242  243   ..


Honda Element. Manual - part 242


1. Park the vehicle on level ground.  

2. Warm up the engine to normal operating temperature (the radiator fan comes on), and turn the engine off. 

Do not allow the engine to warm up longer than the time it takes for the radiator fan to come on twice. 

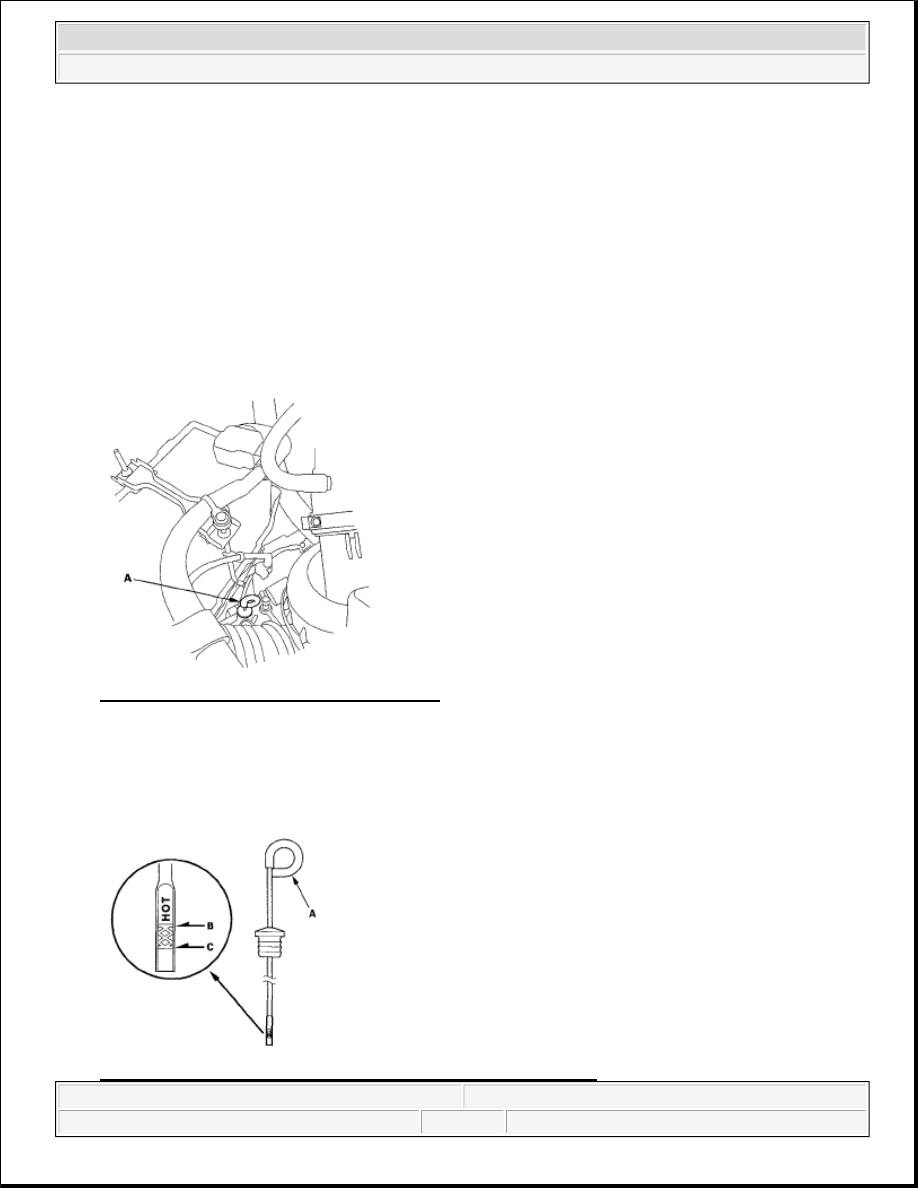
3. Remove the dipstick (yellow loop) (A) from the transmission, and wipe it with a clean cloth. 

Fig. 205: Identifying Dipstick (Yellow Loop) 
Courtesy of AMERICAN HONDA MOTOR CO., INC. 

4. Insert the dipstick back into the transmission.  

5. Remove the dipstick (A), and check the fluid level. It should be between the upper mark (B) and the 

lower mark (C). 

Fig. 206: Identifying Upper Mark And Lower Mark On Dipstick

NOTE:

Keep all foreign particles out of the transmission.

NOTE:

Check the fluid level within 60-90 seconds after turning the engine off. 
Higher fluid level may be indicated if the radiator fan comes on twice or 
more.


2007 Honda Element EX 

2007-2008 TRANSMISSION Automatic Transmission - Element


Courtesy of AMERICAN HONDA MOTOR CO., INC.

6. If the level is below the upper mark, check for fluid leaks at the transmission, hose and line joints, and 

cooler lines. If a problem is found, fix it before filling the transmission with ATF. 

7. If the level is above the upper mark, drain the ATF to proper level (see step 3 ). 

8. If necessary, fill the transmission with ATF through the dipstick hole to bring the fluid level to midway 

between the upper mark and the lower mark of the dipstick. Do not fill past the upper mark. Always use 
Honda ATF-Z1 Automatic Transmission Fluid (ATF). Using a non-Honda ATF can affect shift quality.  

9. Insert the dipstick (A) back into the transmission with the handle pointing toward the breather pipe (B). 

Fig. 207: Identifying Dipstick Back Into Transmission 
Courtesy of AMERICAN HONDA MOTOR CO., INC. 

ATF REPLACEMENT 

1. Park the vehicle on level ground.  

NOTE:

If the vehicle is driven when the ATF level is below the lower mark: 

Transmission damage will result.  

Vehicle does not move in any gear.  

Vehicle accelerates poorly, and flares when starting off in the D and 
R positions.  

The engine vibrates at idle.  

NOTE:

If the vehicle is driven when the ATF level is above the upper mark, the 
vehicle may creep forward in the N position, or have shifting problems.

NOTE:

Keep all foreign particles out of the transmission.


2007 Honda Element EX 

2007-2008 TRANSMISSION Automatic Transmission - Element


2. Warm up the engine to normal operating temperature (the radiator fan comes on), and turn the engine off. 

3. Remove the drain plug (A), and drain the automatic transmission fluid (ATF). 

Fig. 208: Identifying Drain Plug With Torque Specification 
Courtesy of AMERICAN HONDA MOTOR CO., INC. 

4. Reinstall the drain plug with a new sealing washer (B).  

5. Remove the dipstick, and refill the transmission with the recommended fluid amount through the dipstick 

hole until the level reaches between the upper mark and the lower mark on the dipstick. Always use 
Honda ATF-Z1 Automatic Transmission Fluid (ATF). Using a non-Honda ATF can affect shift quality. 

Automatic Transmission Fluid Capacity:  

4WD:  

2.5 L (2.6 US qt) at change  

7.2 L (7.6 US qt) at overhaul  

2WD:  

2.6 L (2.7 US qt) at change  

7.0 L (7.4 US qt) at overhaul  

6. Insert the dipstick (A) back into the transmission with the handle pointing toward the breather pipe (B). 

NOTE:

If ATF cooler cleaning is necessary, refer to ATF cooler cleaning (see ATF 
COOLER CLEANING ).


2007 Honda Element EX 

2007-2008 TRANSMISSION Automatic Transmission - Element


Fig. 209: Identifying Dipstick (Oil Gauge) 
Courtesy of AMERICAN HONDA MOTOR CO., INC. 

TRANSFER ASSEMBLY INSPECTION 

1. Raise the vehicle on a lift, and make sure it is supported securely.  

2. Shift the transmission into the N position.  

3. Make a reference mark (A) across the propeller shaft (B) and the transfer companion flange (C). 

Fig. 210: Identifying Propeller Shaft And Transfer Companion Flange With Mounting Bolts With 
Torque Specification
 
Courtesy of AMERICAN HONDA MOTOR CO., INC. 

4. Separate the propeller shaft from the transfer assembly.  

5. Set a dial indicator (A) on the transfer companion flange (B), and measure the transfer gear backlash. 

Standard: 0.06-0.16 mm (0.002-0.006 in.) B


2007 Honda Element EX 

2007-2008 TRANSMISSION Automatic Transmission - Element


Content   ..  240  241  242  243   ..