Harley Davidson Touring Models 84-98 FLH, FLHT, FXR. Service manual - page 6
8А. On 1993-1998 FLH and FLT series models,
reinstall the oil pan drain plug and gasket. Tighten securely.
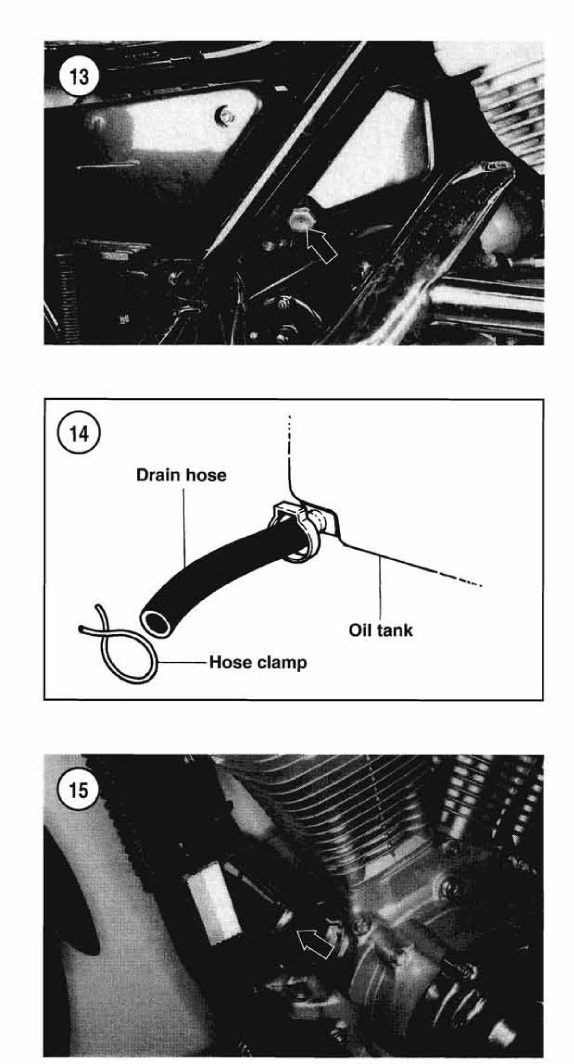
8B. On all other models, reinstall the oil tank drain plug and gasket or
reinstall the drain hose clamp onto the drain hose.
9. Clean the tappet oil screen as described under Valve Lifter Oil
Screen Cleaning in this chapter.
10. Fill the oil pan (1993-1998 FLH and FLT series models) or oil tank
(all other models) with the correct viscosity (Table 4) and quantity
(Table 6) of oil.
11. Insert the filler cap into the
oil tank or oil pan. Push it down until it bottoms.
NOTE
After oil has been added, the oil level will register above the upper
groove dipstick mark until the engine runs and the filterfills with oil.
To obtain a correct reading after adding oil and installing a new
oilfilter, follow the procedure in Step 12.
12. After changing the engine oil and filter, check the oil level as
follows:
a. Start and run the engine for 1 minute. Then shut it off.
b. Check the oil level on the dipstick as described in this section.
c. If the oil level is correct, it will register in the dipstick safe
operating level range. If so, do not top off or add oil to bring it to
the upper groove level on the dipstick.
13. Check the oil filter and drain plug for leaks.
14. Dispose of the used oil properly.
Oil Tank Flushing (Except 1993-1998 FLH and FLT Series Models)
After rebuilding the engine and at every second oil change during warm
riding weather, flush the oil tank before refilling it with new oil.
During colder weather, flush the oil tank at each oil change.
1. Drain the oil tank as previously described.
2. Remove the oil tank as described in Chapter Four.
CAUTION
Do not try to totally flush the oil tank while it is mounted in the
frame. Any sludge not removed during this procedure will dog oil
passages and cause engine seizure.
3. Reinstall the oil tank drain plug (if used) and plug all tank hose
openings.
4. Fill the oil tank 3/4 full with kerosene.
5. Secure the dipstick in place and vigorously move the tank
side-to-side and top-to-bottom to break loose accumulated sludge and
sediment within the tank.
6. Remove the dipstick and drain the tank into a suitable container. Use
a small flashlight and check for any large deposits of sludge and
sediment that did not drain out. If necessary, carefully break any hard
deposits loose with a wooden dowel or similar tool inserted into the
tank. Remove these deposits.
7. Repeat Steps 4-6 until all deposits are removed and the interior of
the oil tank is clean.