Geely Emgrand X7. Manual part - 393


  Главная      Geely     Geely Emgrand X7 - Manual


поиск по сайту            


содержание   ..   390  391  392  393  394  ..


Geely Emgrand X7. Manual part - 393
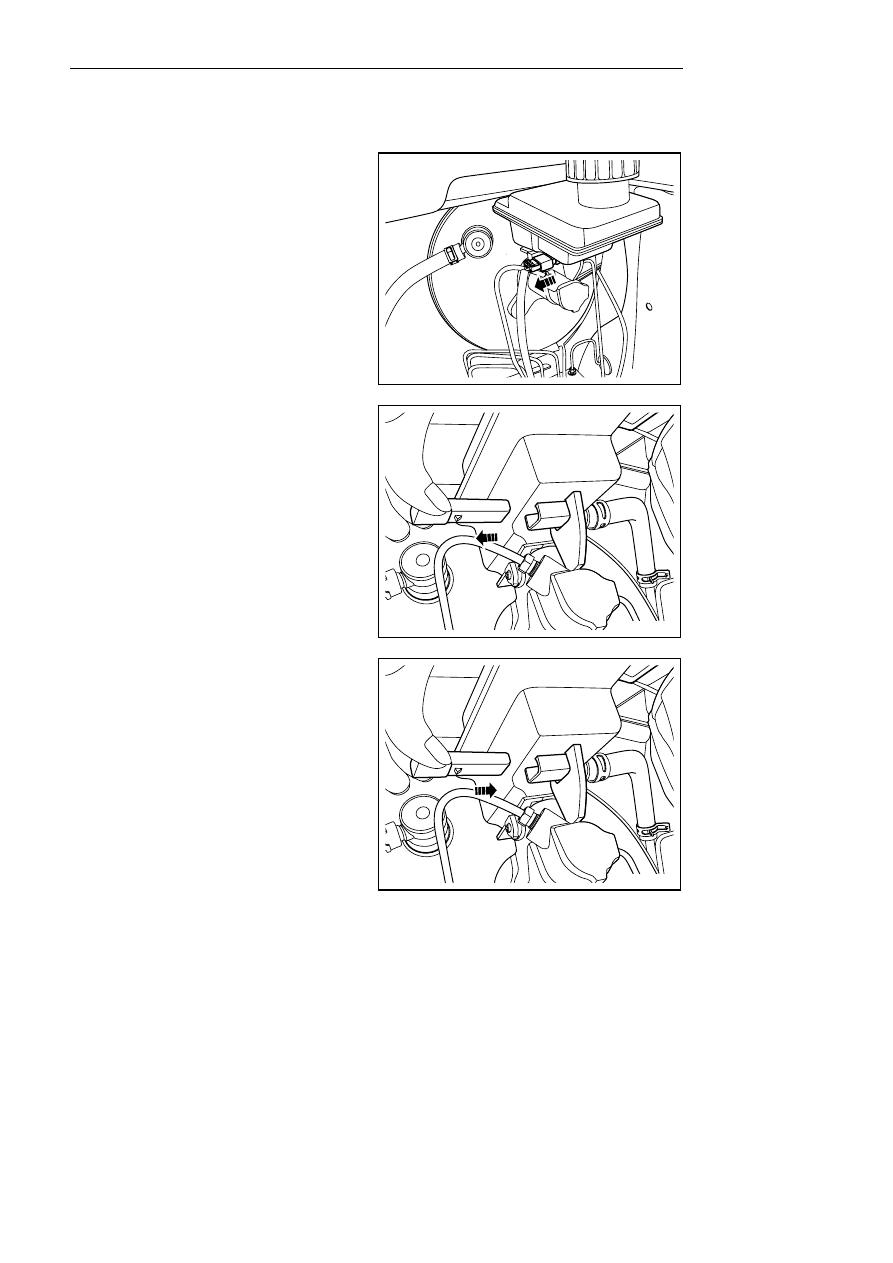


6.4.5.7 Brake fluid level sensor replacement 

Dismantle procedure 

Warning! 

Warning: Refer to warning for battery disconnection 
in Warning and precaution . 

1.   Disconnect the battery negative cable. Refer to 

2.11.8.1 Battery cable disconnection/connection 
procedures. 

2.  Disconnect brake fluid level sensor harness 

connector. 

NL06-0030b


3.    Take out brake fluid level sensor from the bottom 

of brake fluid reservoir. 

Notes: 

It is unnecessary to discharge the brake fluid. 


NL06-0049b


Installation Procedure: 

1.  Install brake fluid level sensor to fluid reservoir. 

NL06-0050b


1571


2.  Connect the harness connector of the brake fluid 

level sensor. 

3.  Connect the battery negative cable. 


NL06-0050b


1572


6.4.5.8 Replace brake pedal assembly 

Dismantle procedure 

1.  Remove instrument panel. Refer to 12.8.3.1 

Instrument Panel Replacement. 

2.   Separate vacuum booster connecting rod U clip 

from brake pedal. 

3.   For dismantling of brake lamp switch, refer to 

11.3.8.13 Replacement of brake lamp switch. 


NL06-0044b


4.   Dismantle fixing bolt on the upper of brake 

pedal. 

NL06-0045b


5.   Remove the 4 fixing nuts at the bottom of the 

braking padel. 

6.    Take out the brake pedal assembly. 


NL06-0051b


1573


Installation Procedure: 

1.    install brake pedal 

2.   Install and tighten upper fixing bolt of brake 

pedal. 

Torque:21 Nm(Metric) 15.5 lb-ft(English system) 


NL06-0051b


3.   Install and tighten 4 fixing nuts on the lower 

section of brake pedal. 

Torque:21 Nm(Metric) 15.5 lb-ft(English system) 

4.    Install brake lamp switch. 


NL06-0045b


5.   Install the U-shaped clip of the vacuum booster 

connecting rod and brake pedal connecting pin 
and install the fixing pin. 

6.  Install the instrument panel.   


NL06-0044b


1574


содержание   ..   390  391  392  393  394  ..