Ford Falcon. Manual - part 432
501-14-7
Handles, Locks, Latches and Entry Systems
501-14-7
REMOVAL AND INSTALLATION (Continued)
4. Remove the actuator assembly while
Hood Latch Release Cable
disconnecting the latch rod.
Removal
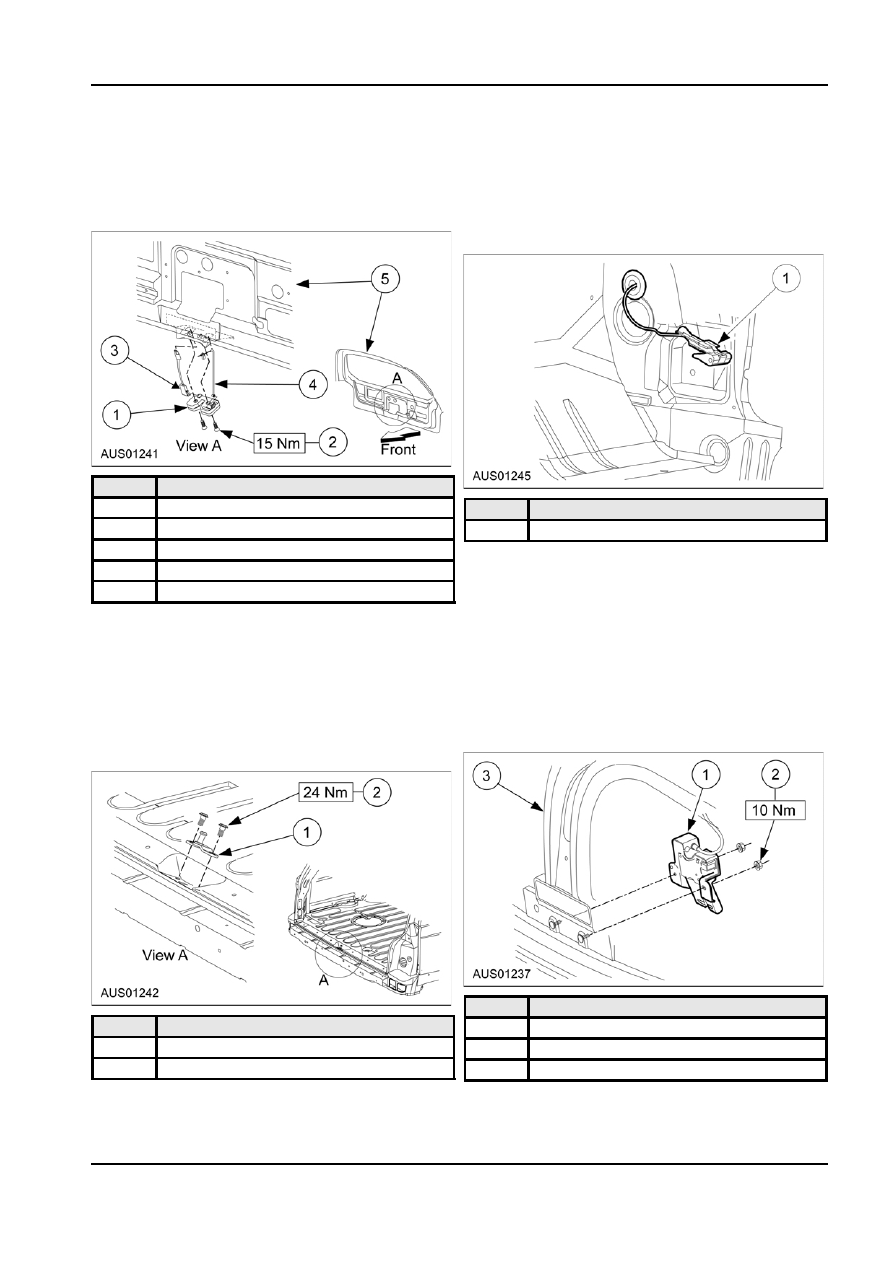
5. Remove the latch assembly retaining screws and
remove the latch with connecting rod and
1. Remove hood latch.
courtesy lamp wiring lead attached.
2. Disconnect hood release handle from instrument
panel.
Item
Description
1
Latch assembly
Item
Description
2
Screw
1
Hood release handle
3
Courtesy lamp wiring
3. Pop out grommet on cowl side attached to cable.
4
Connecting rod
Installation
5
Liftgate body
1. Reverse removal procedure.
Installation
Decklid Latch and Emergency Release
1. Reverse removal procedure.
Cable
Liftgate Latch Striker
Removal
Removal
1. Remove decklid trim if fitted.(Refer to Section
501-05.)
1. Remove load floor carpet. (Refer to Section
501-05.)
2. Remove decklid latch nuts.
2. Remove liftgate latch striker bolts.
Item
Description
Item
Description
1
Decklid latch assembly
1
Liftgate striker
2
Nut
2
Bolt
3
Decklid body
Installation
1. Reverse removal procedure.
G31878 en