Ford Falcon. Manual - part 69
206-05-5
Parking Brake and Actuation
206-05-5
GENERAL PROCEDURES (Continued)
13. Repeat 2 to 12 for the opposite side parking
8. Install adjustment pawl to the backing plate with
brake.
pop rivet provided.
14. Adjust the parking brake cable in accordance with 9. Adjustment pawls are left and right hand. Ensure
the procedure described in this section.
correct fitment.
10. Install parking brake adjustment screw to fully
Major Parking Brake Service
home position in notched adjusting nut.
1. Raise the vehicle.
11. Back off 1/4 of a turn.
2. Remove rear wheel, disc brake caliper and rotor.
12. Install screw and nut assembly into the backing
plate on the adjustment pawl side. Keep the shoe
3. Remove
and
discard:
slot parallel with the backing plate face.
Adjusting Nut
13. Install pushrod into tappet.
Adjusting Screw
14. Install pushrod and tappet into backing plate.
Adjusting Pawl
Ensure pushrod set correctly in lever socket by
Tappet
holding the lever into the backing plate whilst
Pushrod
inserting pushrod and tappet.
4. Remove and discard the operating lever and dust 15. Clean excess grease away using a clean rag.
cover assembly.
16. Install shoe and lining assembly. Refer to Parking
5. Clean backing plate. The cleaning fluid must be a
Brake Shoe Replacement in this section.
high flash point oil-free solvent such as
17. Repeat 2 to 14 for opposite side parking brake.
tricloroethylene or acetane. These cleaning fluids
are usually highly flammable and harmful if
vapours are inhaled for prolonged periods.
Manufacturer warnings and recommendations
should be strictly adhered to. Ensure actuation
cavity in backing plate is free from grease and
any other contamination.
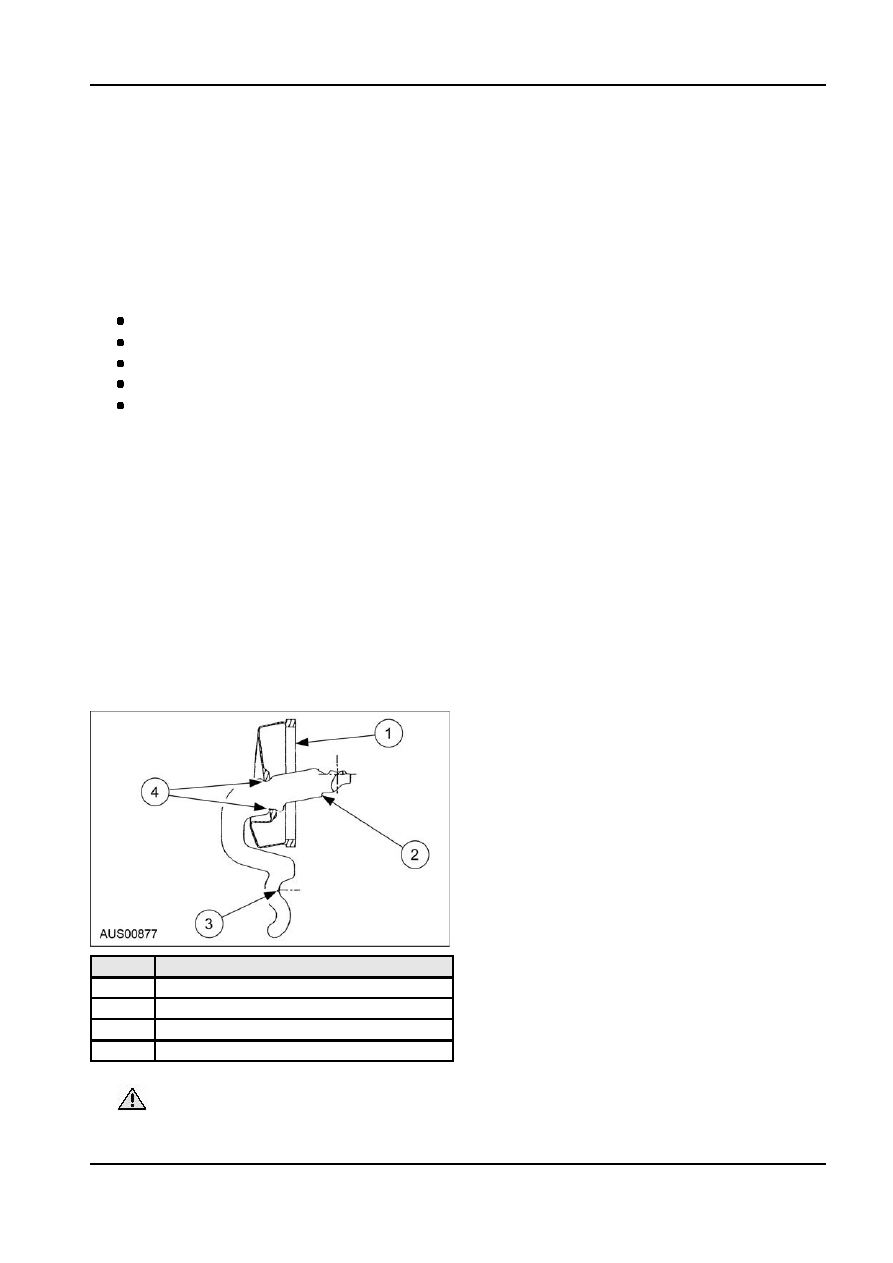
6. Install lever and dust cover assembly. Slide the
lever onto the dust cover notches. Insert the lever
and dust cover assembly into the backing plate
with the lever cable retainer end positioned
downward. Refit the dust cover by stretching it
over the cast retainer on the back plate.
Item
Description
1
Dust Cover
2
Lever
3
Cable Retainer
4
Dust Cover Notches
7. Lubricate actuation cavity and tappet.
CAUTION: Ensure cavity internal bore is
fully covered with grease.
G87685 en