Ford Transit (2018 year). Manual - part 70
 

  Index      Ford     Ford Transit - service manual 2018 year in english


Search            


Content   ..  68  69  70  71   ..


Ford Transit (2018 year). Manual - part 70


Changing Tires With a Tire
Pressure Monitoring System

E142549

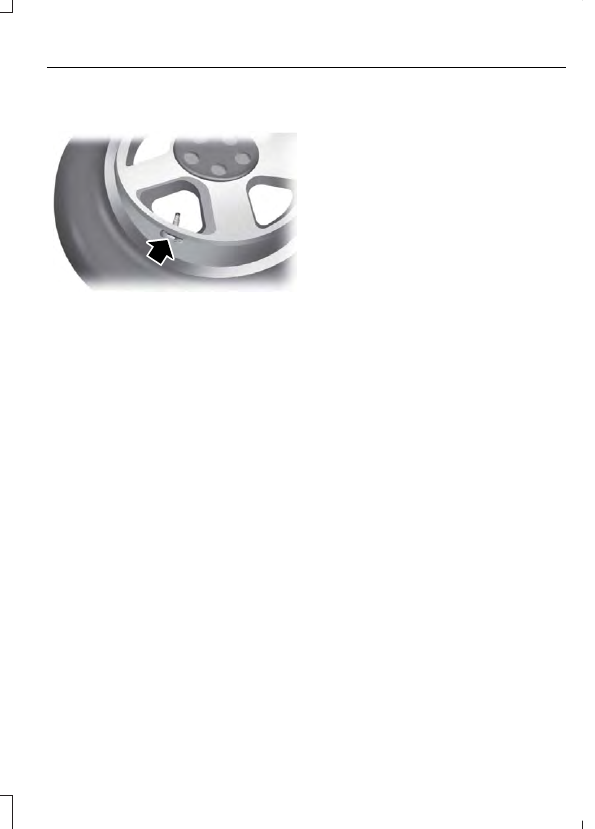
Note: Each road tire is equipped with a tire
pressure sensor located inside the wheel
and tire assembly cavity. The pressure
sensor is attached to the valve stem. The
pressure sensor is covered by the tire and is
not visible unless the tire is removed. Take
care when changing the tire to avoid
damaging the sensor.

You should always have your tires serviced
by an authorized dealer.

Check the tire pressure periodically (at
least monthly) using an accurate tire
gauge. See When Inflating the Tires in
this chapter.

Understanding the Tire Pressure
Monitoring System

The system measures the pressure in the
four road tires and sends the tire pressure
readings to your vehicle. The low tire
pressure warning light will illuminate if any
of the tire pressures are significantly low.
If the warning light is illuminated, one or
more of the tires are under-inflated and
need to be inflated to the correct pressure.

When the Temporary Spare Tire is
Installed

If one of the road wheels and tire needs to
be replaced with the temporary spare
wheel and tire, the system will continue to
identify a defect. This is to remind you that
the damaged road wheel and tire must be
repaired and refitted to your vehicle.

To restore the correct operation of the
system, you must have the repaired road
wheel and tire assembly refitted to your
vehicle. For additional information, see
Changing Tires with a Tire Pressure
Monitoring System in this section.

When You Believe the System is Not
Operating Correctly

The main function of the system is to warn
you when the tire pressures are low. It can
also warn you in the event the system is
no longer capable of operating correctly.
See the following chart for information
concerning the system:

Customer action required

Possible cause

Low tire pressure

warning light

Make sure tires are at the proper pres-
sure. See Inflating your tires in this
chapter. After inflating your tires to the
manufacturer’s recommended pressure
as shown on the Tire Label (located on
the edge of driver’s door or the B-Pillar),
the vehicle must be driven for at least
two minutes over 20 mph (32 km/h)
before the light turns off.

Tire(s) under-inflated

Solid warning light

Repair the damaged road wheel and tire
assembly and reinstall it on the vehicle
to restore system function. For a
description on how the system functions,
see When Your Temporary Spare Tire
is Installed in this section.

Spare tire in use

If the tires are properly inflated and the
spare tire is not in use but the light
remains on, contact your authorized
dealer as soon as possible.

TPMS malfunction

Repair the damaged road wheel and tire
assembly and reinstall it on the vehicle
to restore system function. For a
description on how the system functions,
see When Your Temporary Spare Tire
is Installed in this section.

Spare tire in use

Flashing warning

light

If the tires are properly inflated and the
spare tire is not in use but the light
remains on, contact your authorized
dealer as soon as possible.

TPMS malfunction

When Inflating the Tires

When inflating the tires (for example; at a
gas station), the system may not respond
immediately to the air added to the tires.

It may take up to two minutes of driving
over 20 mph (32 km/h) for the light to turn
off after you have filled your tires to the
recommended inflation pressure.

How Temperature Affects the Tire
Pressures

While driving in a normal manner, tire
pressures may increase up to 4 psi
(30 kPa) from a cold start situation. If the
vehicle is stationary overnight and the
temperature significantly lower than the
daytime temperature, tire pressures may

decrease up to 3 psi (20 kPa) for a drop of
30°F (17°C) in ambient temperature. This
lower pressure value will be detected by
the system as being significantly lower
than the correct inflation pressure and the
warning light will illuminate.

If the warning light is on:

Check each tire to verify that none are
flat.

If one or more tires are flat, repair as
necessary.

Check the tire pressures and Inflate all
the tires to the correct pressure.

Tire Pressure Monitoring System
Reset Procedure

Carry out the tire pressure monitoring
system reset procedure after:

Every tire rotation.

Each tire replacement, only when the
sensor stays the same and does not
change.

Note: The tire pressure monitoring system
reset procedure will not work with a new
sensor until an authorized dealer programs
the new sensor.

Overview

WARNING

To determine the required
pressure(s) for your vehicle, see the
Safety Compliance Certification

Label (on the door hinge pillar, door-latch
post or the door edge that meets the
door-latch post, next to the driver seat) or
the Tire Label on the B-Pillar or the edge
of the driver door.

To maintain your vehicle’s load carrying
capability, this vehicle requires different
tire pressures in the front tires compared
to the rear tires. The system on your vehicle
is designed to illuminate the warning light
at different pressures for the front and rear
tires.

The tires need to be periodically rotated
to provide consistent performance and
maximum tire life, the system needs to
know when the tires have been rotated to
determine which set of tires are on the
front and rear axles. With this information,
the system can detect and correctly warn
of low tire pressures.

System Reset Tips:

To reduce the chance of interference
from another vehicle, the system reset
procedure should be carried out at
least three feet (one meter) away from
another Ford vehicle undergoing the
system reset procedure.

Do not wait more than two minutes
between resetting each tire sensor or
the system will time-out and the entire
procedure will have to be repeated on
all four wheels. A double horn chirp
indicates the need to repeat the
procedure.

Carrying Out the System Reset
Procedure

Read the entire procedure before carrying
out a system reset.

1.

Drive your vehicle above 20 mph
(32 km/h) for at least two minutes and
then park in a safe location where you
can easily get to all four tires and have
access to a tire inflation pump.

2. Switch the ignition off.

3. Switch the ignition on with the engine

off.

4. Turn the hazard flashers on then off

three times, this must be completed
within 10 seconds. If the reset mode
has been entered successfully, the horn
will chirp once and the system indicator
will flash. If this does not occur, repeat
the procedure from step 2. If after
repeated attempts to enter the reset
mode, the horn does not chirp and the
system indicator does not flash, have
your vehicle checked by an authorized
dealer as soon as possible.

5. Train the system sensors in the tires

using the following reset sequence
starting with the left front tire and
following a clockwise order: Left front,
right front, right rear, left rear.

6. Remove the valve cap from the valve

stem on the left front tire. Decrease the
air pressure until the horn chirps.

Note: The single horn chirp confirms that
the sensor identification code has been
learned by your vehicle for this position. If a
double horn chirp is heard, the reset
procedure was unsuccessful and must be
repeated.

7.

Remove the valve cap from the valve
stem on the right front tire. Decrease
the air pressure until the horn chirps.

8. Remove the valve cap from the valve

stem on the right rear tire. Decrease the
air pressure until the horn chirps.

9. Remove the valve cap from the valve

stem on the left rear tire. Decrease the
air pressure until the horn chirps.
Training is complete when the horn
chirps after the last system sensor (left
rear) has been trained and the system
indicator stops flashing.

10.

Switch the ignition off.  If two short
horn chirps are heard, the reset
procedure was unsuccessful and
must be repeated.

Note: If after repeating the procedure two
short horn chirps are heard again, have your
vehicle checked by an authorized dealer as
soon as possible.

11.

Set all four tires to the correct
pressure  See Maintenance (page
223).  or the tir
e inflation pressure label
(located on the edge of driver door or
the B-Pillar).

CHANGING A ROAD WHEEL

WARNINGS

Do not use tire sealants as they may
damage the tire pressure monitoring
system.

If the tire pressure monitor sensor
becomes damaged it may not
function.

Note: The tire pressure monitoring system
indicator light will illuminate when the spare
tire is in use. To restore the full function of
the monitoring system, all road wheels
equipped with tire pressure monitoring
sensors must be mounted on this vehicle.

If you get a flat tire while driving, do not
apply the brake heavily. Instead, gradually
decrease your speed. Hold the steering
wheel firmly and slowly move to a safe
place on the side of the road.

Have a flat serviced by an authorized
dealer in order to prevent damage to the
system sensors  See Tire Pressure
Monitoring System (page 281). 
 Replace
the spare tire with a road tire as soon as
possible. During repairing or replacing of
the flat tire, have the authorized dealer
inspect the system sensor for damage.


Content   ..  68  69  70  71   ..