Ford Excursion (2005 year). Manual - part 31
 

  Index      Ford     Ford Excursion - service manual 2005 year in english


Search            


Content   ..  29  30  31  32   ..


Ford Excursion (2005 year). Manual - part 31


Installing child safety seats with combination lap and shoulder
belts

Air bags can kill or injure a child in a child seat. NEVER place a

rear-facing child seat in front of an active air bag. If you must

use a forward-facing child seat in the front seat, move the seat all the
way back.

Children 12 and under should be properly restrained in the rear
seat whenever possible.

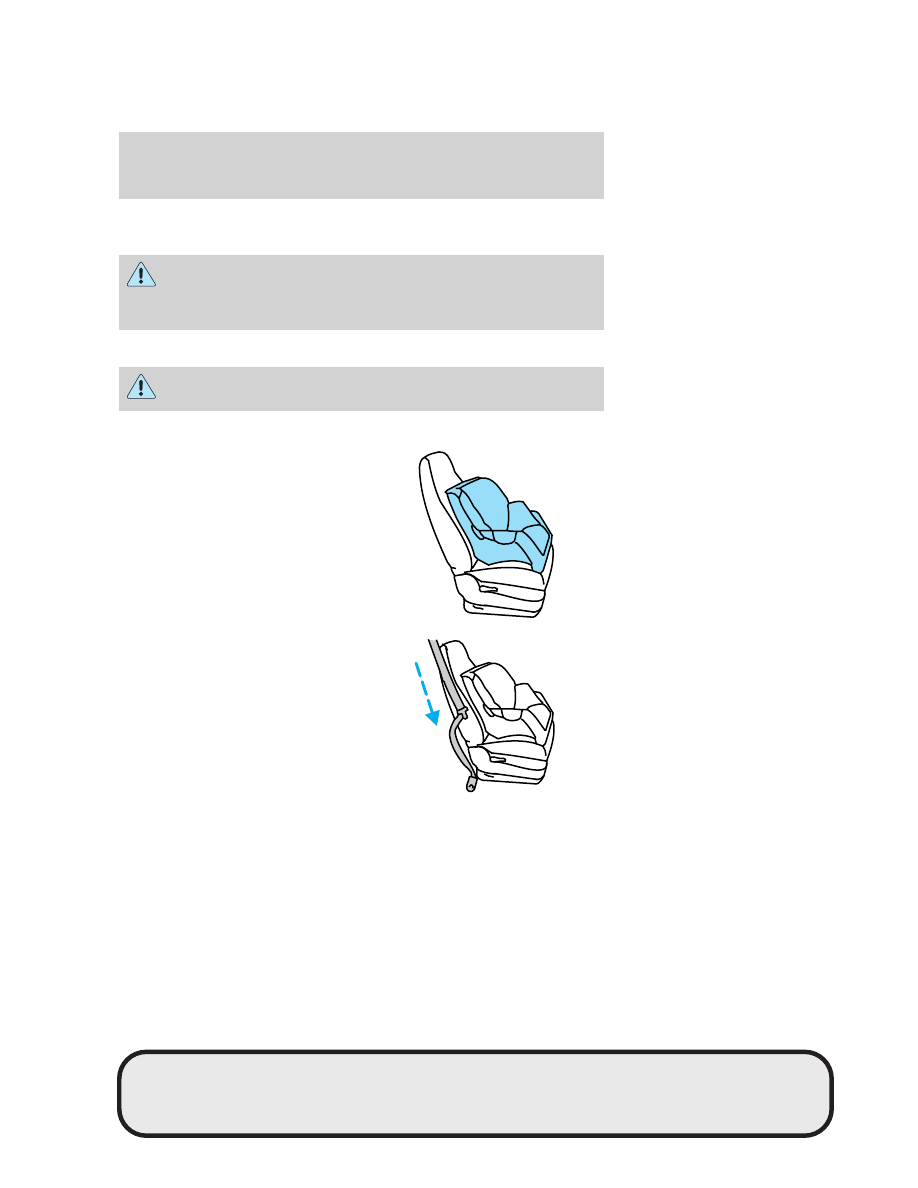
1. Position the child safety seat in a
seat with a combination lap and
shoulder belt.

2. Pull down on the shoulder belt
and then grasp the shoulder belt
and lap belt together.

Seating and Safety Restraints

126

3. While holding the shoulder and
lap belt portions together, route the
tongue through the child seat
according to the child seat
manufacturer’s instructions. Be sure
the belt webbing is not twisted.

4. Insert the belt tongue into the
proper buckle (the buckle closest to
the direction the tongue is coming
from) for that seating position until
you hear a snap and feel the latch
engage. Make sure the tongue is
latched securely by pulling on it.

5. To put the retractor in the
automatic locking mode, grasp the
shoulder portion of the belt and pull
downward until all of the belt is
pulled out and a click is heard.

6. Allow the belt to retract. The belt will click as it retracts to indicate it
is in the automatic locking mode.

Seating and Safety Restraints

127

7. Pull the lap belt portion across
the child seat toward the buckle and
pull up on the shoulder belt while
pushing down with your knee on the
child seat.

8. Allow the safety belt to retract to
remove any slack in the belt.

9. Before placing the child in the
seat, forcibly move the seat forward
and back to make sure the seat is
securely held in place. To check
this, grab the seat at the belt path
and attempt to move it side to side
and forward. There should be no
more than one inch of movement for
proper installation.

10. Try to pull the belt out of the retractor to make sure the retractor is
in the automatic locking mode (you should not be able to pull more belt
out). If the retractor is not locked, unbuckle the belt and repeat steps
two through nine.

Check to make sure the child seat is properly secured before each use.

Attaching child safety seats with tether straps

Most new forward-facing child safety seats include a tether strap which
goes over the back of the seat and hooks to an anchoring point. Tether
straps are available as an accessory for many older safety seats. Contact
the manufacturer of your child seat for information about ordering a
tether strap.

The second row seats of your vehicle are equipped with built-in tether
strap anchors located behind the seats as described below.

The tether anchors in your vehicle are along the bottom of the seatback
marked with the tether anchor symbol (shown with title).

The tether strap anchors in your vehicle are in the following positions
(shown from top view):

Seating and Safety Restraints

128

• Second row 60/40 bench seat

• Second row bucket seats

Attach the tether strap only to the appropriate tether anchor as
shown. The tether strap may not work properly if attached

somewhere other than the correct tether anchor.

1. Position the child safety seat on the seat cushion.

2. Route the child safety seat tether strap over the back of the seat.

For vehicles with adjustable head restraints, route the tether strap under
the head restraint and between the head restraint posts, otherwise route
the tether strap over the top of the seatback.

3. Locate the correct anchor for the selected seating position.

Seating and Safety Restraints

129


Content   ..  29  30  31  32   ..