Tesla Model S (2022 year). Manual in english - page 3

Traction Control
How It Works
The traction control system constantly monitors the
speed of the front and rear wheels. If Model S
experiences a loss of traction, the system minimizes
wheel spin by controlling brake pressure and motor
power. By default, the traction control system is on.
Under normal conditions, it should remain on to ensure
maximum safety.
This yellow indicator flashes on the
instrument panel whenever the traction
control system is actively controlling brake
pressure and motor power to minimize
wheel spin. If the indicator stays on, a fault
is detected with the traction control
system. Contact Tesla Service.
WARNING: Traction control cannot prevent
collisions caused by driving dangerously or turning
too sharply at high speeds.
Allowing Wheel Slip
To allow the wheels to spin at a limited speed, you can
enable Slip Start. Slip Start can be enabled only when
Model S is moving 30 mph (48 km/h) or slower. Slip
Start automatically disables when the speed exceeds
50 mph (80 km/h).
Under normal conditions, Slip Start should not be
enabled. Enable it only in circumstances where you
deliberately want the wheels to spin, such as:
• Starting on a loose surface, such as gravel or snow.
• Driving in deep snow, sand or mud.
• Rocking out of a hole or deep rut.
To allow the wheels to spin, touch Controls > Pedals &
Steering > Slip Start.
The instrument panel displays an alert
message when Slip Start is enabled.
Although Slip Start is automatically disabled the next
time you start Model S, it is strongly recommended that
you disable it immediately after the circumstances that
required you to enable it have passed.
NOTE: Slip Start can not be enabled when you are
actively using cruise control.
Driving
67
Park Assist
How Park Assist Works
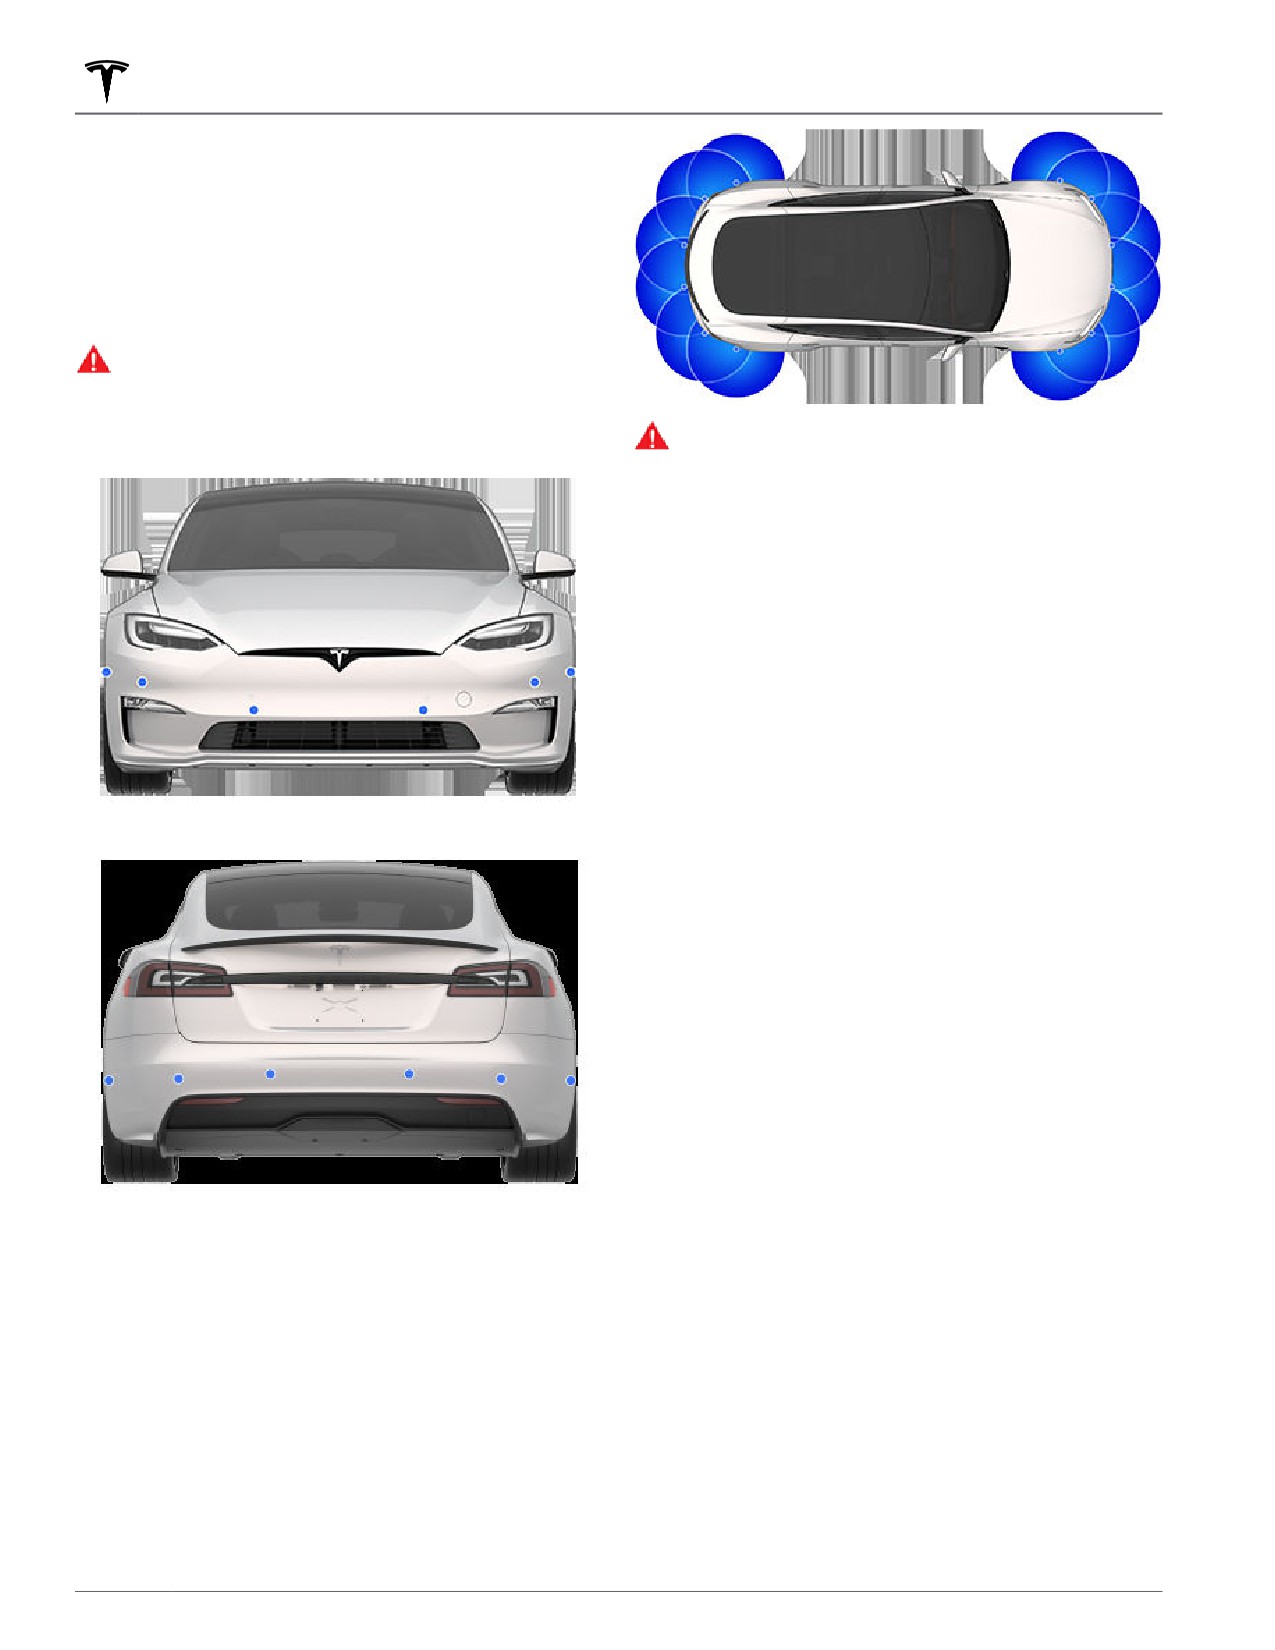
Model S has several sensors designed to detect the
presence of objects. When driving slowly in Drive or
Reverse (for example, when parking), the vehicle alerts
you if an object is detected in close proximity of your
Model S. Objects are only detected in your chosen
direction; front objects in Drive, rear objects in Reverse.
WARNING: You may not be alerted if Model S rolls
freely in the opposite direction (for example, Park
Assist does not display an alert if Model S rolls
backwards down a hill while in Drive).
WARNING: Never depend on Park Assist to inform
you if an area you are approaching is free of
objects and/or people. Several external factors can
reduce the performance of Park Assist, causing
either no readings or false readings (see
Limitations and False Warnings on page 69).
Therefore, depending on Park Assist to determine
if Model S is approaching an obstruction can result
in damage to the vehicle and/or objects, and can
potentially cause serious injury. Always inspect the
area with your own eyes. When reversing, perform
shoulder checks and use all mirrors. Park assist
does not detect children, pedestrians, bicyclists,
animals, or objects that are moving, protruding,
located too far above or below the sensors, or too
close or too far from the sensors. Park Assist is for
guidance purposes only and is not intended to
replace your own direct visual checks. It is not a
substitute for careful driving.
Visual and Audio Feedback
When you shift to Reverse, the Park Assist view displays
on the left side of the instrument panel, showing objects
that are in close proximity to the front and rear of
Model S. This view closes when you shift into Drive
unless an object is detected close to the front of
Model S, in which case the Park Assist view closes
automatically when your driving speed exceeds 5 mph
(8 km/h). When reversing, visual feedback also displays
on the touchscreen (see Rear Facing Camera(s) on page
77). You can manually close the park assist view on the
touchscreen by touching the X.
When driving with the Camera app displayed on the
touchscreen, you can switch to the Park Assist view
The sensors are activated when driving slower than
when driving at speeds below 5 mph (8 km/h). Touch
5 mph (8 km/h).
the button located in the upper left corner of the
Camera app screen. This is useful if you need assistance
with parallel parking.
If chimes are turned on (see Controlling Audible
Feedback on page 69), an audible beep sounds as you
approach an object. You can temporarily mute the chime
by touching the speaker icon on the bottom corner of
the Park Assist view.
NOTE: If a sensor is unable to provide feedback, the
instrument panel displays an alert message.
68

Park Assist
CAUTION: Keep sensors clean from dirt, debris,
• Model S rolls freely in the opposite direction you
snow, and ice. Avoid using a high pressure power
selected (for example, Park Assist does not display an
washer on the sensors and do not clean a sensor
alert if Model S rolls backwards down a hill while in
with a sharp or abrasive object that can scratch or
Drive).
damage its surface.
CAUTION: Do not install accessories or stickers on
Other Parking Aids
or near the parking sensors.
In addition to Park Assist, when shifted into Reverse, the
Controlling Audible Feedback
backup camera displays a view of the area behind
Model S (see Rear Facing Camera(s) on page 77).
You can use Park Assist with or without audible
feedback. To turn chimes on or off, touch Controls >
Safety > Park Assist Chimes.
To mute the chimes temporarily, touch the speaker icon
in the bottom corner of the Park Assist view. The chimes
are muted until you shift or drive over 5 mph (8 km/h).
Limitations and False Warnings
The parking sensors may not function correctly in these
situations:
• One or more of the ultrasonic sensors or cameras is
damaged, dirty, or obstructed (such as by mud, ice,
or snow, or by a vehicle bra, excessive paint, or
adhesive products such as wraps, stickers, rubber
coating, etc.).
• The object is located below approximately 8 inches
(20 cm) (such as a curb or low barrier).
CAUTION: Shorter objects that are detected
(such as curbs or low barriers) can move into
the blind spot of the sensors. Model S cannot
alert you about an object while it is in the blind
spot of the sensors.
• Weather conditions (heavy rain, snow, or fog) are
interfering with sensor operation.
• The object is thin (such as a sign post).
• A sensor’s operating range has been exceeded.
• The object is sound-absorbing or soft (such as
powder snow).
• The object is sloped (such as a sloped embankment).
• Model S has been parked in, or being driven in,
extremely hot or cold temperatures.
• The sensors are affected by other electrical
equipment or devices that generate ultrasonic waves.
• You are driving in a location where the sensors'
ultrasonic waves are deflected away from the vehicle
(such as driving next to a wall or pillar).
• The object is located too close to the bumper.
• A bumper is misaligned or damaged.
• An object that is mounted to Model S is interfering
with and/or obstructing the sensor (such as a bike
rack or bumper sticker).
Driving
69

Vehicle Hold
When Model S is stopped, Vehicle Hold can continue to
apply the brakes even after you remove your foot from
the brake pedal. When driving on a hill or on a flat
surface, brake as you normally would. After coming to a
complete stop, simply press the brake pedal again (until
the instrument panel displays the Vehicle Hold indicator
light) to enable Vehicle Hold. You can then release the
brake pedal and remain stopped, even on a hill.
This indicator displays on the instrument
panel whenever Vehicle Hold is actively
braking Model S.
To disengage Vehicle Hold, press the accelerator pedal
or press and release the brake pedal.
NOTE: Shifting into Neutral also disengages Vehicle
Hold.
NOTE: After actively braking Model S for approximately
ten minutes, Model S shifts into Park and Vehicle Hold
cancels. Model S also shifts into Park if it detects that
the driver has left the vehicle.
70
Acceleration Modes
Touch Controls > Pedals & Steering > Acceleration to
2. Wait for the instrument panel to indicate that the
choose a preferred acceleration mode:
vehicle is Peak Performance Ready.
3. With Model S shifted into Drive and at a complete
• Chill limits acceleration for a slightly smoother and
stop, firmly hold the brake pedal with your left foot,
gentler ride.
then fully press the accelerator pedal.
NOTE: When Chill is selected, Chill displays on the
4. Once step 3 is complete, the front suspension begins
instrument panel, above the driving speed.
lowering into a "cheetah stance".
• Sport provides the normal level of acceleration.
NOTE: Suspension lowering for "cheetah stance"
significantly reduces ground clearance.
• Insane (called Plaid on performance vehicles) (if
equipped) provides access to the maximum level of
5. Wait for the instrument panel to indicate that Drag
acceleration immediately available.
Strip Mode is Ready to Launch.
NOTE: Using the increased torque and power
6. Once you see "Cheetah Stance Enabled" and "Ready
available in Insane or Plaid mode can reduce range
to launch" on the instrument panel, release the brake
and e
ciency.
pedal to launch the vehicle.
NOTE: Insane or Plaid strives to keep the Battery
within an optimal temperature range. In addition to
heating the Battery, these settings also cool the
battery when necessary (for example, while driving at
high speeds, during rapid acceleration, driving for
long periods, etc.).
In addition, Model S features Drag Strip Mode. Using
Drag Strip Mode to precondition your Model S is useful
before a short distance race.
Drag Strip Mode
Drag Strip Mode preconditions the Battery and drive
unit to ideal operating temperatures for timed
acceleration. Model S stays in Drag Strip Mode for three
hours, even if you leave the vehicle. After three hours,
the feature times out to prevent unnecessary energy
consumption (for example, you leave the vehicle and
forget to cancel Drag Strip Mode).
When using Drag Strip Mode, Model S consumes more
energy to keep the Battery within an optimal
temperature range.
Cancel Drag Strip Mode at any time by toggling Drag
Strip Mode off.
NOTE: Drag Strip Mode automatically disables Slip Start
when enabled.
WARNING: Drag Strip Mode is designed for use on
closed circuit driving courses only. It is the driver’s
responsibility to ensure that driving style and
acceleration do not endanger or inconvenience
other road users.
How to Launch the Vehicle
The touchscreen provides visual instructions on how to
launch:
1. Touch Controls > Pedals & Steering > Drag Strip
Mode.
Driving
71
Track Mode
Track Mode, available only on Plaid Model S vehicles, is
If you started the Lap Timer, each time you pass the
designed to modify the stability control, traction control,
start/finish location, the timer resets for the next lap.
regenerative braking, and cooling systems to increase
See Using the Lap Timer on page 73.
performance and handling while driving on closed
circuit courses. Track Mode improves cornering ability by
A real-time accelerometer (G-meter) appears on the
intelligently using the motors, and regenerative and
instrument panel. See G-Meter on page 73.
traditional braking systems. When enabled, the cooling
system runs at an increased level during and after
When Track Mode is on:
aggressive driving sessions to allow your vehicle’s
systems to withstand the surplus heat.
◦ Autopilot features are unavailable.
◦ The Slip Start setting is overridden.
In Track Mode, adaptive suspension damping is
optimized for handling and vehicle body control to
◦ Energy usage increases.
promote driver confidence in dynamic maneuvers. Ride
◦ Entertainment features are unavailable.
height is automatically set to Low and the suspension no
longer automatically raises for comfort over rough
Use the touchscreen setting to turn Track Mode off at
surfaces.
any time. Powering off Model S also turns off Track
Mode (although it may still appear on the
WARNING: Track Mode is designed for use on
touchscreen if Post-Drive cooling is in progress).
closed circuit driving courses only. It is the driver’s
When Track Mode is off, all settings return to their
responsibility to drive safely and ensure others are
previous state and all features return to their normal
not endangered.
operating state.
WARNING: Track Mode is designed for use by
experienced track drivers familiar with the course.
Do not use on public roads. It is the driver’s
responsibility to be in control of the vehicle at all
Customizing Track Mode
times, including on the track. Because vehicle
behavior (including traction and stability control)
To customize Track Mode, touch Track Mode Settings on
differs when using Track Mode, always use caution.
the Track Mode popup that appears on the map when
you enable Track Mode. You can also access the Track
Mode settings by touching Controls > Pedals & Steering,
Using Track Mode
then touching Customize next to the Track Mode setting.
Choose an existing Track Mode setting from the list of
Track Mode is always disabled when you start Model S.
pre-defined profiles provided by Tesla. Or create a new
To enable Track Mode for your current drive, shift into
settings profile by touching Add New Settings, entering
Park and follow these steps:
a name for the settings profile, then adjusting these
settings to suit your preferences or driving scenario, or
1. Touch Controls > Pedals & Steering > Track Mode.
customize for a specific track:
When enabled, TRACK displays on the instrument
• Handling Balance - Drag the slider to customize the
panel above the driving speed, and a Track Mode
balance of Model S in a turn. If Model S is too loose,
popup appears on the map. The instrument panel
you can choose a front-biased under-steering setup.
displays a color-coded image of your Model S that
Di
cult to get the vehicle through a turn? Try a rear-
provides you with important at-a-glance status
biased setup to increase rotation. You can select any
information about the Battery, the motors, and the
value, in 5% increments, between 100/0 (for 100%
brakes. See Monitoring Vehicle Health on page 73.
front biased used for under-steering) and 0/100 (for
100% rear biased used for over-steering).
2. If desired, customize the Track Mode settings by
• Stability Assist - Drag the slider to choose the level at
touching Track Mode Settings on the Track Mode
which the stability control systems assist in
popup (see Customizing Track Mode on page 72).
controlling the vehicle. You can choose any level from
You can also access the Track Mode settings by
-10 to +10. Choosing +10 engages all stability assist
touching Pedals & Steering > Driving, then touching
systems for controllable driving in which stability
Customize next to the Track Mode setting.
systems remain engaged, whereas -10 disables all
3. To use the Lap Timer, follow the onscreen instructions
stability systems and the stability of the drive rests
to drop a pin on the map to define the lap's start/
solely on the driver. The default setting of 0
finish location. Then press START on the Lap Timer to
represents a balance which provides some stability
begin your driving session. Once started, the Lap
being automatically controlled and leaving some
Timer starts counting when you drive Model S past
control up to the driver.
the lap's start/finish location where you dropped the
pin. See Using the Lap Timer on page 73.
4. Shift into gear and GO!
72
Track Mode
• Regenerative Braking - Drag the slider to choose how
If Save Dashcam for Laps is enabled (see Customizing
much regenerative braking is available. You can
Track Mode on page 72), and a properly formatted USB
choose any value, in 5% increments, between 0 and
flash drive is inserted, Track Mode saves a video of the
100%. Tesla recommends the 100% setting to prevent
driving session (as recorded by the front cameras),
overheating the brakes.
along with a .CSV file that provides detailed information
about the lap.
• Post-Drive Cooling - Enable if you want the cooling
systems to continue cooling the vehicle's
NOTE: To stop the timer at the end of your driving
components even after you leave the vehicle. Cooling
session, touch STOP on the Lap Timer.
stops automatically when the components are
su
ciently cool, or when you power Model S off and
Monitoring Vehicle Health
back on again. Post-Drive Cooling is useful if you
want to quickly cool the components between
driving sessions. If Post-Drive Cooling is set to OFF,
You can easily monitor the health of Model S when using
the components eventually cool, but it takes longer.
Track Mode by glancing at the instrument panel. The
colors indicate the status of the various components,
• Brake Temperatures - Enable to display temperature
allowing you to determine the current operating state
warnings associated with the braking system. You
and make decisions accordingly. The components are
may want to disable warnings if you have installed an
displayed in green when operating within their ideal
aftermarket high performance braking system.
temperature range. Colors change as follows:
• Save Dashcam for Laps - Enable if you want to save a
video and data on a USB flash drive when using the
• The Battery displays blue when cold and red when
Lap Timer. A USB flash drive must be set up and
hot.
inserted as described (see USB Drive Requirements
• A brake displays blue when cold and orange when
for Recording Videos on page 22). The USB flash
hot (an early warning for overheating brakes, which
drive must contain a folder named TeslaTrackMode.
are shown in red).
When enabled, Track Mode stores a video and
associated data for each lap. Track Mode also stores
• A motor displays blue when it's cold or red when it's
the car status and telemetry data with details about
hot.
the vehicle's position, speed, acceleration, use of
accelerator, etc. You can then view the video
NOTE: A component displayed in red may indicate a
recordings and analyze this data, which is saved as
need to stop driving and allow the component to cool.
a .CSV file on the USB flash drive, to determine where
time is being lost or gained.
CAUTION: Any vehicle damage or injuries caused
by using Track Mode is the driver's responsibility.
The vehicle warranty does not cover damage
Track Mode allows you to save up to 20 settings profiles.
caused by excessive overuse of vehicle
To delete a chosen profile, touch Delete at the bottom of
components. It also does not cover racing,
the settings screen.
autocross, or driving in competition.
NOTE: You can not change or delete a pre-defined
profile provided by Tesla.
G-Meter
Using the Lap Timer
In Track Mode, a real-time G-Meter displays on the
instrument panel. The G-Meter graphically displays peak
lateral, acceleration, and deceleration values in the form
When you enable Track Mode, the map displays a Lap
of a circular meter. The history of your drive is
Timer. Follow the onscreen instructions to place a start/
represented in the shaded area. The G-Meter resets at
finish pin on the map. Once the pins are placed, press
the start of each driving session.
START to initiate the driving (lapping) session. When
you drive Model S through the start/finish location, the
Lap Timer automatically starts timing the duration of the
lap, resetting the timer whenever you pass the start/
finish location, and displaying the real-time delta
between the current lap and the fastest lap so far in the
driving session. The map highlights the track in blue.
At the completion of each lap, the Lap Timer displays
the duration of the lap. It also displays the times
associated with the previous and best laps in the driving
session.
Driving
73
Trip Information
Displaying Trip Information
Trip information displays on the touchscreen when you
touch Controls > Trips. For the current trip, you can
display distance, duration and average energy usage.
You can also show distance and total and average
energy used since your last charge and for additional
trips.
To name or rename a trip, touch the trip's name, enter a
new name for the trip, then press Save. To reset a
particular trip meter, touch its associated Reset button.
Odometer
To display the odometer, touch Controls > Software or
open the mobile app.
74
Getting Maximum Range
Factors Affecting Energy
• Limit the use of resources such as heating and air
conditioning. Using seat and steering yoke heaters (if
Consumption
equipped) to keep warm is more e
cient than
heating the cabin using climate controls.
While driving:
• With your vehicle plugged in, use the mobile app to
precondition your vehicle to ensure the cabin is at a
• Elevated driving speed.
comfortable temperature and windows are defrosted
• Environmental conditions such as cold or hot weather
(if needed) before your drive by touching Climate >
and wind.
On and customizing your preferences (see Mobile
App on page 160).
• Using climate controls to heat or cool the cabin.
• Touch Schedule, available on both the charging and
• Uphill travel: Driving uphill requires more energy and
climate control screens, to set a time when you want
depletes range at a faster rate. However, driving
your vehicle to be ready to drive (see Scheduled
downhill allows your vehicle to regain a portion of its
Charging and Scheduled Departure on page 168).
expended energy through regenerative braking (see
Regenerative Braking on page 65).
• Ensure the wheels are aligned to specification, the
tires are kept at the recommended inflation pressures
• Short trips or stop-and-go tra
c: It takes energy to
(see Tire Care and Maintenance on page 173), and
bring the cabin and Battery to a specified
are rotated when needed (see Maintenance on page
temperature when starting the vehicle. You may see a
171).
higher average consumption when the vehicle is used
for very short trips or in heavy tra
c.
• Lighten your load by removing any unnecessary
cargo.
• Heavy cargo load.
• Fully raise all windows.
• Windows rolled down.
• Features such as Sentry Mode and Cabin Overheat
• Wheels and tires not maintained.
Protection can impact range. Disable features when
• Customized settings or third-party accessories (roof
not needed.
or trunk racks, third-party wheels).
• To prevent an excessive amount of energy
consumption while the vehicle is idle, keep the
While parked and not plugged in to a charger:
vehicle plugged in when not in use.
• Minimize the use of DC chargers (such as
• Preconditioning the cabin or using climate controls.
Superchargers) for optimal Battery health.
• Summon.
• Vehicle infotainment and climate controls system.
It is normal for estimated range to decrease slightly over
the first few months before leveling off. Over time, you
• Sentry mode.
may see a gradual, but natural, decrease in range at full
• Tesla or third-party mobile app requests.
charge - this depends on factors such as Supercharging
regularly or the mileage and age of the Battery. Your
Model S will inform you in the unlikely event a hardware
Tips to Maximize Range
issue is causing excessive Battery or range degradation.
You can maximize your driving range using the same
Range Assurance
driving habits you use to conserve fuel in a gasoline-
powered vehicle. To achieve maximum range:
The driving range displayed in Model S is an estimate of
the remaining battery energy based on EPA-rated
• Slow down your driving and avoid frequent and rapid
consumption. It may not account for your personal
acceleration. Consider using Chill Mode (touch
driving patterns or external conditions. The displayed
Controls > Pedals & Steering > Acceleration) and
range on the instrument panel may decrease faster than
Speed Assist (see Speed Assist on page 117) to
the actual distance driven.
assist in controlling your acceleration and speed.
• If safe to do so, modulate the accelerator pedal
NOTE: Rated driving range is based on EPA-rated
instead of using the brake pedal when gradually
consumption in the United States, which deviates from
slowing down. Whenever Model S is moving and you
tests advertised and performed in other jurisdictions.
are not pressing the accelerator pedal, regenerative
braking slows down the vehicle and feeds surplus
Model S helps protect you against running out of energy.
energy back to the Battery (see Regenerative Braking
Your vehicle continuously monitors its energy level and
on page 65).
proximity to known charging locations.
Driving
75
Getting Maximum Range
Touch Chargers in the Navigation search
bar to toggle between types of chargers,
including Superchargers and destination
charging sites.
When you are at risk of driving beyond the range of
known charging locations, the touchscreen displays a
message giving you the opportunity to display a list of
charging locations that are within range. When you
select a charging location from the list, Model S provides
navigation instructions and the turn-by-turn direction list
displays the predicted amount of energy that will remain
when you arrive at the charging destination.
Trip Planner (if available in your market region) routes
you through Supercharger locations to minimize the
amount of time you spend charging and driving. To
enable, touch Controls > Navigation > Trip Planner (see
Trip Planner on page 135).
76
Rear Facing Camera(s)
WARNING: Never depend on the cameras to
Camera Location
inform you if the area behind you is free of objects
and/or people. The cameras may not detect
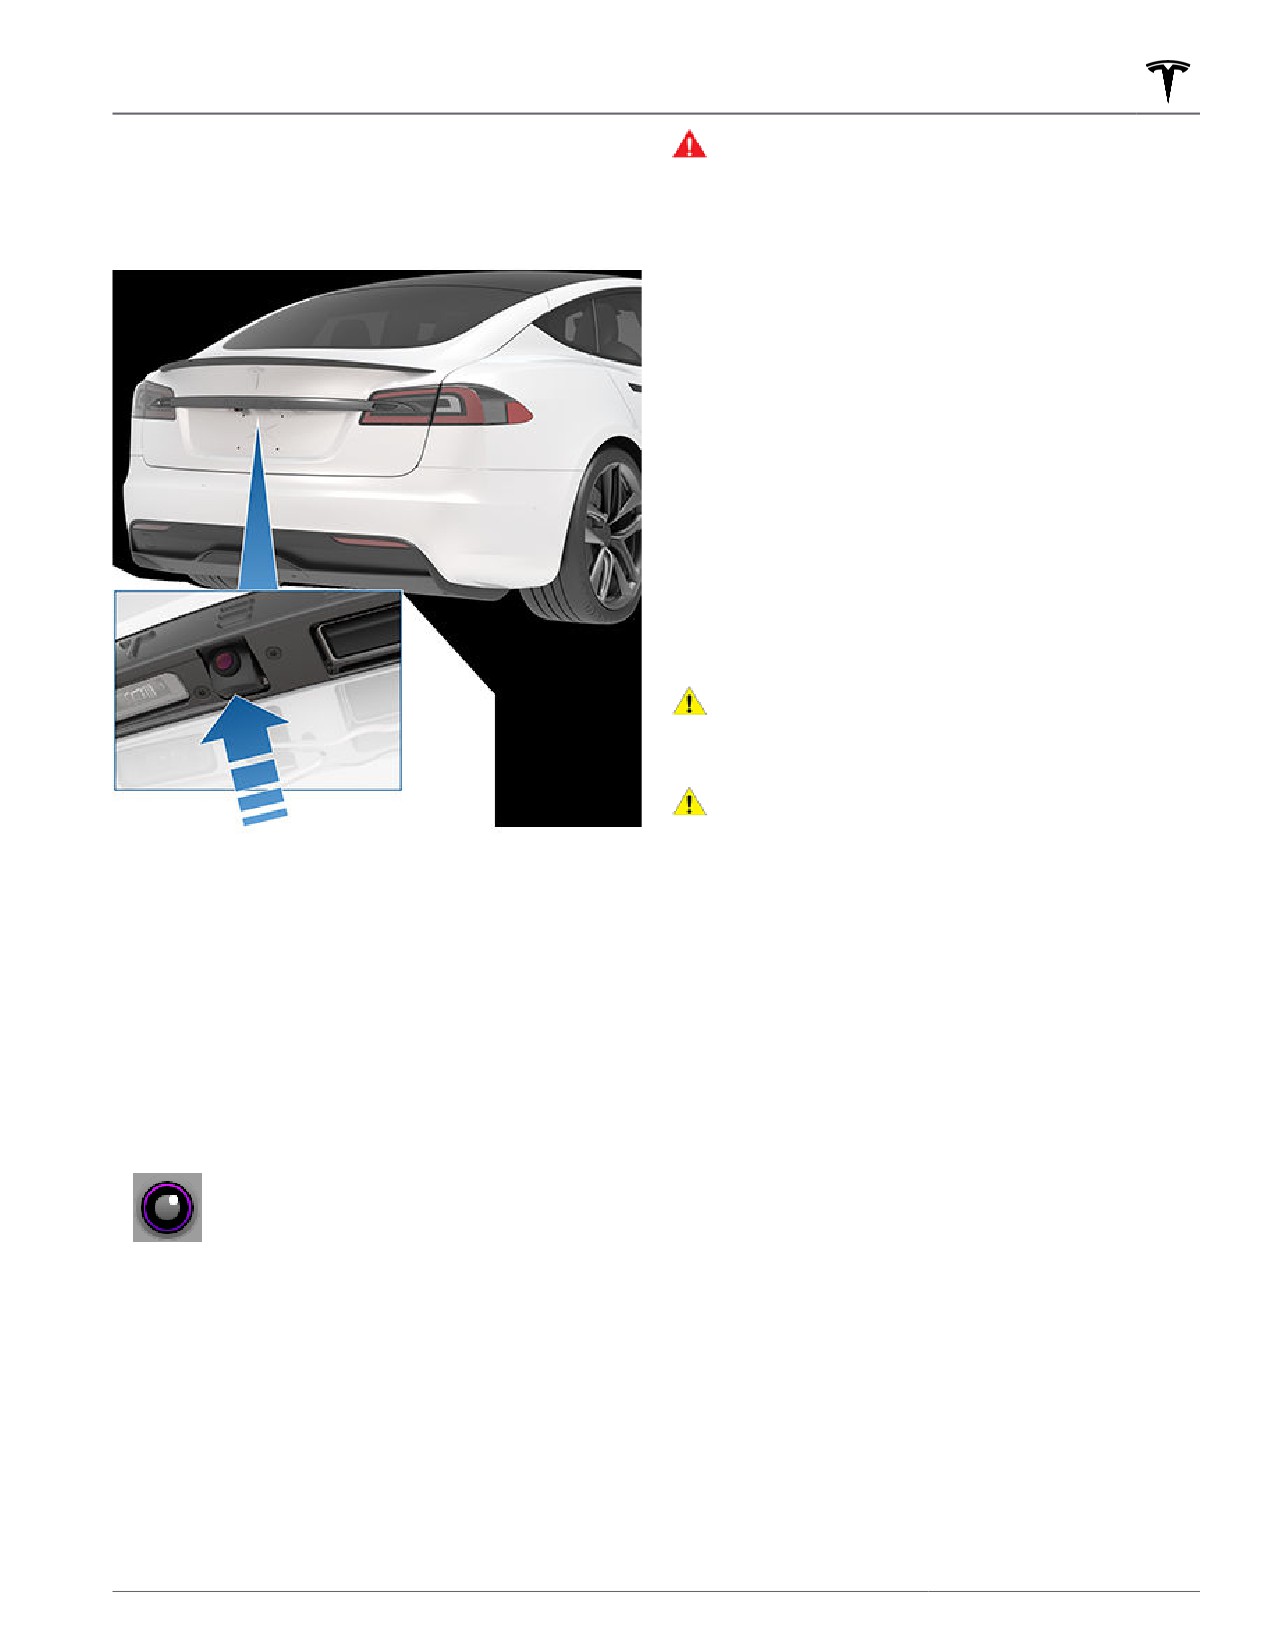
Model S is equipped with a rear view camera located
objects or barriers that can potentially cause
above the rear license plate.
damage or injury. In addition, several external
factors can reduce the performance of the
cameras, including a dirty or obstructed lens.
Therefore, depending on the cameras to determine
if Model S is approaching an obstruction can result
in damage to the vehicle and/or objects and can
potentially cause serious injury. Always inspect the
area with your own eyes. When reversing, perform
shoulder checks and use all mirrors. Use the
cameras for guidance purposes only. It is not
intended to replace your own direct visual checks
and is not a substitute for careful driving.
Cleaning a Camera
To ensure a clear picture, the camera lens must be clean
and free of obstructions. Remove any build-up of dirt or
debris by spraying water onto the camera lens with a
spray bottle or pressure washer.
CAUTION: Do not attempt to remove dirt or debris
by wiping an exposed lens with your hands or a
cloth. This debris can damage the surface of the
lens when rubbed against it during wiping.
CAUTION: Do not use chemical-based or abrasive
cleaners. Doing so can damage the surface of the
lens.
Whenever you shift into Reverse, the touchscreen
displays the view from the camera. Lines show your
driving path based on the position of the steering yoke.
These lines adjust as you move the steering yoke.
Model S also displays images from the side cameras (if
equipped). Simply swipe up or down to hide or show the
side camera views.
NOTE: Visual feedback from the parking sensors also
appear on the instrument panel (see Park Assist on page
68).
To display the view from the rear view
cameras at any time, open the app
launcher and touch the Camera app.
Driving
77
Pedestrian Warning System
The Pedestrian Warning System (if equipped) causes
Model S to emit sound when driving below
approximately 19 mph (32 km/h) or while driving in
reverse. Electric vehicles operate quietly and this sound
helps to alert pedestrians of your oncoming vehicle. The
sound, which activates whenever Model S is shifted out
of Park, gets louder as speed increases.
WARNING: If sound cannot be heard, pedestrians
may not be aware of your oncoming vehicle, which
may increase the likelihood of a collision resulting
in serious injury or death. If the Pedestrian
Warning System is not operating, immediately
contact Tesla.
78
Cold Weather Best Practices
To ensure that Model S provides you with the best
Mirrors
ownership experience possible in harsh cold weather
conditions, follow these best practices.
If ice buildup is expected when parking, turn off Auto-
Fold Mirrors. Touch Controls > Auto-Fold. Ice can
Before Driving
prevent exterior side mirrors from folding or unfolding.
When snow and ice accumulate on your vehicle, moving
NOTE: Side mirrors automatically heat as needed during
parts, such as the door handles, windows, mirrors, and
preconditioning, or when the rear defroster is turned on.
wipers can freeze in place. To achieve maximum range
and performance, it is helpful to warm the cabin and
Wipers
Battery before you leave. There are several ways to do
so:
If you expect snow or ice to build up when parked, touch
Controls > Service > Wiper Service Mode. This raises
• Touch Schedule, available on both the charging and
wipers against the windshield so they can defrost when
climate control screens, to set a time when you want
the windshield defrosts (see Wipers and Washers on
your vehicle to be ready to drive (see Scheduled
page 63). You can also turn on wiper defrosters (if
Charging and Scheduled Departure on page 168).
equipped). See Climate Controls on page 125.
• On the mobile app, navigate to Climate to customize
the temperature at which you want to heat the cabin.
Tires and Tire Chains
This also warms the high voltage Battery as needed.
• On the mobile app, navigate to Climate > Defrost Car
• Use winter tires to increase traction in snowy or icy
to melt snow, ice, and frost on the windshield,
conditions. You can purchase winter tires on http://
windows, and mirrors. This also warms the high
voltage Battery as needed.
176).
NOTE: Tesla recommends activating climate settings
• Tire chains provide additional traction when driving in
at least 30-45 minutes before departure (see Climate
snowy or icy conditions. Check local regulations to
Controls on page 125). Preconditioning times
determine if tire chains are recommended or required
depend on outside temperature and other factors.
during winter months. See Using Tire Chains on page
The Mobile App will notify you once your vehicle has
177 for more information.
reached the desired preconditioning temperature.
• In extremely cold weather or icy conditions, it is
Your vehicle’s tire pressures will drop in cold ambient
possible that your charge port latch may freeze in
temperatures. If the TPMS indicator light appears, inflate
place. In cases where you cannot remove or insert the
the tires before driving. The tires will lose one PSI for
charge cable, or the vehicle is not Supercharging due
every 10° F (6° C) drop in outside temperature (see Tire
to the latch being frozen in place, use the Defrost Car
Care and Maintenance on page 173). Proper tire
setting in the mobile app. This can help thaw ice on
pressures help protect tires from potholes and improve
the charge port latch so the charge cable can be
range when properly inflated.
removed or inserted.
• Warming the Battery using Scheduled Departure or
While Driving
the mobile app before driving can also reduce
charging time at a Supercharger or third party fast
Cold weather can increase energy consumption because
charger, especially if the Supercharger or third party
more power is required for driving, cabin and Battery
fast charger is close enough that Trip Planner (if
heating. Follow these suggestions to reduce energy
available in your market region) does not have
consumption:
su
cient time to precondition the Battery (see
Warming the Battery Before Supercharging on page
• Use seat heaters to keep warm. Seat heaters use less
80).
energy than the cabin heater. Lowering the cabin
temperature and using seat heaters reduces energy
consumption (see Climate Controls on page 125).
Windows
• Slow down your driving and avoid frequent and rapid
acceleration.
• On the mobile app, navigate to Climate > Defrost as
mentioned previously.
Regenerative Braking
• Use the mobile app to schedule a service
appointment for Tesla to provide hydrophobic
coating to your windows for a nominal fee.
Regenerative braking can be limited if the Battery is too
cold. As you continue to drive, the Battery warms up
and regenerative power increases (see Regenerative
Braking on page 65).
Driving
79

Cold Weather Best Practices
NOTE: Limited regenerative braking can be avoided if
Battery are warm by your set departure time. For more
you allow enough time to precondition your vehicle or if
information, see Scheduled Charging and Scheduled
you use Schedule to precondition Model S before your
Departure on page 168.
departure time (see Scheduled Charging and Scheduled
Departure on page 168).
Charge Port
Blue Snowflake Icon
• If your charge port latch freezes in place and a
charging cable becomes stuck in the charge port, try
A blue snowflake icon appears on your
manually releasing the charge cable. See Manually
instrument panel when some of the stored
Releasing Charge Cable on page 169.
energy in the Battery is unavailable because the
• Use the mobile app to precondition your vehicle to
Battery is cold. This portion of unavailable
help thaw ice on the charge port latch so that the
energy displays in blue on the Battery meter.
charge cable can be removed or inserted (see Mobile
Regenerative braking, acceleration, and charging
App on page 160).
rates may be limited. The snowflake icon no
longer displays when the Battery is su
ciently
NOTE: You can also prevent the occurrence of a charge
warm.
port latch freezing in place by using the Schedule
settings (see Scheduled Charging and Scheduled
Departure on page 168).
Warming the Battery Before
Supercharging
NOTE: If your charge port latch is frozen in place, it may
not lock the charging cable in place when inserted, but it
can still charge at a slow AC rate even if the latch is not
By using Trip Planner (if available in your market region)
engaged.
to navigate to a Supercharger, Model S pre-heats the
Battery to ensure when you arrive at the Supercharger,
the Battery temperature is optimal and ready to charge.
Storage
This reduces the amount of time it takes to charge. See
(see Trip Planner on page 135).
If you leave Model S parked for an extended period of
time, plug the vehicle into a charger to prevent normal
NOTE: Tesla recommends using Trip Planner to navigate
range loss and to keep the Battery at an optimal
to a Supercharger for at least 30-45 minutes before
temperature. Your vehicle is safe to stay plugged in for
arrival to ensure optimal Battery temperature and
any length of time.
charging conditions. If the drive to the Supercharger is
less than 30-45 minutes, consider preconditioning the
When not in use, Model S enters a sleep mode to
Battery prior to driving (see Before Driving on page 79).
conserve energy. Reduce the number of times you check
your vehicle’s status on the mobile app, as this
Autopilot
automatically wakes up your vehicle and starts normal
energy consumption.
To ensure optimal Autopilot performance, keep the
sensors free of snow, ice, mud, and dirt (see About
Autopilot on page 81).
After Driving
Leave Model S plugged in when not in use. This uses the
charging system, rather than the Battery itself, to keep
the Battery warm (see High Voltage Battery Information
on page 164).
Scheduled Departure
When parked, plug in Model S and use the Schedule
settings, available on both the charging and climate
control screens, to set a time when you want to
precondition Model S (see Scheduled Charging and
Scheduled Departure on page 168). Your vehicle
determines the appropriate time to begin charging so it
is complete during off-peak hours and the cabin and
80
About Autopilot
How It Works
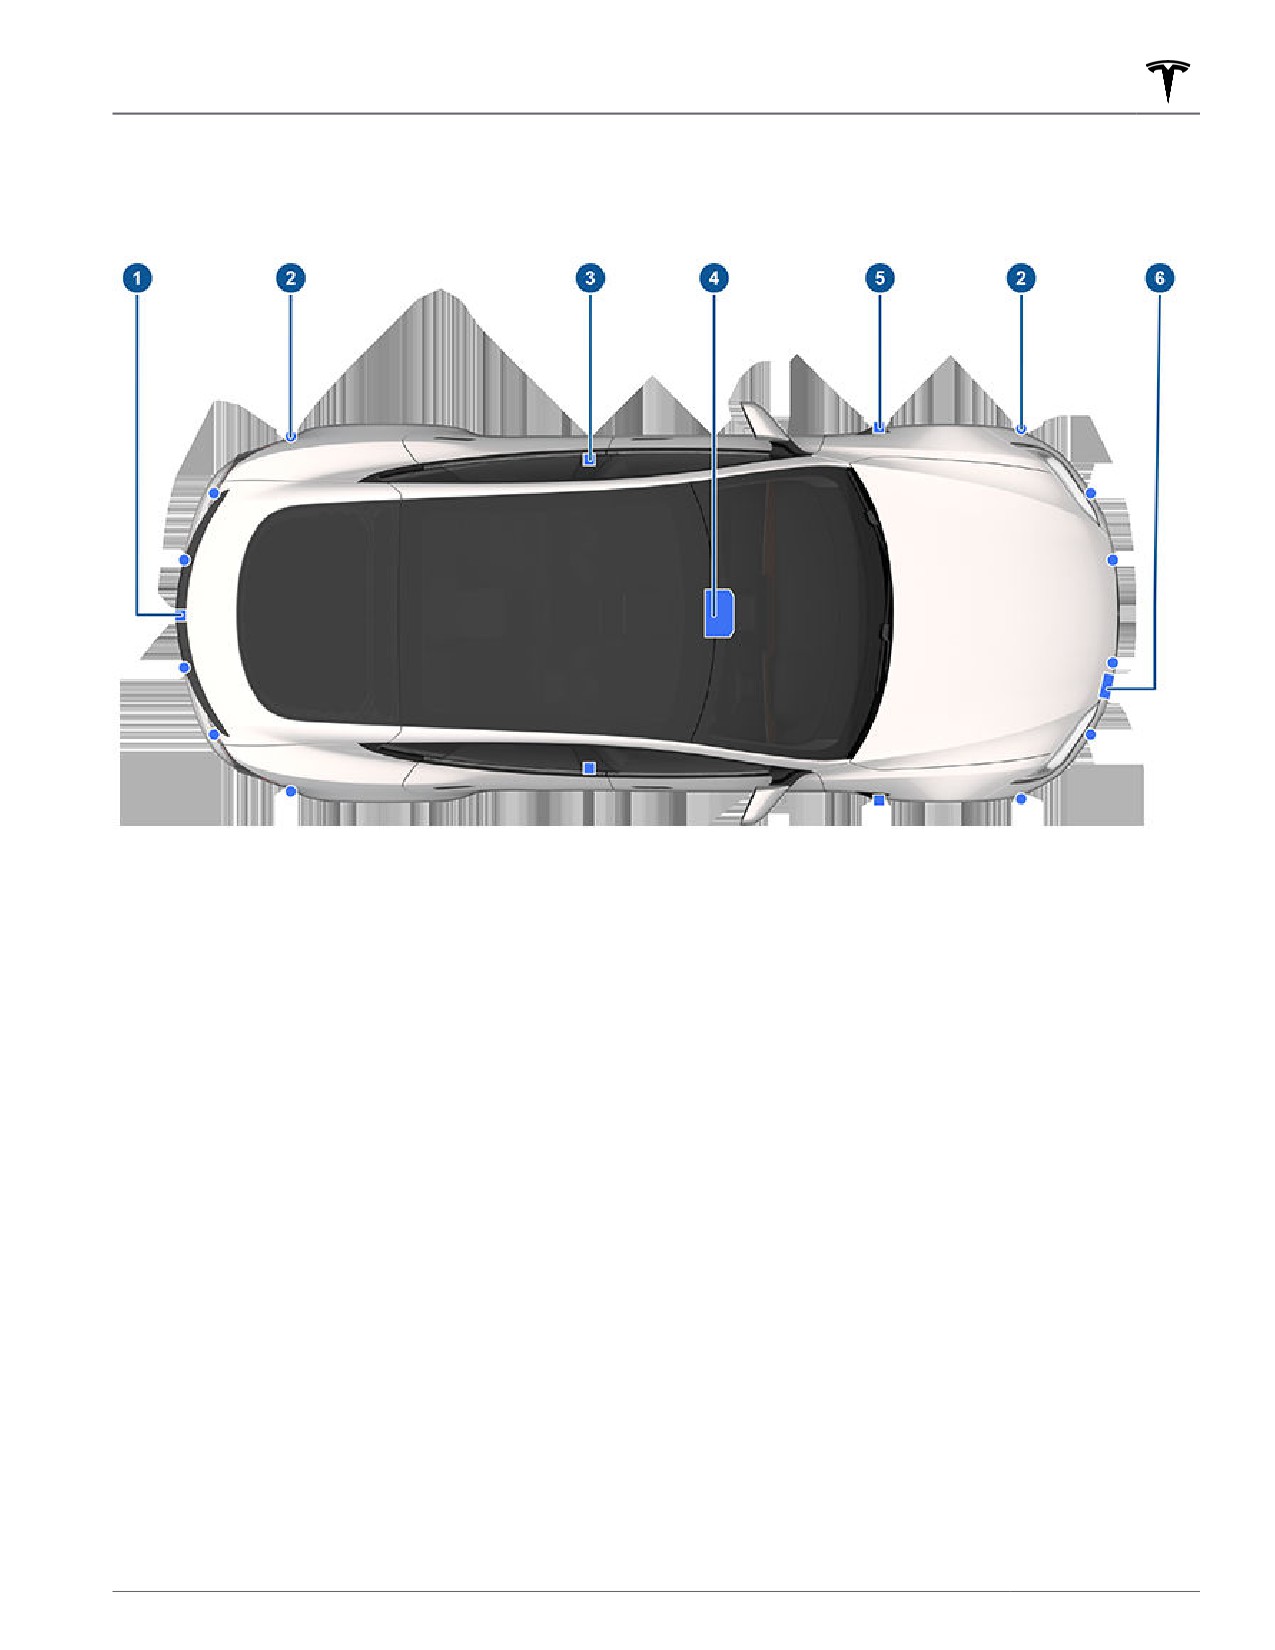
Your Model S includes the following components that actively monitor the surrounding area:
1. A camera is mounted above the rear license plate.
2. Ultrasonic sensors are located in the front and rear bumpers.
3. A camera is mounted in each door pillar.
4. Three cameras are mounted to the windshield above the rear view mirror.
5. A camera is mounted to each front fender.
6. Radar (if equipped) is mounted behind the front bumper.
Model S is also equipped with high precision electronically-assisted braking and steering systems.
In addition, the cabin camera can determine driver inattentiveness and provide alerts when Autopilot is engaged. By
default, data from the camera does not leave the vehicle itself. In other words, data is not saved or transmitted
unless you enable data sharing. To enable data sharing, touch Controls > Software > Data Sharing > Allow Cabin
Camera Analytics. Cabin Camera Analytics helps Tesla continue to develop even safer vehicles in the future. See
Cabin Camera on page 118.
NOTE: Ensure all cameras and sensors (if equipped) are clean before each drive. See Cleaning Cameras and Sensors
on page 83 for more information. Dirty cameras and sensors, as well as environmental conditions such as rain and
faded lane markings, can affect Autopilot performance.
Autopilot
81
About Autopilot
When calibration is complete, Autopilot features are
Active Safety Features
available for use. Calibration typically completes after
driving 20-25 miles (32-40 km), but the distance varies
These Active Safety features are designed to increase
depending on road and environmental conditions. For
your safety:
example, calibration completes quicker when driving on
a straight road with multiple lanes (such as a controlled-
• Lane Assist (see Lane Assist on page 111)
access highway), with highly-visible lane markings (in
the driving lane as well as the adjacent lanes). Contact
• Collision Avoidance Assist (see Collision Avoidance
Assist on page 114)
Tesla only if your Model S has not completed the
calibration process after driving 100 miles (160 km) in
• Speed Assist (see Speed Assist on page 117)
the described conditions.
• Cabin Camera (see Cabin Camera on page 118)
If a camera has shifted from its calibrated position (for
example, the camera or windshield was replaced), you
You can enable/disable some of these features and in
must clear the calibration. To do so, touch Controls >
some cases, control how they work. To access settings
Service > Camera Calibration > Clear Calibration. When
for these features, touch Controls > Autopilot.
the calibration is cleared, Model S repeats the calibration
process. While this helps re-calibrate the cameras in
Autopilot Features
many cases, Clear Calibration may not resolve all
camera and sensor concerns.
NOTE: Depending on market region, vehicle
configuration, options purchased, and software version,
NOTE: To calibrate, cameras require highly-visible lane
your vehicle may not be equipped with all features listed
markings in both the driving lane and adjacent lanes (at
below, or a feature may not operate exactly as
least two lanes over on each side of the vehicle). For
described.
best results, drive in the middle lane of a multi-lane
highway (ideally with at least five lanes) that has clear
These Autopilot convenience features are designed to
lane markings and minimal tra
c.
reduce driver workload:
NOTE: If you attempt to use a feature that is not
available until the calibration process is complete, the
• Tra
c-Aware Cruise Control (see Tra
c-Aware
feature is disabled and the instrument panel displays a
Cruise Control on page 84)
message.
• Autosteer (see Autosteer on page 88)
NOTE: Model S must repeat the calibration process if the
• Auto Lane Change (see Auto Lane Change on page
cameras are serviced by Tesla, and in some cases, after a
90)
software update.
• Autopark (see Autopark on page 103)
Limitations
• Summon (see Summon on page 105)
• Smart Summon (Smart Summon on page 108)
Many factors can impact the performance of Autopilot
components, causing them to be unable to function as
• Stop Light and Stop Sign Warning (see Stop Light
intended. These include (but are not limited to):
and Stop Sign Warning on page 91)
• Navigate on Autopilot (see Navigate on Autopilot on
• Poor visibility (due to heavy rain, snow, fog, etc.).
page 93)
• Bright light (due to oncoming headlights, direct
• Tra
c Light and Stop Sign Control (see Tra
c Light
sunlight, etc.).
and Stop Sign Control on page 96)
• Damage or obstructions caused by mud, ice, snow,
etc.
You can enable/disable some of these features and in
some cases, control how they work. To access settings
• Interference or obstruction by object(s) mounted
associated with these features, touch Controls >
onto the vehicle (such as a bike rack).
Autopilot.
• Obstruction caused by applying excessive paint or
adhesive products (such as wraps, stickers, rubber
Drive to Calibrate Cameras
coating, etc.) onto the vehicle.
• Narrow or winding roads.
Model S must maneuver with precision when Autopilot
• A damaged or misaligned body panel.
features are being used. Therefore, before some features
can be used for the first time or after some types of
• Use of gray or aftermarket glass.
service repairs, cameras must complete a self-calibration
• Interference from other equipment that generates
process. For your convenience, the instrument panel
ultrasonic waves.
displays a progress indicator.
• Extremely hot or cold temperatures.
82
About Autopilot
CAUTION: If a windshield replacement is needed,
take your vehicle to Tesla Service. This ensures
appropriate handling and mounting of the
camera(s). Failure to do so can cause one or more
Autopilot features to malfunction.
WARNING: The list above does not represent an
exhaustive list of situations that may interfere with
proper operation of Autopilot components. Never
depend on these components to keep you safe. It
is the driver's responsibility to stay alert, drive
safely, and be in control of the vehicle at all times.
WARNING: Advanced safety features may not be
available during the calibration period.
WARNING: Re-calibrating the cameras or sensors
on the touchscreen is not a substitute for checking
the physical positioning and condition of these
components. Walk around your vehicle and inspect
the cameras and sensors for physical damage.
Incorrectly calibrated or positioned cameras and
sensors may limit or disable the use of safety
features. Contact Tesla if you suspect lingering
issues.
Cleaning Cameras and Sensors
To ensure the various Autopilot components can provide
information that is as accurate as possible, keep them
clean and free of obstructions, condensation, or damage
(see Cleaning on page 178).
Condensation can form inside the camera enclosures,
especially if you park your vehicle outside in cold or wet
conditions. The instrument cluster may display an alert
stating that a camera is blocked and that some or all
Autopilot features may be temporarily restricted until
the camera vision is clear. To proactively dry the
condensation, precondition the cabin by setting it to a
warm temperature, turning the windshield defroster on,
and directing the front air vents toward the door pillars
(see Mobile App on page 160).
CAUTION: Do not wipe an exposed lens with your
hands or a cloth in an attempt to remove dirt or
debris. The debris can damage the surface of the
lens when wiped.
CAUTION: Do not use chemical-based or abrasive
cleaners. Doing so can damage surfaces.
CAUTION: Do not clean an ultrasonic sensor or
camera lens with a sharp or abrasive object that
can scratch or damage its surface.
Autopilot
83
Tra
c-Aware Cruise Control
NOTE: Depending on market region, vehicle
detected ahead of you, you can initiate Tra
c-Aware
configuration, options purchased, and software version,
Cruise Control at any speed, even when stationary,
your vehicle may not be equipped with Trac-Aware
provided Model S is at least 5 feet (150 cm) behind the
Cruise Control, or the feature may not operate exactly as
detected vehicle and certain vehicle and environmental
described. If your vehicle is not equipped, refer to the
conditions are met.
owner's manual on your vehicle's touchscreen for
instructions on how to use Cruise Control.
NOTE: The maximum cruising speed is 90 mph (150
km/h). It is the driver's responsibility to cruise at a safe
NOTE: Tra
c-Aware Cruise Control is a BETA feature.
speed based on road conditions and speed limits.
Tra
c-Aware Cruise Control determines when there is a
When Tra
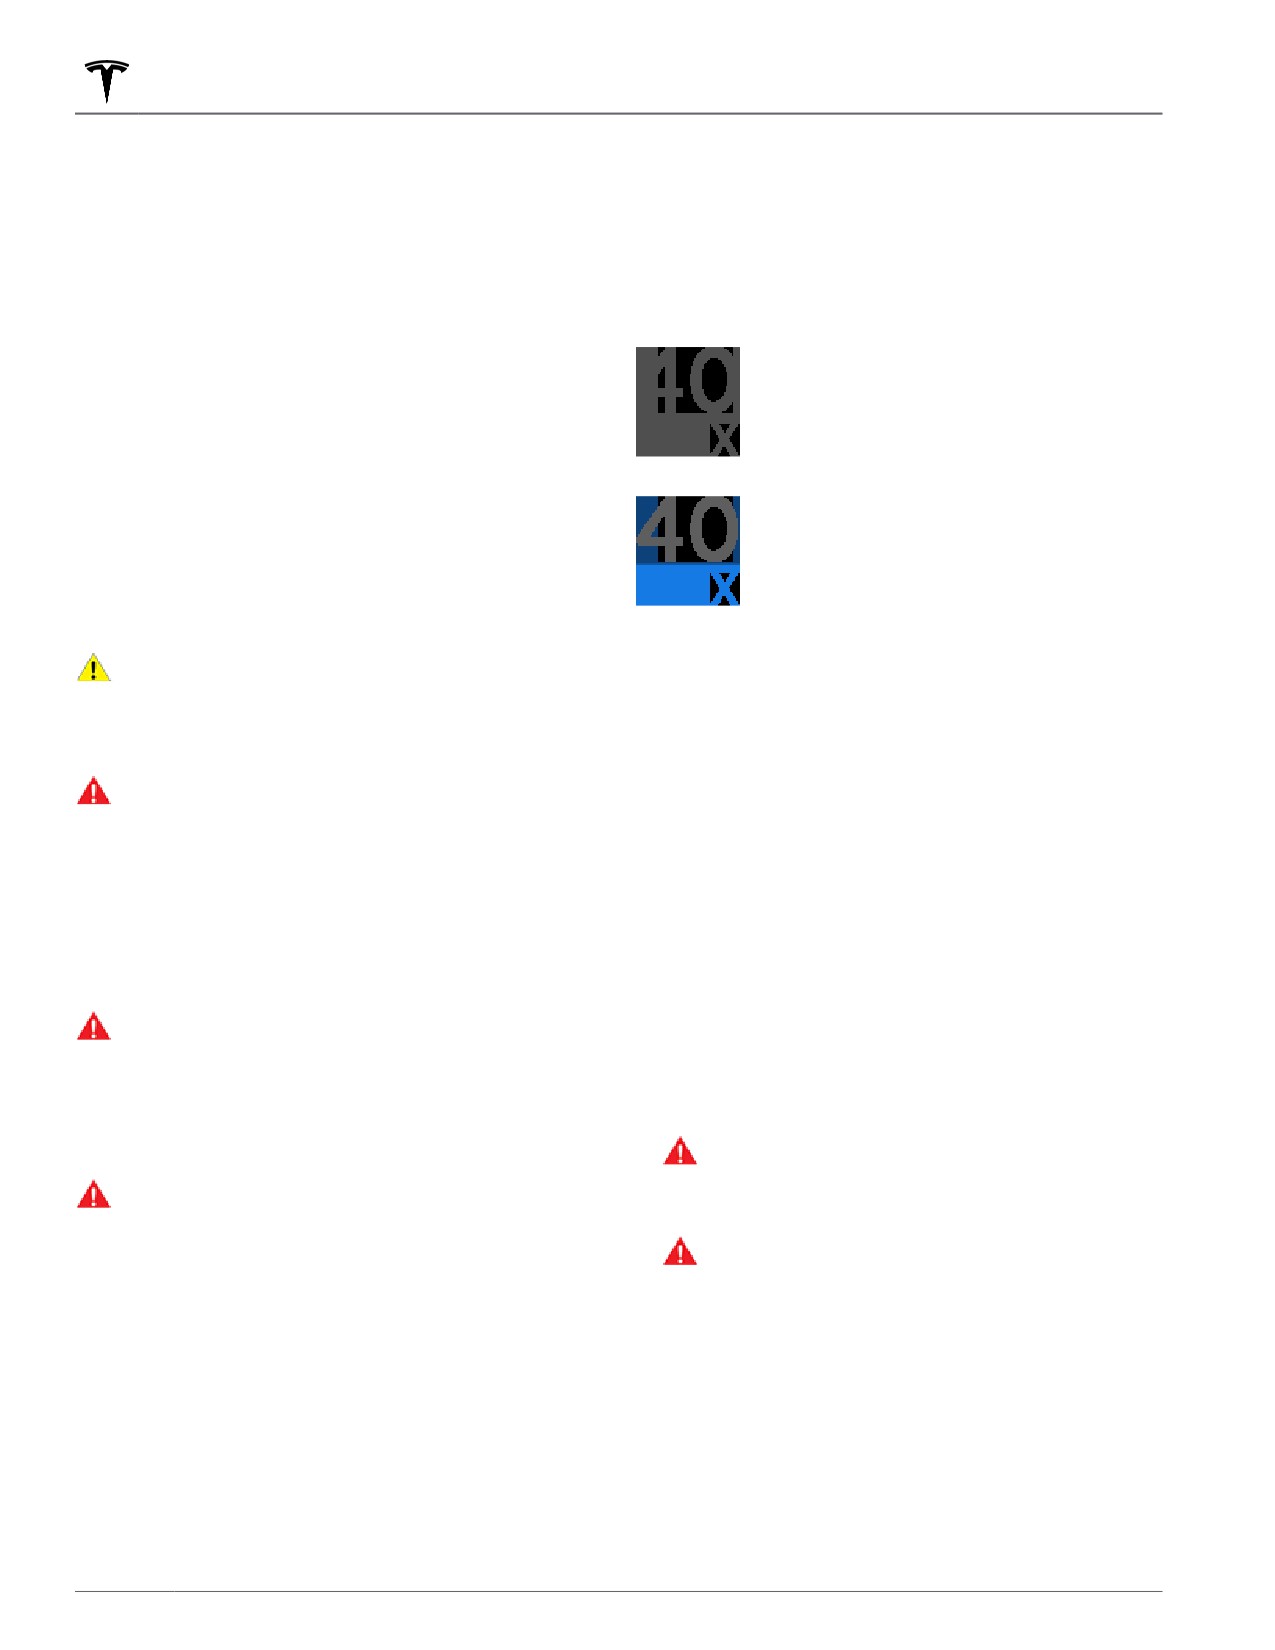
c-Aware Cruise Control is
vehicle in front of you in the same lane. If the area in
available but not engaged, the instrument
front of Model S is clear, Tra
c-Aware Cruise Control
panel displays the cruising speed in gray.
maintains a set driving speed. When a vehicle is
The number shown represents the cruising
detected, Tra
c-Aware Cruise Control is designed to
speed that will be set when you engage
slow down Model S as needed to maintain a selected
Tra
c-Aware Cruise Control.
time-based distance from the vehicle in front, up to the
set speed. Tra
c-Aware Cruise Control does not
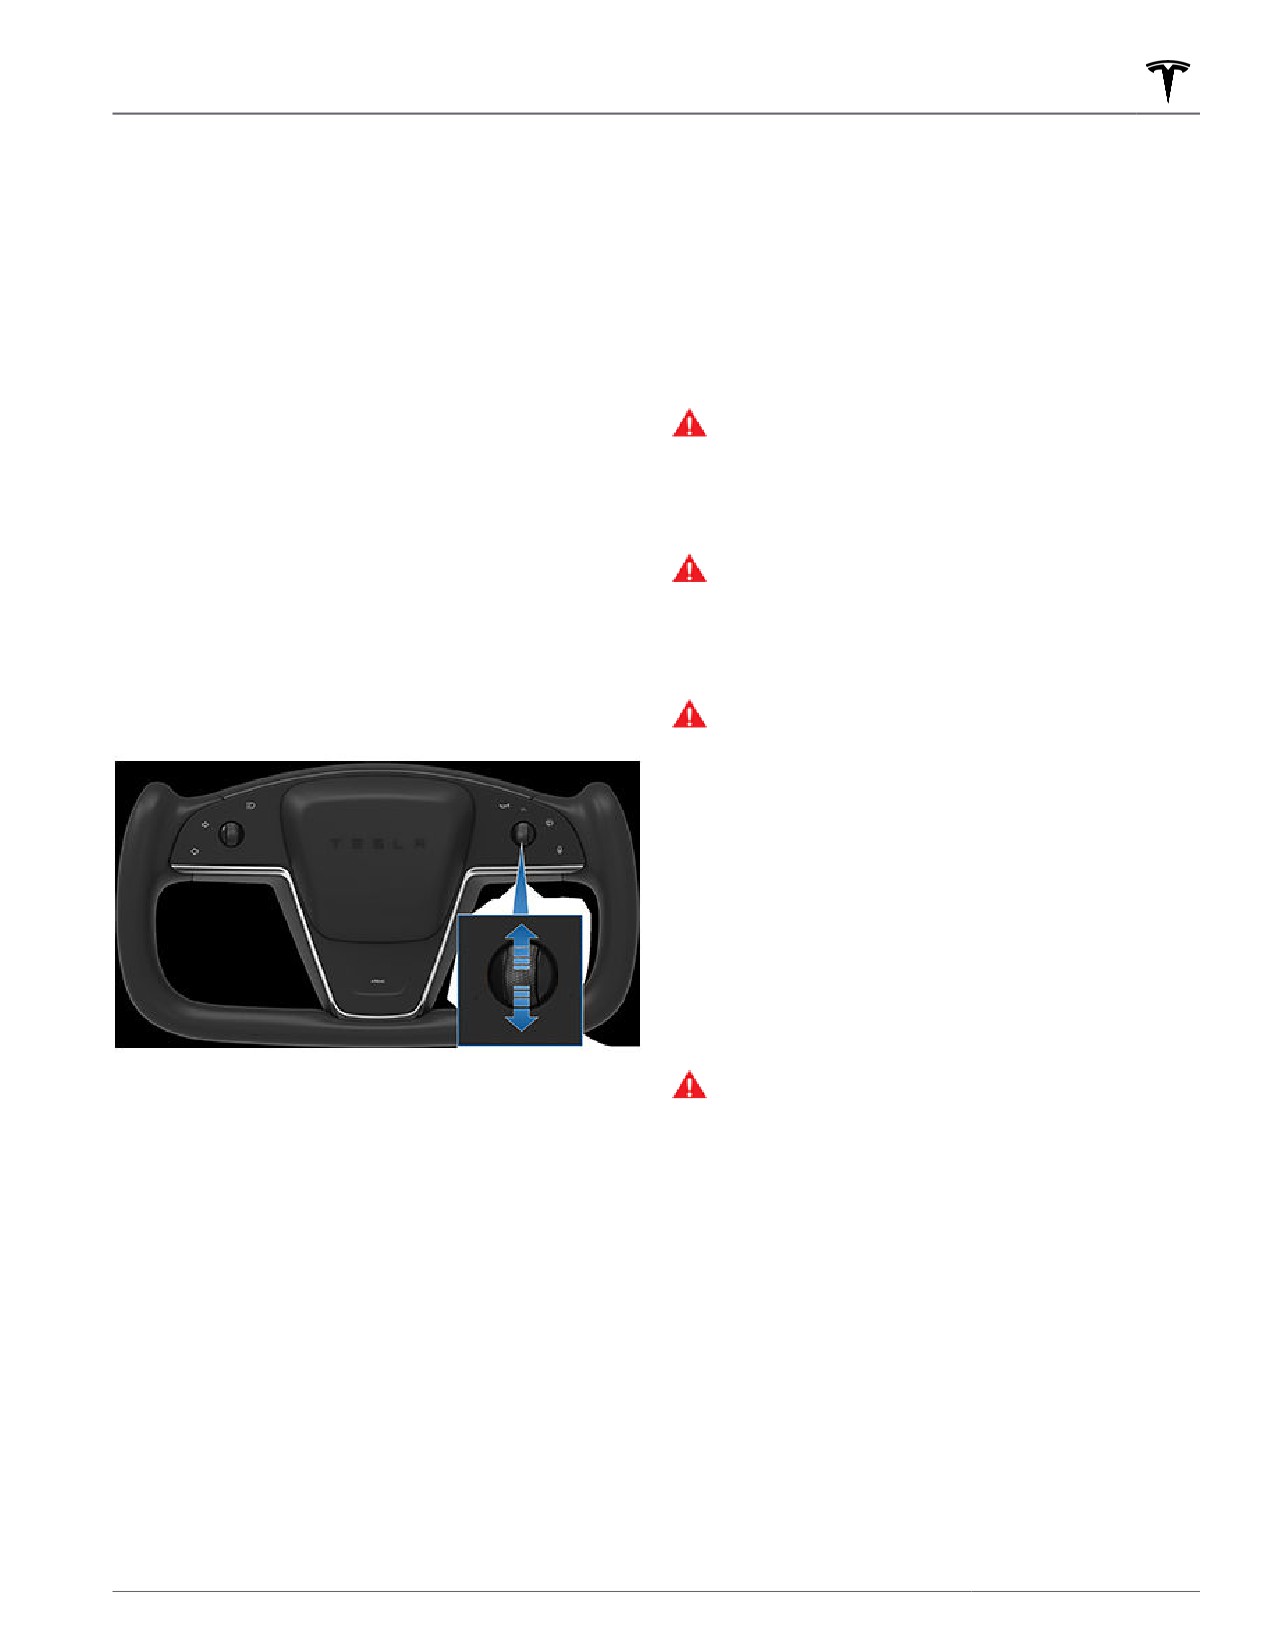
When Tra
c-Aware Cruise Control is
eliminate the need to watch the road in front of you and
actively cruising at a set cruising speed,
to manually apply the brakes when needed.
the cruising speed is highlighted with blue
text.
Tra
c-Aware Cruise Control is primarily intended for
driving on dry, straight roads, such as highways.
1. Touch Controls > Autopilot > Autosteer Activation
CAUTION: Ensure all cameras and sensors are
and choose Double Click to allow you to use Tra
c-
clean before each drive. Dirty cameras and
Aware Cruise Control independently of Autosteer
sensors, as well as environmental conditions such
when you single press the right scroll wheel.
as rain and faded lane markings, can affect
Autopilot performance.
NOTE: If Autosteer Activation is set to single-click,
pressing the right scroll wheel once also activates
WARNING: Tra
c-Aware Cruise Control is
Autosteer (which includes Tra
c-Aware Cruise
designed for your driving comfort and
Control).
convenience and is not a collision warning or
avoidance system. It is your responsibility to stay
2. You can choose whether Tra
c-Aware Cruise Control
alert, drive safely, and be in control of the vehicle
engages at the currently detected speed limit or your
at all times. Never depend on Tra
c-Aware Cruise
current driving speed. Touch Controls > Autopilot >
Control to adequately slow down Model S. Always
Set Speed and choose either Speed Limit or Current
watch the road in front of you and be prepared to
Speed. If you choose to engage Tra
c-Aware Cruise
take corrective action at all times. Failure to do so
Control at the currently detected speed limit, you can
can result in serious injury or death.
specify an offset. Touch Set Speed Offset. You can
WARNING: Although Tra
c-Aware Cruise Control
choose a Fixed offset, in which the cruising speed
is capable of detecting pedestrians and cyclists,
adjusts by a specific number of mph (km/h) on all
never depend on Tra
c-Aware Cruise Control to
roads, or a Percentage offset, in which the cruising
adequately slow Model S down for them. Always
speed is adjusted as a percentage of the road's
watch the road in front of you and be prepared to
detected speed limit.
take corrective action at all times. Failure to do so
WARNING: When cruising at the speed limit,
can result in serious injury or death.
there may be situations where the cruising
WARNING: Do not use Tra
c-Aware Cruise
speed may not change when the speed limit
Control on winding roads with sharp curves, on icy
changes.
or slippery road surfaces, or when weather
WARNING: Do not rely on Tra
c-Aware Cruise
conditions (such as heavy rain, snow, fog, etc.)
Control or Speed Assist to determine an
make it inappropriate to drive at a consistent
accurate or appropriate cruising speed. It is the
speed. Tra
c-Aware Cruise Control does not
driver's responsibility to cruise at a safe speed
adapt driving speed based on road and driving
based on road conditions and applicable speed
conditions.
limits.
To Use Trac-Aware Cruise Control
3. To engage Tra
c-Aware Cruise Control, press the
right scroll wheel.
To initiate Tra
c-Aware Cruise Control when no vehicle
NOTE: If the setting for Autosteer Activation is set to
is detected ahead of you, you must be driving at least
Single Click (touch Controls > Autopilot > Autosteer
18 mph (30 km/h), unless certain vehicle and
Activation), Autosteer engages.
environmental conditions are met, in which case, you
may be able to initiate it at lower speeds. If a vehicle is
84
Tra
c-Aware Cruise Control
4. To change your speed while using Tra
c-Aware
You can manually accelerate at any time when cruising
Cruise Control, you can roll the right scroll wheel on
at a set speed, but when you release the accelerator,
the steering wheel up or down. For more details, see
Tra
c-Aware Cruise Control resumes cruising at the set
Changing the Cruising Speed on page 85.
speed.
5. To cancel Tra
c-Aware Cruise Control, press the right
NOTE: When Tra
c-Aware Cruise Control is actively
scroll wheel, or press the brake pedal. See Canceling
slowing down Model S to maintain the selected distance
and Resuming on page 87 for more information.
from the vehicle ahead, brake lights turn on to alert
other road users that you are slowing down. You may
notice slight movement of the brake pedal. However,
Set Trac-Aware Cruise Control
when Tra
c-Aware Cruise Control is accelerating
Chime
Model S, the accelerator pedal does not move.
WARNING: Tra
c-Aware Cruise Control may
If you want a chime to sound when you engage or
occasionally cause Model S to brake when not
cancel Tra
c-Aware Cruise Control, touch Controls >
required or when you are not expecting it. This can
Autopilot > Trac-Aware Cruise Control Chime.
be caused by closely following a vehicle ahead,
detecting vehicles or objects in adjacent lanes
NOTE: Model S must be in Park.
(especially on curves), etc.
WARNING: Due to limitations inherent in the
Changing the Cruising Speed
onboard GPS (Global Positioning System), you
may experience situations in which Model S slows
Roll the right scroll wheel up to increase, or down to
down, especially near exits or off-ramps where a
decrease, the set speed. Slowly rolling the scroll wheel
curve is detected and/or you are navigating to a
changes the set speed in 1 mph (1 km/h) increments and
destination and not following the route.
quickly rolling the scroll wheel changes the set speed to
WARNING: Tra
c-Aware Cruise Control may not
the closest 5 mph (5 km/h) increment.
detect all objects and, especially when cruising
over 50 mph (80 km/h), may not brake/decelerate
when a vehicle or object is only partially in the
driving lane or when a vehicle you are following
moves out of your driving path and a stationary or
slow-moving vehicle or object is in front of you.
Always pay attention to the road ahead and stay
prepared to take immediate corrective action.
Depending on Tra
c-Aware Cruise Control to
avoid a collision can result in serious injury or
death. In addition, Tra
c-Aware Cruise Control
may react to vehicles or objects that either do not
exist, or are not in your lane of travel, causing
Model S to slow down unnecessarily or
inappropriately.
NOTE: It may take a few seconds for Model S to reach
WARNING: Tra
c-Aware Cruise Control may be
the new cruising speed, assuming Model S is not cruising
unable to provide adequate speed control because
behind a vehicle that is driving slower than your set
of limited braking capability and hills. It can also
speed.
misjudge the distance from a vehicle ahead.
Driving downhill can increase driving speed,
causing Model S to exceed your set speed (and
Cruising at the Set Speed
potentially the road's speed limit). Never depend
on Tra
c-Aware Cruise Control to slow down
Tra
c-Aware Cruise Control maintains your set cruising
Model S enough to prevent a collision. Always
speed whenever a vehicle is not detected in front of
keep your eyes on the road when driving and be
Model S. When cruising behind a detected vehicle,
prepared to take corrective action as needed.
Tra
c-Aware Cruise Control accelerates and decelerates
Depending on Tra
c-Aware Cruise Control to
Model S as needed to maintain a chosen following
reduce your driving speed enough to prevent a
distance (see Adjust the Following Distance on page
collision can result in serious injury or death.
86), up to the set speed.
Tra
c-Aware Cruise Control also adjusts the cruising
speed when entering and exiting curves.
Autopilot
85

Tra
c-Aware Cruise Control
based on the new location. For example, if you merged
HOLD State
onto a different highway, the set cruising speed reverts
back to what it was before driving on the interchange.
When following a vehicle, Tra
c-Aware Cruise Control
remains active at low speeds, even when Model S comes
WARNING: In some cases (such as having
to a full stop. When the vehicle is moving again, Tra
c-
insu
cient data), Tra
c-Aware Cruise Control may
Aware Cruise Control resumes operating at the set
not automatically reduce the set speed on the
speed. However, under the following circumstances,
highway interchange or off-ramp. Do not rely on
Tra
c-Aware Cruise Control goes into a HOLD state, in
Tra
c-Aware Cruise Control to determine an
which case, you need to briefly press the accelerator
appropriate driving speed. Tesla recommends
pedal to resume cruising. When the HOLD status is
driving at a speed that is safe for road conditions
active, the instrument panel displays the HOLD icon and
and within posted speed limits.
a message that indicates that you need to resume cruise
control. The following circumstances can cause Tra
c-
Aware Cruise Control to go into the HOLD state:
Adjust the Following Distance
• Model S has been at a standstill for 5 minutes.
To adjust the following distance you want to maintain
between Model S and a vehicle traveling ahead of you,
• Model S detects a pedestrian (the HOLD state may
touch Controls > Autopilot > Cruise Follow Distance and
clear when the pedestrian is no longer detected).
choose a setting from 1 (the closest following distance)
• Model S suddenly loses visibility of the vehicle in
to 7 (the longest following distance). Each setting
front of you.
corresponds to a time-based distance that represents
how long it takes for Model S, from its current location,
• An obstacle is detected in front of Model S.
to reach the location of the rear bumper of the vehicle
ahead of you.
Cruising Near or On Exits
NOTE: Your setting is retained until you manually
change it.
When cruising near an exit on a controlled-access
highway and engaging the turn signal toward the off-
NOTE: For vehicles manufactured after approximately
ramp, Tra
c-Aware Cruise Control assumes you are
February 13, 2022, the closest following distance(s) may
exiting and begins to slow down Model S. If you do not
be unavailable.
drive onto the off-ramp, Tra
c-Aware Cruise Control
WARNING: It is the driver's responsibility to
resumes cruising at the set speed. In a region with right
determine and maintain a safe following distance
hand tra
c, this occurs only when you engage the right
at all times. Do not rely on Tra
c-Aware Cruise
turn signal when driving in the right-most lane within
Control to maintain an accurate or appropriate
164 feet (50 meters) of an exit. Likewise in regions with
following distance.
left hand tra
c; when engaging the left turn signal when
driving in the left-most lane within 164 feet (50 meters)
WARNING: Never depend on Tra
c-Aware Cruise
of an exit.
Control to adequately slow down Model S to avoid
a collision. Always watch the road in front of you
When cruising onto an on-ramp to a controlled-access
and stay prepared to take immediate corrective
highway, Tra
c-Aware Cruise Control automatically
action.
adjusts the set cruising speed to the speed limit of the
highway, plus any offset you have specified.
Overtake Acceleration
NOTE: The on-board Global Positioning System (GPS)
When following a vehicle with Tra
c-Aware Cruise
determines if you are driving in a region with right or left
Control active, engaging the turn signal (to indicate a
hand tra
c. In situations where GPS data is unavailable
move into the passing lane) accelerates Model S towards
(for example, if there is inadequate signal), engaging the
the vehicle ahead. By momentarily holding the turn
turn signal near an exit does not cause Tra
c-Aware
signal, you can quickly accelerate up to your set speed
Cruise Control to slow down Model S.
without having to press the accelerator pedal. The turn
When enabled while on a highway interchange or off-
signal causes acceleration only when all of the following
conditions are met:
ramp, Tra
c-Aware Cruise Control may reduce your set
speed in 5 mph (5 km/h) increments - to as slow as
25 mph (40 km/h) - to better match the reported
• Tra
c-Aware Cruise Control is operating and detects
speeds of other Tesla vehicles that have driven at that
a vehicle in front of you.
specific location. To override this and continue cruising
• No obstacles or vehicles are detected in the target
at your set speed, tap the accelerator pedal. The new set
lane.
speed is maintained for the duration of the interchange
or off-ramp (unless you override it or cancel Tra
c-
• Model S is traveling below the set speed, but over
45 mph (72 km/h).
Aware Cruise Control). After the interchange or off-
ramp, the set speed may revert or change as necessary
86
Tra
c-Aware Cruise Control
Overtake Acceleration is intended as an aid when
• A door is opened.
passing a vehicle ahead of you. When the turn signal is
• A camera or sensor is obstructed. This could be
engaged, Tra
c-Aware Cruise Control continues to
caused by dirt, mud, ice, snow, fog, etc.
maintain distance from the vehicle ahead, but allows you
to drive slightly closer than your selected distance.
• The traction control setting is manually disabled or is
repeatedly engaging to prevent wheels from slipping.
Acceleration cancels when one of the conditions
• The wheels are spinning while at a standstill.
happen:
• The Tra
c-Aware Cruise Control system is failing or
• You reach your set cruising speed.
requires service.
• Changing lanes takes too long.
When Tra
c-Aware Cruise Control is unavailable or
• Model S gets too close to the vehicle ahead.
cancels, Model S no longer drives consistently at a set
speed and no longer maintains a specified distance from
OR
the vehicle ahead.
• You disengage the turn signal.
WARNING: Tra
c-Aware Cruise Control can cancel
unexpectedly at any time for unforeseen reasons.
Always watch the road in front of you and stay
NOTE: Overtake Acceleration occurs when you fully
prepared to take appropriate action. It is the
press and hold the turn signal. When you release the
driver's responsibility to be in control of Model S at
turn signal, Model S stops accelerating (in the same way
all times.
as when you release the accelerator pedal) and resumes
the set speed.
Summary of Cruise Indicators
WARNING: Overtake Acceleration can cancel for
many unforeseen reasons in addition to those
listed above (for example, lack of GPS data). Stay
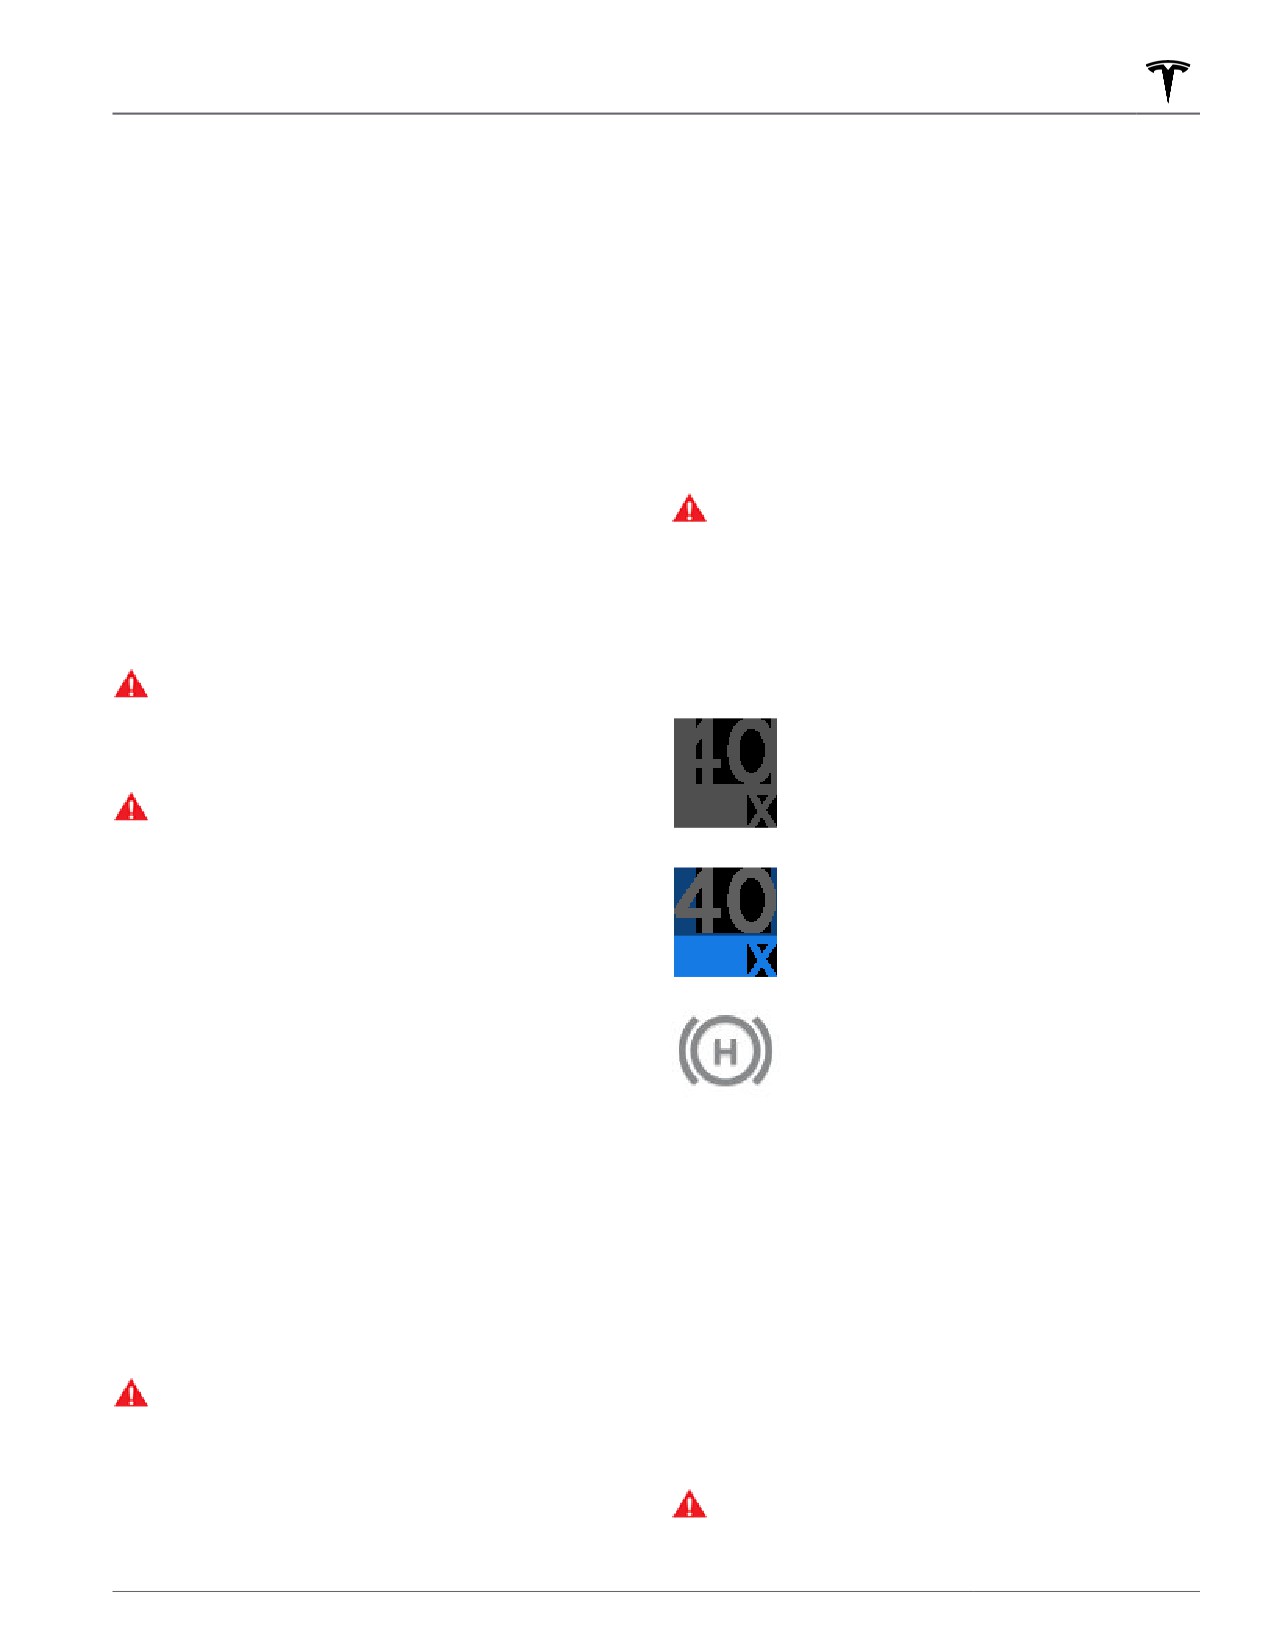
Tra
c-Aware Cruise Control is available
alert and never depend on Overtake Acceleration
but is not actively controlling your speed
to increase your driving speed.
until you activate it. The number shown in
gray is the cruising speed that will be set
WARNING: Overtake Acceleration increases your
when you engage Tra
c-Aware Cruise
driving speed whenever the appropriate turn
Control.
signal is engaged, and accelerates Model S closer
to the vehicle ahead. Although Tra
c-Aware
Tra
c-Aware Cruise Control is actively
Cruise Control continues to maintain distance from
cruising and is either maintaining the set
the vehicle ahead, it is important to be aware that
speed (no vehicle in front) or is
your selected following distance is reduced when
maintaining a chosen following distance
Overtake Acceleration is active, particularly in
from a vehicle ahead (up to the set speed).
cases where it may not be your intention to
overtake the vehicle you are following.
Model S has fully stopped but is in a HOLD
state. If safe, press the accelerator pedal to
resume cruising at the set speed.
Canceling and Resuming
To manually cancel Tra
c-Aware Cruise Control, press
the brake pedal or press the right scroll wheel on the
steering yoke.
Limitations
To resume cruising, press the right scroll button.
Tra
c-Aware Cruise Control is particularly unlikely to
operate as intended in the following types of situations:
NOTE: When Tra
c-Aware Cruise Control cancels,
Model S does not coast. Instead, regenerative braking
• The road has sharp curves.
slows down Model S in the same way as when you move
your foot off the accelerator when driving without
• Visibility is poor (due to heavy rain, snow, fog, etc.).
Tra
c-Aware Cruise Control (see Regenerative Braking
• Bright light (such as from oncoming headlights or
on page 65).
direct sunlight) is interfering with the view of the
WARNING: Tra
c-Aware Cruise Control cancels,
camera(s).
or may not be available, in the following situations:
• A camera or sensor is obstructed (fogged over, dirty,
covered by a sticker, etc.).
• You press the brake pedal.
• Your driving speed exceeds the maximum cruising
WARNING: The list above does not represent an
speed of 90 mph (150 km/h).
exhaustive list of situations that may interfere with
• You shift Model S.
proper operation of Tra
c-Aware Cruise Control.
Autopilot
87
Autosteer
NOTE: Depending on market region, vehicle
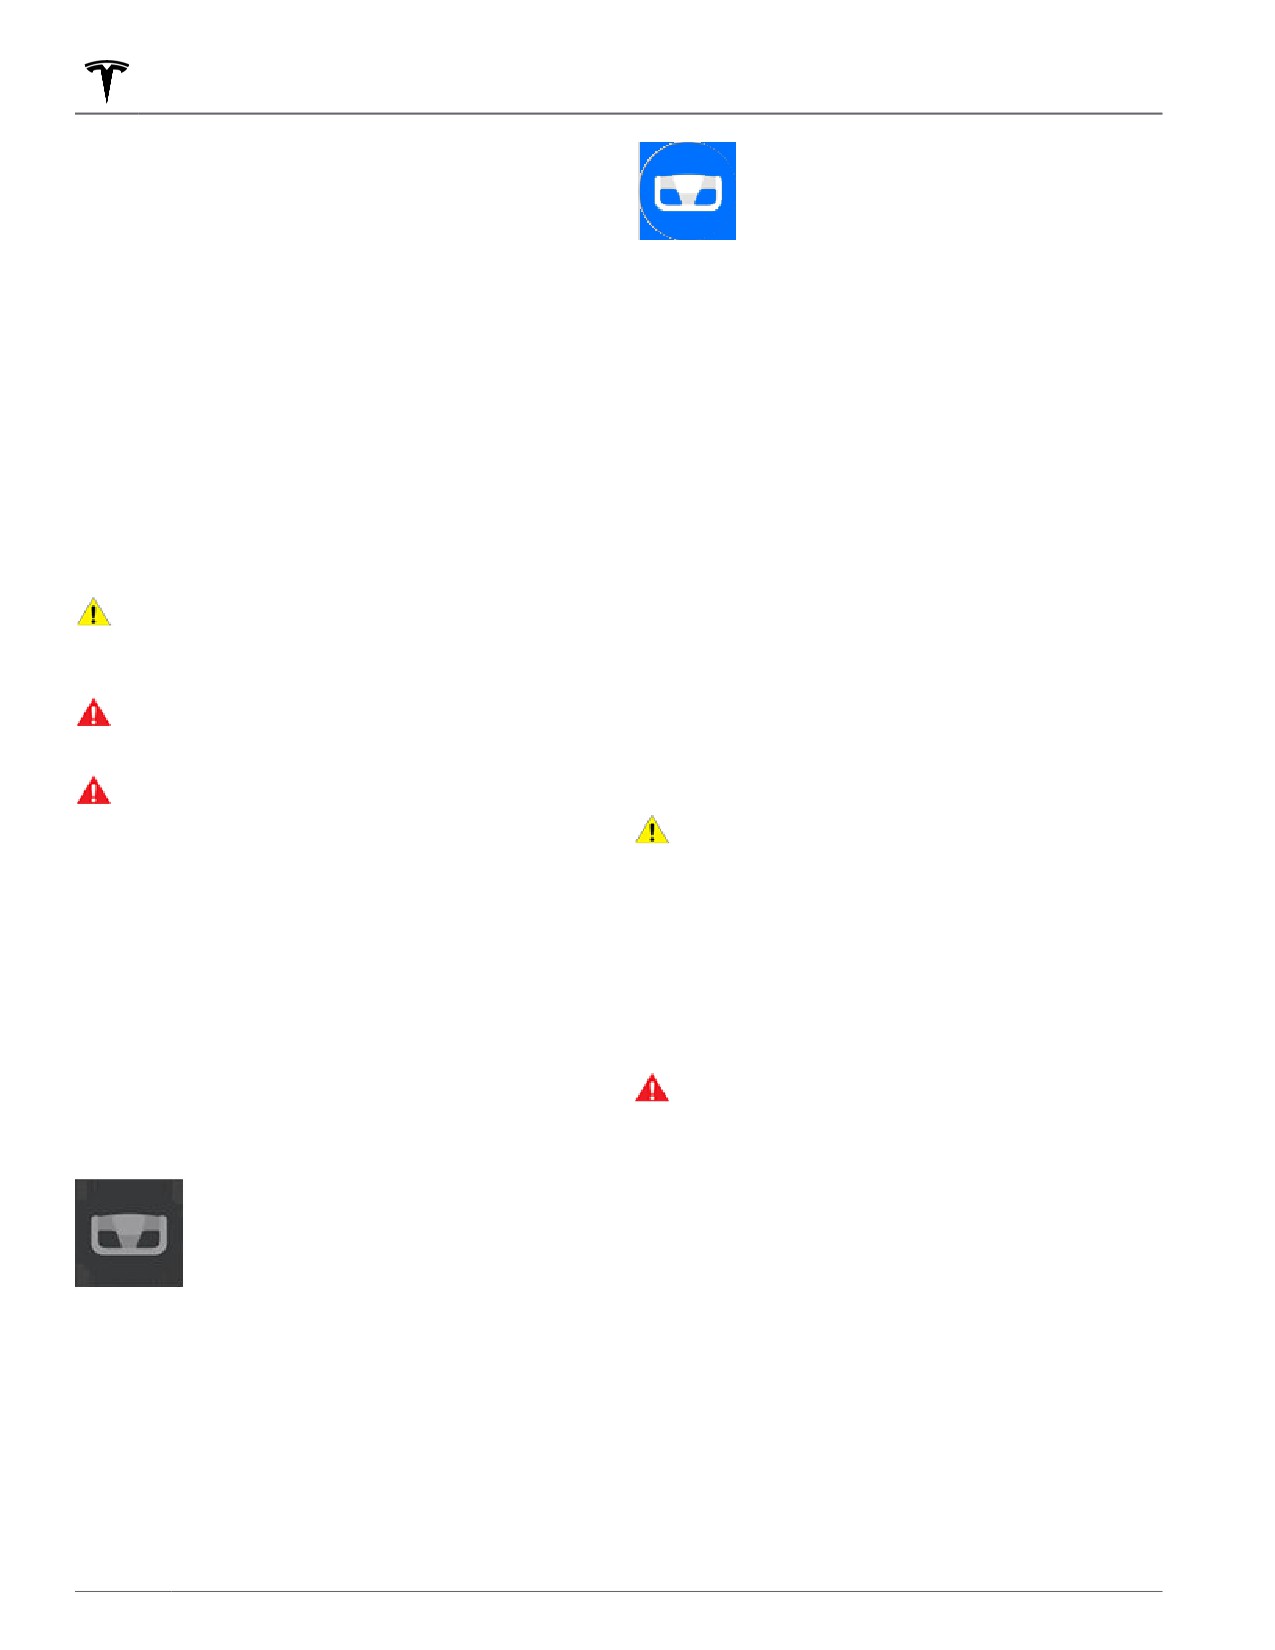
To indicate that Autosteer is now actively
configuration, options purchased, and software version,
steering Model S, the instrument panel
your vehicle may not be equipped with Autosteer, or the
displays the Autosteer icon in blue. When
feature may not operate exactly as described.
Autosteer is able to detect lane markings,
NOTE: Autosteer is a BETA feature.
it also displays the driving lane in blue.
Autosteer builds upon Tra
c-Aware Cruise Control (see
Autosteer briefly displays a message on the instrument
Tra
c-Aware Cruise Control on page 84), intelligently
panel reminding you to pay attention to the road and be
keeping Model S in its driving lane when cruising at a set
ready to take over at any time.
speed. Autosteer also allows you to use the turn signals
to move Model S into an adjacent lane (see Auto Lane
The speed at which you can initiate Autosteer can vary
Change on page 90). Autosteer detects lane markings
depending on various conditions and whether or not a
and the presence of vehicles and objects to steer
vehicle is detected ahead of you. When no vehicle is
Model S.
detected ahead of you, you must be driving at least
18 mph (30 km/h), unless certain vehicle and
NOTE: To display more details about the roadway and its
environmental conditions are met, in which case, you
surroundings, such as road markings, stop lights, objects
may be able to initiate it at lower speeds. When a
(such as trash cans and poles), etc., touch Controls >
vehicle is detected ahead of you, you can initiate
Autopilot > Full Self-Driving Visualization Preview (if
Autosteer at any speed, even when stationary, provided
equipped).
Model S is at least 5 feet (150 cm) behind the detected
CAUTION: Ensure all cameras and sensors are
vehicle.
clean. Dirty cameras and sensors, as well as
NOTE: The maximum cruising speed is 90 mph (150
environmental conditions such as rain and faded
km/h). It is the driver's responsibility to cruise at a safe
lane markings, affect performance.
speed based on road conditions and speed limits.
WARNING: Autosteer is a hands-on feature. You
NOTE: Auto High Beam is automatically enabled when
must keep your hands on the steering yoke at all
Autosteer is engaged and the maximum cruising speed
times.
may be limited to a lower speed for vehicles
WARNING: Autosteer is intended for use on
manufactured after approximately February 13, 2022.
controlled-access highways with a fully attentive
driver. When using Autosteer, hold the steering
CAUTION: If available in your market region,
Model S detects lights from an emergency vehicle
yoke and be mindful of road conditions and
when using Autosteer at night on a high speed
surrounding tra
c. Do not use Autosteer in
road, the driving speed is automatically reduced
construction zones, or in areas where bicyclists or
and the instrument panel displays a message
pedestrians may be present. Never depend on
Autosteer to determine an appropriate driving
informing you of the slowdown. You will also hear
a chime and see a reminder to keep your hands on
path. Always be prepared to take immediate
the steering yoke. When the light detections pass
action. Failure to follow these instructions could
by or cease to appear, Autopilot resumes your
cause damage, serious injury or death.
cruising speed. Alternatively, you may tap the
accelerator to resume your cruising speed.
Operating Autosteer
WARNING: Never depend on Autopilot features to
determine the presence of emergency vehicles.
Before you can operate Autosteer, you must enable it by
Model S may not detect lights from emergency
touching Controls > Autopilot > Autosteer (Beta).
vehicles in all situations. Keep your eyes on your
driving path and always be prepared to take
To indicate that Autosteer is available (but
immediate action.
not actively steering Model S), the
instrument panel displays a gray Autosteer
In situations where Autosteer is temporarily unavailable,
icon.
the Autosteer icon disappears. For example, your driving
speed is not within the speed required for Autosteer to
operate. Autosteer may also be unavailable if it is not
To initiate Autosteer, press the right scroll wheel.
receiving adequate data from the camera(s).
NOTE: If the setting for Autosteer Activation is set to
Single Click (touch Controls > Autopilot > Autosteer
If unable to detect lane markings, Autosteer may
Activation), Autosteer engages when you single-press
determine the driving lane based on a vehicle you are
the right scroll wheel. If set to Double Click, you must
following.
double-press the right scroll wheel to engage Autosteer.
In most cases, Autosteer attempts to center Model S in
the driving lane. However, there may be situations in
which Autosteer may steer Model S in a driving path
that is offset from the center of the lane (for example,
detection of guard rails).
88
Autosteer
WARNING: Autosteer is not designed to, and will
Autosteer requires that you pay attention to your
not, steer Model S around objects partially in a
surroundings and remain prepared to take control at any
driving lane and in some cases, may not stop for
time. If Autosteer still does not detect your hands on the
objects that are completely blocking the driving
steering yoke, the flashing light on the instrument panel
lane. Always watch the road in front of you and
increases in frequency and a chime sounds.
stay prepared to take immediate action. It is the
driver's responsibility to be in control of Model S at
If you repeatedly ignore Autosteer's prompts to apply
all times.
slight force to the steering yoke, Autosteer disables for
the rest of the drive and displays the following message
requesting you to drive manually. If you don't resume
Restricted Speed
manual steering, Autosteer sounds a continuous chime,
turns on the warning flashers, and slows the vehicle to a
On a controlled-access highway, the cruising speed
complete stop.
reflects the speed limit, taking into consideration any
offset you've specified using Speed Assist. However, if
Autosteer unavailable for the rest of this
you choose to use Autosteer on residential roads, a road
drive. Hold steering yoke to drive
without a center divider, or a road where access is not
manually.
limited, Autosteer may limit the maximum allowed
cruising speed and the instrument panel displays a
message indicating that speed is restricted. The
restricted speed will be the speed limit of the road plus
For the rest of the drive, you must steer manually.
5 mph (10 km/h).
Autosteer is available again on your next drive (after you
In situations where the speed limit cannot be detected
stop and shift Model S into Park).
when Autosteer is engaged, Autosteer reduces your
driving speed and limits the set cruising speed to 45
Take Over Immediately
mph (70 km/h). Although you can manually accelerate
to exceed the limited speed, Model S may not brake for
In situations where Autosteer is unable to steer Model S,
detected obstacles. Autosteer slows down to the limited
Autosteer sounds a warning chime and displays the
speed when you release the accelerator pedal. When
following message on the instrument panel:
you leave the road, or disengage Autosteer by using the
steering yoke, you can increase your set speed again, if
desired.
Take over immediately
Hold Steering Yoke
Autosteer determines how best to steer Model S. When
active, Autosteer requires you to hold the steering yoke.
When you see this message, TAKE OVER STEERING
If it does not detect your hands on the steering yoke for
IMMEDIATELY.
a period of time, a flashing light appears along the top
of the instrument panel and the following message
displays:
Canceling Autosteer
Apply slight turning force to steering yoke
Autosteer cancels when:
• You press the brake pedal.
• You start steering manually.
• You exceed the maximum speed at which Autosteer
operates - 90 mph (150 km/h).
Autosteer detects your hands by recognizing slight
resistance as the steering yoke turns, or from you
• You shift.
manually turning the steering yoke very lightly (without
• A door is opened.
enough force to take over steering). Autosteer also
qualifies your hands as being detected if you engage a
• An Automatic Emergency Braking event occurs (see
turn signal or use a button or scroll wheel on the
Collision Avoidance Assist on page 114).
steering yoke.
When Autosteer cancels, it sounds a chime and the
NOTE: When your hands are detected, the message
Autosteer icon either turns gray to indicate that
disappears and Autosteer resumes normal operation.
Autosteer is no longer active, or disappears to indicate
that it is not currently available.
Autopilot
89
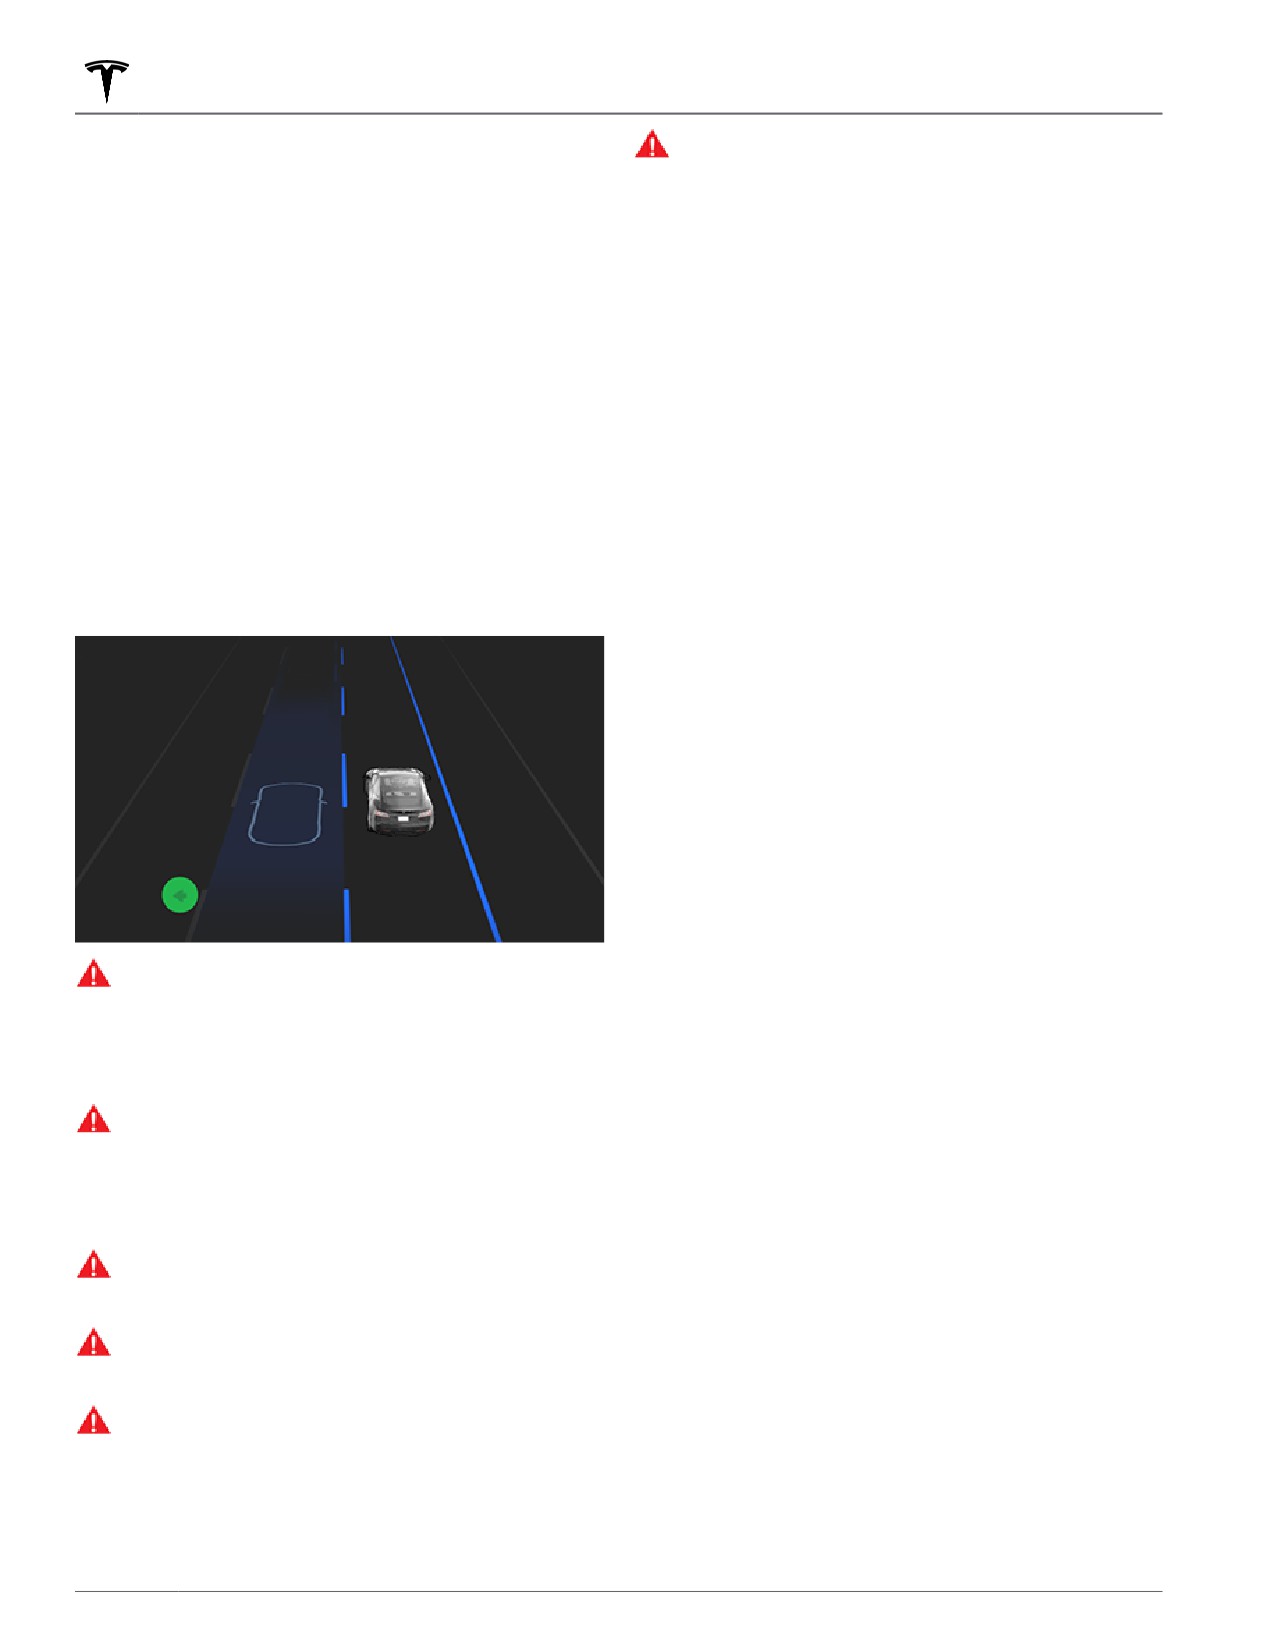
Autosteer
NOTE: If Autosteer Activation is set to Double Click and
WARNING: Failure to follow all warnings and
Autosteer cancels because you started steering
instructions can result in property damage, serious
manually, Tra
c-Aware Cruise Control remains active. If
injury or death.
Autosteer Activation is set to Single Click and Autosteer
cancels because you started steering manually, Tra
c-
Operating Auto Lane Change
Aware Cruise Control also cancels.
To disable Autosteer so it is no longer available, touch
Auto Lane Change is available whenever Autosteer is
Controls > Autopilot > Autosteer (Beta).
active. To change lanes using Auto Lane Change:
1. Perform visual checks to make sure it is safe and
Auto Lane Change
appropriate to move into the target lane.
NOTE: Depending on market region, vehicle
2. Engage the appropriate turn signal, keeping your
hands on the steering yoke.
configuration, options purchased, and software version,
your vehicle may not be equipped with Auto Lane
3. If needed, cancel the turn signal once you are in the
Change, or the feature may not operate exactly as
target lane.
described.
NOTE: The minimum speed at which Auto Lane Change
When Autosteer is active, engage a turn signal to move
operates may vary depending on region, adjacent lane
Model S into an adjacent lane (moving the steering yoke
speeds, and other factors. Always be ready to manually
would cancel Autosteer).
steer and change lanes as necessary.
Auto Lane Change moves Model S into the adjacent lane
in the direction indicated by the turn signal, provided
the following conditions are met:
• The turn signal is engaged.
• Model S does not detect a vehicle in its blind spot, or
a vehicle or obstacle up to the center of the target
lane.
• Lane markings indicate that a lane change is
permitted.
• Midway through the lane change, Model S must
detect the target lane's outside lane marking. If this
lane marking is not detected, the lane change is
WARNING: It is the driver's responsibility to
aborted and Model S returns to its original driving
determine whether a lane change is safe and
lane.
appropriate. Therefore, before initiating a lane
change, always check blind spots, lane markings,
• The view of the camera(s) is not obstructed.
and the surrounding roadway to confirm it is safe
and appropriate to move into the target lane.
When an automatic lane change is in progress, Overtake
WARNING: Never depend on Auto Lane Change to
Acceleration is activated, allowing Model S to accelerate
determine an appropriate driving path. Drive
closer to a vehicle in front (see Overtake Acceleration on
attentively by watching the road and tra
c ahead
page 86).
of you, checking the surrounding area, and
monitoring the instrument panel for warnings.
NOTE: Auto Lane Change moves Model S one lane at a
Always be prepared to take immediate action.
time. Moving into an additional lane requires you to
engage the turn signal a second time after the first lane
WARNING: Do not use Auto Lane Change on roads
change is complete.
where tra
c conditions are constantly changing
and where bicycles and pedestrians are present.
When using Auto Lane Change, it is important to
WARNING: The performance of Auto Lane Change
monitor its performance by watching the driving path in
depends on the ability of the camera(s) to
front of you and the surrounding area. Stay prepared to
recognize lane markings.
take over steering at any time. As you are crossing over
into the adjacent lane, the instrument panel displays the
WARNING: Do not use Auto Lane Change on
location in the lane that Model S is moving into.
winding roads with sharp curves, on icy or slippery
roads, or when weather conditions (such as heavy
rain, snow, fog, etc.) may be obstructing the view
from the camera(s) or sensors.
90

Autosteer
In situations where Auto Lane Change is unable to
CAUTION: Stop Light and Stop Sign Warning
operate at optimal performance, or cannot operate due
requires on-board maps to know that a particular
to inadequate data, the instrument panel displays a
stop light or stop sign exists at a location. In some
series of warnings. Therefore, when using Auto Lane
cases, map data is inaccurate or outdated and may
Change, always pay attention to the instrument panel
not include all stop lights or stop signs. Therefore,
and be prepared to manually steer Model S.
Stop Light and Stop Sign Warning may not detect
all stop lights and stop signs.
Adjacent Lane Speed
WARNING: The Stop Light and Stop Sign Warning
feature does not apply the brakes or decelerate
NOTE: Depending on market region, vehicle
Model S and may not detect all stop lights and
configuration, options purchased, and software version,
stop signs. Stop Light and Stop Sign Warning is
designed for guidance purposes only and is not a
your vehicle may not be equipped with Adjacent Lane
substitute for attentive driving and sound
Speed, or the feature may not operate exactly as
judgment. Keep your eyes on the road when
described.
driving and never depend on Stop Light and Stop
When moving significantly faster than vehicles in
Sign Warning to warn you of a stop light or stop
adjacent lanes, Model S automatically reduces the
sign.
driving speed. This is especially helpful in heavy tra
c
WARNING: Stop Light and Stop Sign Warning is
situations or when vehicles are constantly merging into
designed to warn you only when approaching a
different lanes. When Model S detects other vehicles
visible red stop sign, solid red or later portion of a
driving significantly slower, the instrument panel
yellow tra
c light. It may not warn you of
highlights the adjacent lanes with arrows and detected
intersections with flashing lights and it does not
vehicles in gray, and Model S reduces the driving speed
warn you of yield signs or temporary stop and
as appropriate. To temporarily override this feature,
yield signs (such as those used in construction
press the accelerator pedal.
areas). Additionally, Stop Light and Stop Sign
Warning does not warn you of approaching stop
WARNING: Never depend on Autopilot to
lights or stop signs when you are pressing the
determine a safe driving speed; you are
accelerator pedal or brake pedal (which disables
responsible for driving safely and according to
Autosteer).
tra
c laws in your market region.
Limitations
Stop Light and Stop Sign Warning
Autosteer and its associated functions are particularly
NOTE: Depending on market region, vehicle
unlikely to operate as intended when:
configuration, options purchased, and software version,
your vehicle may not be equipped with Stop Light and
• Autosteer is unable to accurately determine lane
Stop Sign Warning, or the feature may not operate
markings. For example, lane markings are excessively
exactly as described.
worn, have visible previous markings, have been
adjusted due to road construction, are changing
While Autosteer is in use, Model S displays a warning on
quickly (lanes branching off, crossing over, or
the instrument panel and sounds a chime if it detects
merging), objects or landscape features are casting
that you are likely to run through a red stop light or stop
strong shadows on the lane markings, or the road
sign. If this happens, TAKE IMMEDIATE CORRECTIVE
surface contains pavement seams or other high-
ACTION!
contrast lines.
The visual and audible warnings cancel after a few
• Visibility is poor (heavy rain, snow, fog, etc.) or
seconds, or when you press the brake pedal, whichever
weather conditions are interfering with sensor
comes first.
operation.
• A camera(s) or sensor(s) is obstructed, covered, or
Stop Light and Stop Sign Warning provides warnings
damaged.
only. It does not slow down or stop Model S at red tra
c
lights, stop signs, road markings, etc. If equipped with
• Driving on hills.
Tra
c Light and Stop Sign Control, you can enable this
• Approaching a toll booth.
feature to automatically stop Model S at tra
c lights
and stop signs (see Tra
c Light and Stop Sign Control
• Driving on a road that has sharp curves or is
on page 96).
excessively rough.
• Bright light (such as direct sunlight) is interfering
NOTE: Touch Controls > Autopilot > Full Self-Driving
with the view of the camera(s).
Visualization Preview (if equipped) to display more
details about the roadway and its surroundings, such as
• The sensors are affected by other electrical
road markings, stop lights, objects (such as trash cans
equipment or devices that generate ultrasonic waves.
and poles), etc.
Autopilot
91
Autosteer
• A vehicle is detected in your blind spot when you
engage the turn signal.
• Model S is being driven very close to a vehicle in front
of it, which is blocking the view of the camera(s).
WARNING: Many unforeseen circumstances can
impair the operation of Autosteer. Always keep this
in mind and remember that as a result, Autosteer
may not steer Model S appropriately. Always drive
attentively and be prepared to take immediate
action.
92

Navigate on Autopilot
NOTE: Depending on market region, vehicle
change lanes to achieve the set cruising speed. The
configuration, options purchased, and software version,
Mild setting is more conservative about lane changes
your vehicle may not be equipped with Navigate on
and may result in a slightly longer driving time
Autopilot, or the feature may not operate exactly as
whereas Mad Max is designed to allow you to reach
described.
your destination in the shortest driving time possible,
but changes lanes only when safe to do so.
NOTE: Navigate on Autopilot is a BETA feature.
• Exit Passing Lane: Choose whether you want
When using Autosteer on a controlled-access highway
Navigate on Autopilot to maneuver out of a passing
(a main highway on which road users enter and exit
lane when navigating to a destination.
using on-ramps and off-ramps). Navigate on Autopilot
NOTE: In addition to route-based and speed-based
guides Model S to off-ramps and interchanges based on
lane changes, Navigate on Autopilot requests a lane
your navigation route. Along the highway portion of a
change out of a passing lane as a reminder to stay in
navigation route, Navigate on Autopilot also changes
a slower lane when you are not passing other
lanes to prepare for exits (route-based lane changes)
vehicles. Choose NO to disable this and keep Model S
and to minimize the driving time to your destination
in a passing lane except when needed to stay on the
(speed-based lane changes).
navigation route.
WARNING: Navigate on Autopilot does not make
• Require Lane Change Confirmation (if equipped): By
driving autonomous. You must pay attention to the
default, Navigate on Autopilot requires your
road, keep your hands on the steering yoke at all
confirmation before proceeding with a lane change
times, and remain aware of your navigation route.
by pressing the appropriate turn signal. However, if
WARNING: As is the case with normal driving, be
you want Navigate on Autopilot to change lanes
extra careful around blind corners, interchanges,
without requiring this confirmation, turn this setting
and on-ramps and off-ramps - obstacles can
off. When you turn the setting off, you can specify if
appear quickly and at any time.
or how you want to be notified of lane changes (Off,
Chime, Vibrate, or Both).
WARNING: Navigate on Autopilot may not
recognize or detect oncoming vehicles, stationary
WARNING: If you turn off Require Lane Change
objects, and special-use lanes such as those used
Confirmation, Navigate on Autopilot notifies
exclusively for bikes, carpools, emergency vehicles,
you of upcoming lane changes and off-ramps,
etc. Remain alert at all times and be prepared to
but it remains your responsibility to monitor the
take immediate action. Failure to do so can cause
environment and maintain control of Model S at
damage, injury or death.
all times. Lane changes can occur quickly and
suddenly. Always keep your hands on the wheel
and your eyes on the driving path in front of
Enabling and Customizing Navigate
you.
on Autopilot
NOTE: The touchscreen displays route-based lane
To enable Navigate on Autopilot, touch Controls >
changes at the top of the map's turn-by-turn direction
Autopilot > Navigate on Autopilot (Beta). Then, to
list to notify you that an upcoming lane change is
customize how you want Navigate on Autopilot to
needed to stay on the navigation route.
operate, touch Customize Navigate on Autopilot:
• Enable At Start Of Every Trip: Choose whether or not
Operating Navigate on Autopilot
you want to automatically enable Navigate on
Autopilot for every navigation route. When enabled,
Once enabled, the Navigate on Autopilot button appears
the Navigate on Autopilot button on the turn-by-turn
on the map’s turn-by-turn direction list whenever a
direction list is already enabled at the start of every
navigation route is active and the route includes at least
trip.
one controlled-access highway. When enabled, the
Navigate on Autopilot button is blue and the turn-by-
• Speed Based Lane Changes: Navigate on Autopilot is
turn direction displays the Autosteer icon next to the
designed to perform both route-based and speed-
maneuvers (such as off-ramps) that Navigate on
based lane changes. Route-based lane changes are
Autopilot will handle.
designed to keep you on your navigation route (for
example, moving you into an adjacent lane to prepare
NOTE: If Enable At Start Of Every Trip is turned off, you
for an upcoming off-ramp) whereas speed-based
must touch the Navigate on Autopilot button to enable
lane changes are designed to maintain a driving
it for each navigation route.
speed (not to exceed your cruising speed) that allows
you to minimize the time it takes to reach your
destination (for example, moving into an adjacent
lane to pass a vehicle in front of you). Speed-based
lanes changes are optional. You can use this setting
to disable speed-based lane changes or to specify
how aggressively you want Navigate on Autopilot to
Autopilot
93
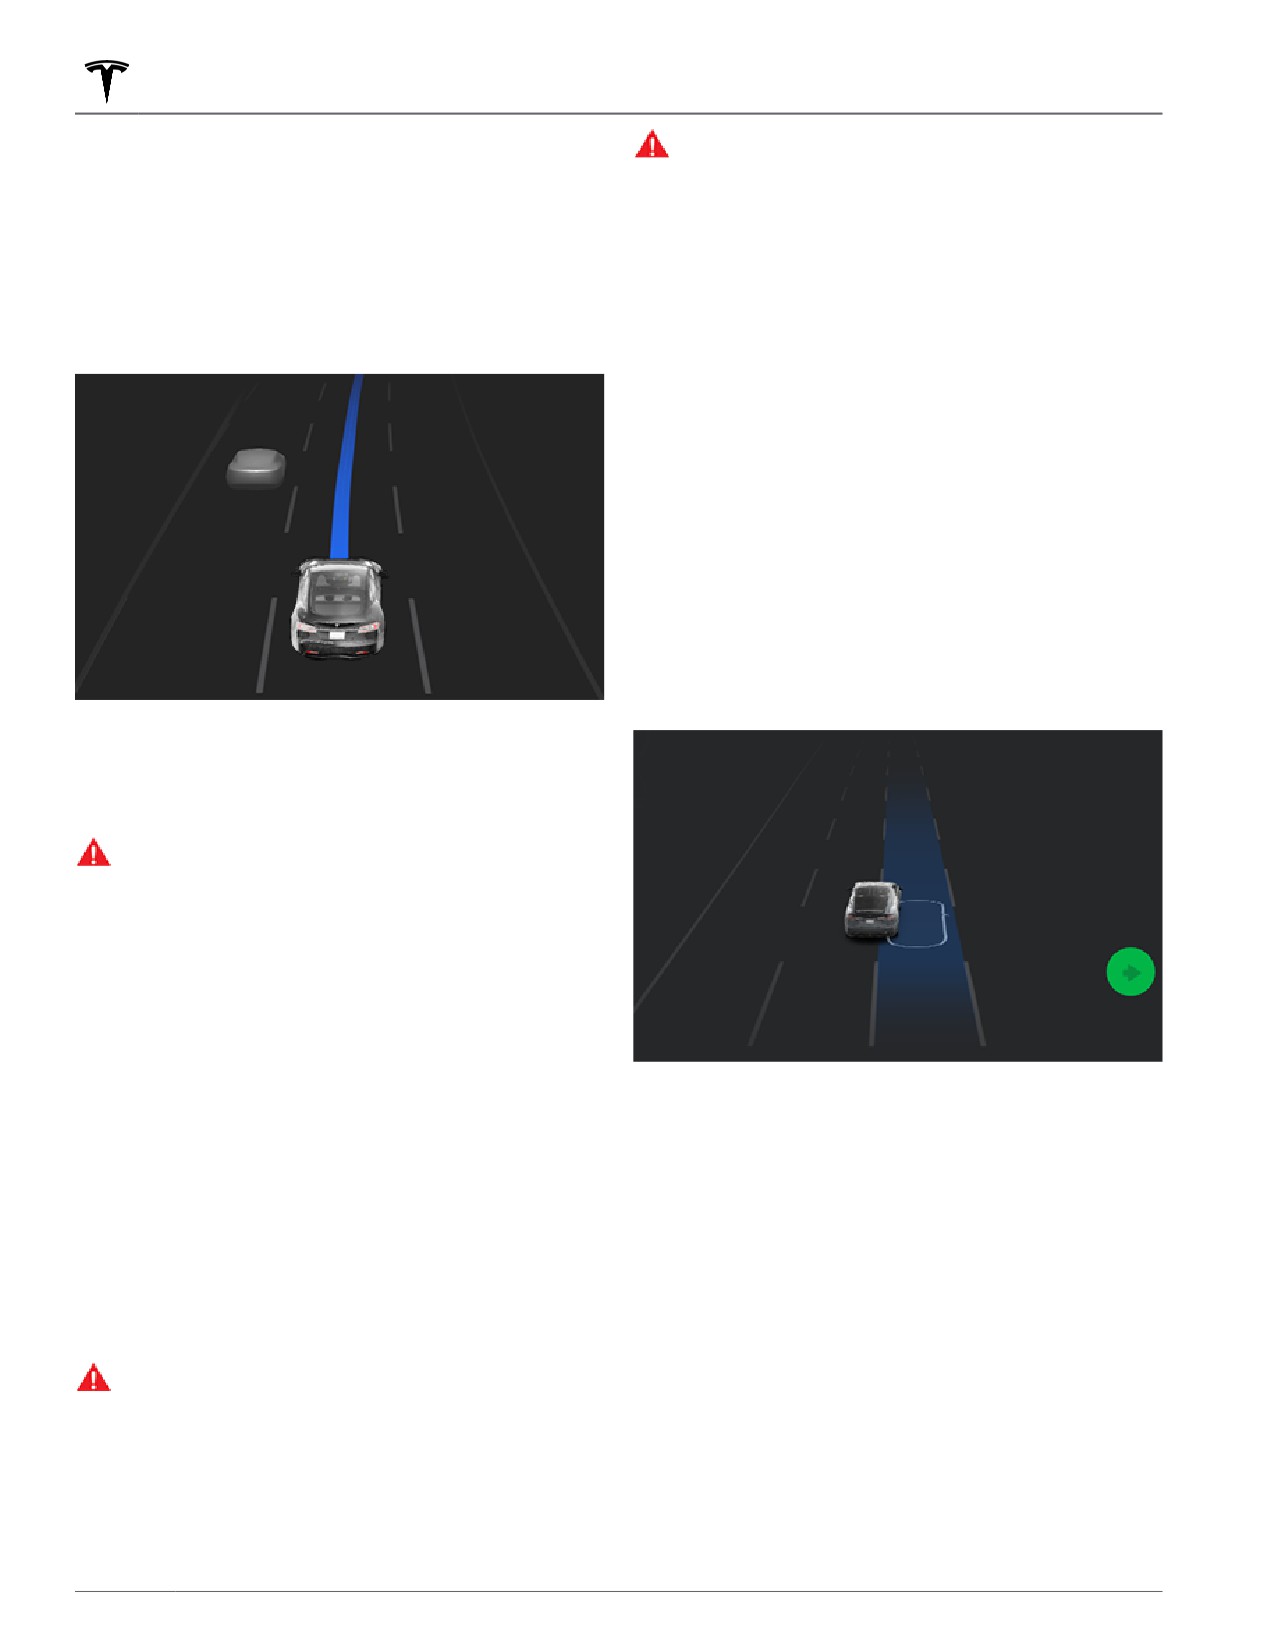
Navigate on Autopilot
Navigate on Autopilot activates and deactivates as
WARNING: Navigate on Autopilot may not always
appropriate, based on the type of road you are driving
attempt to exit at an off-ramp or change lanes,
on. For example, if Autosteer is active and Navigate on
even when an exit or lane change is determined by
Autopilot is enabled, Navigate on Autopilot
the navigation route. Always remain alert and be
automatically becomes active when you reach a
prepared to manually steer onto an off-ramp, or
controlled-access highway on your navigation route.
make a lane change to prepare for, or to exit at, an
off-ramp or interchange.
Whenever Navigate on Autopilot is active, the
instrument panel displays the driving lane as a single
You can cancel Navigate on Autopilot at any time by
blue line in front of Model S:
touching Navigate on Autopilot on the map’s turn-by-
turn direction list (Model S reverts back to Autosteer), or
by canceling Autosteer entirely (see Canceling
Autosteer on page 89).
Lane Changes
Navigate on Autopilot changes lanes to either prepare
Model S for an upcoming off-ramp, to increase your
driving speed (not to exceed your set cruising speed), or
to move Model S out of a passing lane when you are not
actively passing other road users. A message displays at
the top of the map's turn-by-turn direction list to notify
you when an upcoming lane change is required to stay
on your navigation route. The instrument panel displays
the upcoming driving path:
When Navigate on Autopilot is active and you approach
an off-ramp or interchange along your navigation route,
the appropriate turn signal engages and Autosteer
maneuvers Model S onto the off-ramp or interchange.
WARNING: Never depend on Navigate on
Autopilot to determine an appropriate lane at an
off-ramp. Stay alert and perform visual checks to
ensure that the driving lane is safe and
appropriate.
When you leave a controlled-access highway (for
example, you take an exit or you enter a section of the
navigation route that is no longer supported), Navigate
on Autopilot reverts back to Autosteer— a chime sounds
and the instrument panel displays the driving lane lines
in blue (instead of the single blue in front of Model S).
If Require Lane Change Confirmation is turned off,
Navigate on Autopilot engages the appropriate turn
NOTE: When determining navigation routes, and
signal, checks for vehicles and objects, and when
maneuvers at interchanges, Navigate on Autopilot
appropriate, maneuvers Model S into the adjacent lane.
considers whether or not you want to use High
Occupancy Vehicle (HOV) lanes. Therefore, ensure the
If Require Lane Change Confirmation is turned on, you
Use HOV Lanes setting is appropriate for your
must engage the appropriate turn signal to confirm that
circumstances (see Maps and Navigation on page 131).
you want Navigate on Autopilot to proceed with the
If the setting is off, Navigate on Autopilot never uses a
lane change. If you do not confirm the lane change
HOV lane, regardless of time of day. If the setting is on,
within three seconds, a chime sounds to remind you that
Navigate on Autopilot uses HOV lanes, whenever
Navigate on Autopilot requires your confirmation to
applicable.
change lanes.
WARNING: When Navigate on Autopilot
NOTE: If you ignore a route-based lane change
deactivates, Autosteer remains active. Always be
suggestion (for example, you are driving in the left lane
prepared to take appropriate action.
while approaching an off-ramp on the right side of the
highway), Navigate on Autopilot is unable to maneuver
onto the off-ramp and as a result, you are re-routed to
your destination.
94
Navigate on Autopilot
WARNING: Navigate on Autopilot may not always
attempt to exit at an off-ramp or change lanes,
even when an exit or lane change is determined by
the navigation route. Always remain alert and be
prepared to manually steer onto an off-ramp, or
make a lane change to prepare for, or to exit at, an
off-ramp or interchange.
Be Ready to Assist
When attempting to change lanes or maneuver Model S,
or when approaching construction zones, Navigate on
Autopilot may be unable to determine the appropriate
driving lane (for example, complex clover leafs and
multi-lane off-ramps) and the instrument panel displays
an alert indicating that Navigate on Autopilot is trying to
maneuver and may require assistance. When you see the
message, be prepared to take immediate action to
ensure that it is safe and appropriate to complete the
lane change or maneuver.
Autopilot
95
Tra
c Light and Stop Sign Control
NOTE: Depending on market region, vehicle
• Enable the feature. With the vehicle in Park, touch
configuration, options purchased, and software version,
Controls > Autopilot > Trac Light and Stop Sign
your vehicle may not be equipped with Trac Light and
Control. Once enabled, Tra
c Light and Stop Sign
Stop Sign Control, or the feature may not operate
Control operates whenever Tra
c-Aware Cruise
exactly as described.
Control or Autosteer is active.
NOTE: Traffic Light and Stop Sign Control is a BETA
feature and works best on roads that are frequently
How it Works
driven by Tesla vehicles. Traffic Light and Stop Sign
Control attempts to stop at all traffic lights and may
When Tra
c Light and Stop Sign Control is enabled and
also stop at green lights.
you are using Autosteer or Tra
c-Aware Cruise Control,
the instrument panel displays a popup message to
Tra
c Light and Stop Sign Control is designed to
recognize and respond to tra
c lights and stop signs,
inform you that an upcoming tra
c light, stop sign, or
slowing Model S to a stop when using Tra
c-Aware
road marking has been detected. As it approaches the
cruise control or Autosteer. This feature uses the
stop location, even at an intersection where the trac
light is green, Model S slows down and displays a red
vehicle's forward-facing cameras, in addition to GPS
line to indicate where Model S will stop. To continue
data, and slows the car for all detected tra
c lights,
including green, blinking yellow, and off lights in addition
through the intersection—even if the tra
c light is green
to stop signs and some road markings. As Model S
—you must briefly press the accelerator pedal to give
approaches an intersection, the instrument panel
the vehicle permission to proceed. When you've
confirmed that you want to proceed, the red stop line
displays a notification indicating the intention to slow
turns gray and Model S continues through the
down. You must confirm that you want to continue or
Model S stops at the red line displayed on the
intersection and resumes your set cruising speed.
instrument panel's driving visualization.
NOTE: If Model S is approaching a green light and
WARNING: NEVER make assumptions and predict
detects that a vehicle in front of you is continuing
when and where Tra
c Light and Stop Sign
through the intersection, Model S continues through the
intersection without requiring your confirmation,
Control will stop or continue through an
provided you are not in a turning lane and your hands
intersection or road marking. From a driver's
perspective, the behavior of Tra
c Light and Stop
are detected on the steering yoke.
Sign Control may appear inconsistent. Always pay
NOTE: If, after you briefly press the accelerator pedal to
attention to the roadway and be prepared to take
confirm that you want to continue through the
immediate action. It is the driver's responsibility to
intersection, the tra
c signal changes before you enter
determine whether to stop or continue through an
the intersection (for example, the light changes from
intersection. Never depend on Tra
c Light and
green to yellow or from yellow to red), Model S may
Stop Sign Control to determine when it is safe
determine that it is not appropriate to proceed.
and/or appropriate to stop or continue through an
Therefore, Model S stops and you must press the
intersection.
accelerator to proceed. At all times, it is your
responsibility to ensure the vehicle stops or accelerates
appropriately and safely.
Before Using
WARNING: Tra
c Light and Stop Sign Control
Before using Tra
c Light and Stop Sign Control, you
DOES NOT turn Model S through an intersection.
must:
When in a turning lane, Model S stops at the red
stop line. To proceed, briefly press the accelerator
• Ensure that forward-facing cameras are unobstructed
pedal—Model S continues straight through the
(see Cleaning Cameras and Sensors on page 83) and
intersection (even when in a turning lane), so you
calibrated (see Drive to Calibrate Cameras on page
MUST manually steer Model S through the
82). Tra
c Light and Stop Sign Control depends on
intersection (which cancels Autosteer).
the ability of the cameras to detect tra
c lights, stop
signs, and road markings.
Tra
c Light and Stop Sign Control is designed to
operate as described only when the following conditions
• Ensure that the latest version of maps has been
are met:
downloaded to Model S. Although Tra
c Light and
Stop Sign Control primarily uses visual data received
• Autosteer or Tra
c-Aware Cruise Control is engaged.
from the vehicle's cameras, greater accuracy is
achieved when using the most recent map data. To
• The cameras can detect an upcoming tra
c light,
check which version of maps is currently
stop sign or road marking (for example, cameras are
downloaded, touch Controls > Software > Additional
unobstructed and have a clear line-of-sight to the
vehicle information. You must connect to a Wi-Fi
tra
c light, stop sign, or road marking).
network to receive updated maps (see Map Updates
on page 136).
96

Tra
c Light and Stop Sign Control
• The instrument panel on Model S is displaying an
WARNING: Tra
c Light and Stop Sign Control is
upcoming tra
c light in "bold" format. Model S does
not a substitute for attentive driving and sound
not acknowledge tra
c lights that the instrument
judgment.
panel shows as faded. If a tra
c light is not directly
ahead of the camera (for example, it is located at an
angle of the camera's view, or located in an adjacent
lane) the instrument panel displays it as faded and
Model S does not slow down and stop for it.
WARNING: If the instrument panel is not
displaying a red stop line at an upcoming
intersection, Model S does not slow down or stop.
It is the driver's responsibility to pay attention to
upcoming intersections and monitor tra
c
conditions to determine when and if the vehicle
should stop and then to take appropriate action as
needed.
WARNING: Never depend on Tra
c Light and
Stop Sign Control to determine whether to stop at,
or proceed through, an intersection. Drive
attentively by watching the road and paying
attention to the roadway, upcoming intersections,
tra
c conditions, crosswalks, and other road users.
It is always the driver's responsibility to determine
whether to stop or proceed. Be prepared to take
immediate action. Failure to do so can result in
injury or death.
WARNING: In some situations, Tra
c Light and
Stop Sign Control may inaccurately detect a tra
c
light or stop sign, causing Model S to slow down
unexpectedly. Be prepared to take immediate
action at all times.
WARNING: You must briefly press the accelerator
pedal to confirm that you want to proceed through
an intersection, regardless of the status of the
tra
c light. If you do not confirm, Model S stops at
the red stop line displayed on the instrument
panel, even if stopping may be inappropriate.
Stopping at a green light may confuse other
drivers and may result in a collision, injury or
death. Therefore, always pay attention to
upcoming intersections and be prepared to
manually brake or accelerate in response to
surroundings.
WARNING: Never assume that your ability to see a
tra
c light, stop sign, or road marking (especially
at a complex intersection, or an intersection in
which a tra
c light or sign is partially obstructed,
etc.) means that Model S can also see it and
respond appropriately.
WARNING: Even the most recent map data does
not include all tra
c lights and stop signs.
Therefore, Tra
c Light and Stop Sign Control
relies heavily on the ability of the cameras to
detect tra
c lights, stop signs, road markings, etc.
As a result, Model S may ignore an intersection
that is blocked from the camera's view (for
example, obstructed by a tree or a large vehicle or
object, or located near a steep hill or sharp curve).
Autopilot
97
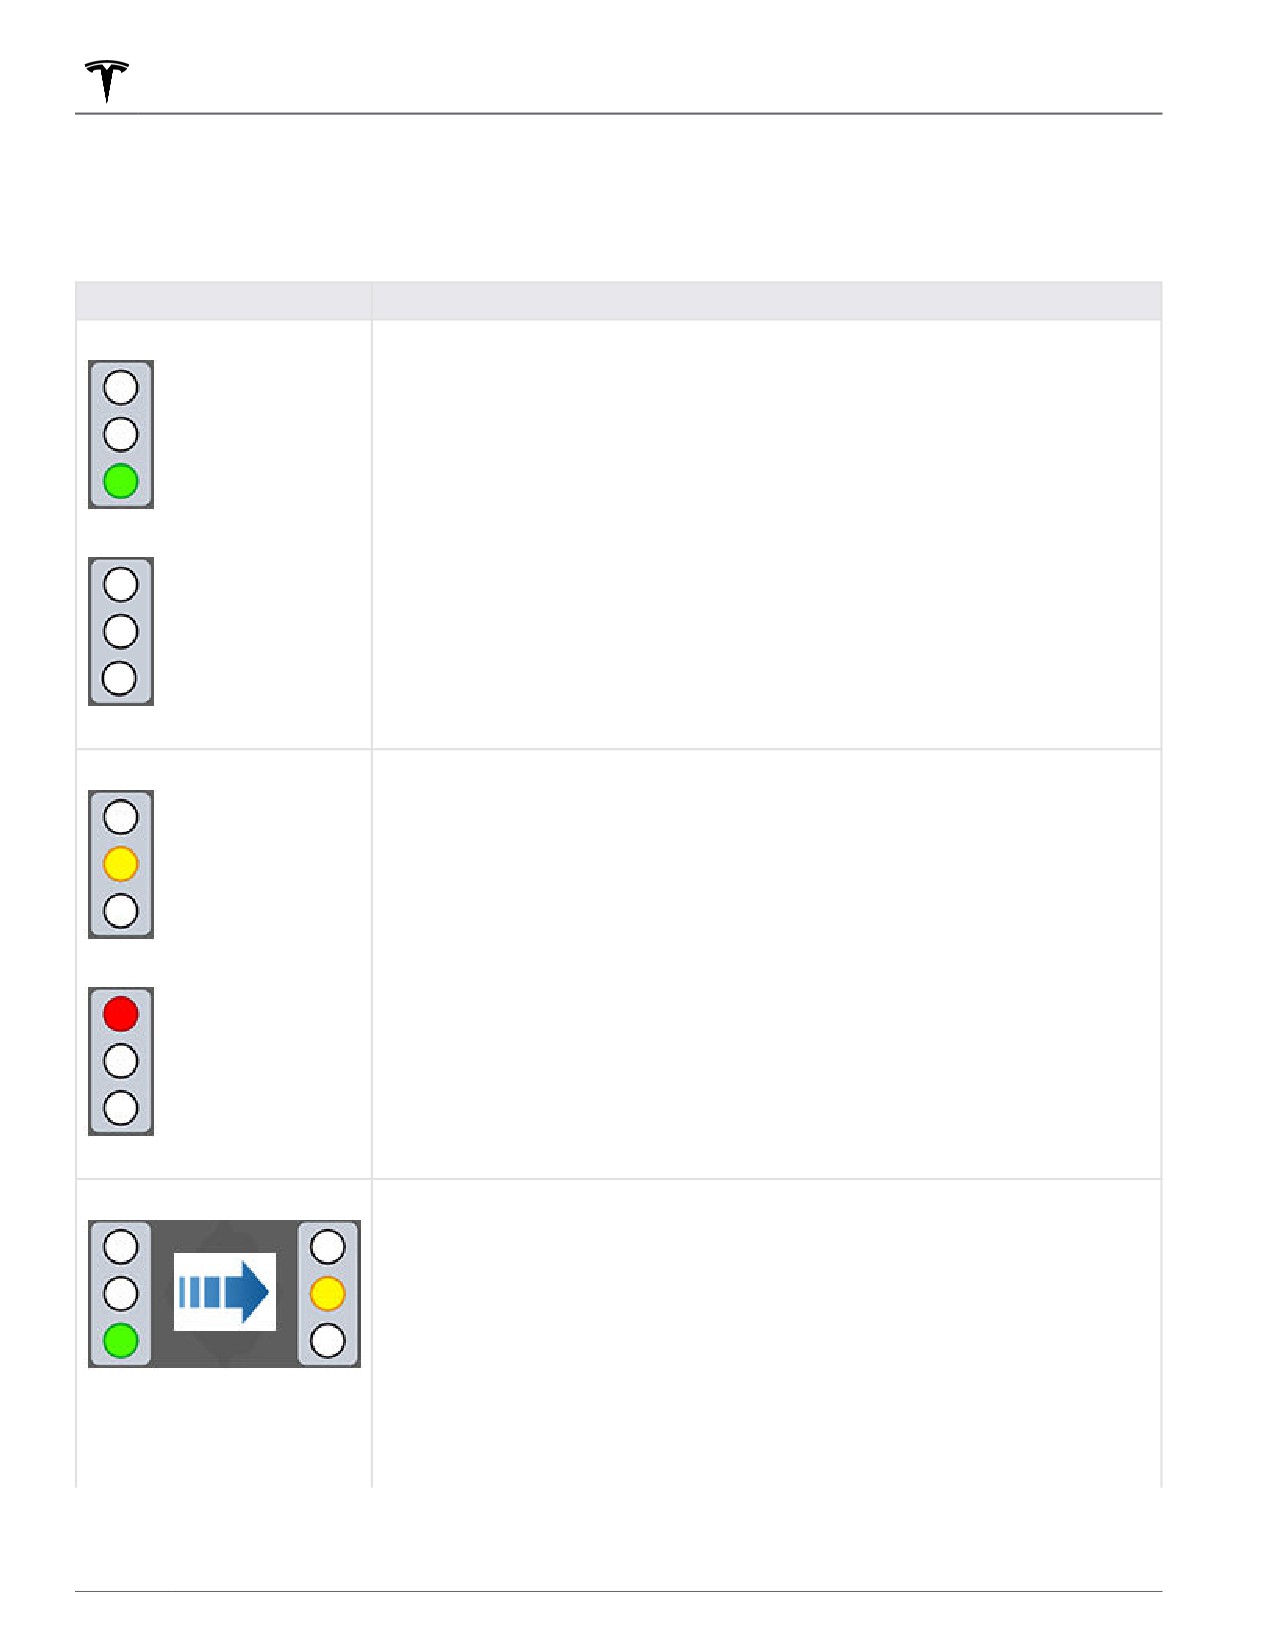
Tra
c Light and Stop Sign Control
Trac Lights
When driving with Autosteer or Tra
c-Aware Cruise Control engaged, and Tra
c Light and Stop Sign Control
enabled, Model S is designed to respond as follows when approaching intersections controlled by a tra
c light:
Type of Tra
c Light
Vehicle Intended Response
At a solid green tra
c light, or at a tra
c light that is currently off (not
illuminated), Model S slows down.
If you are following a car in front of you that continues through the intersection,
the instrument panel displays a green stop line and provided your hands are
detected on the steering yoke, Model S also continues. If a car is not in front of you,
the instrument panel displays a red stop line and you must confirm that you want
to continue through the intersection by briefly pressing the accelerator pedal. If
you don’t confirm, Model S stops at the red stop line.
NOTE: Model S resumes the set cruising speed when it continues through the
intersection, taking into consideration the speed of a vehicle in front of you.
Model S slows down and comes to a complete stop at the red stop line displayed
on the instrument panel. When you want to continue through the intersection (for
example, the light turns green again, or once Model S has come to a complete
stop), you must briefly press the accelerator pedal.
Model S slows down and comes to a complete stop at the red stop line displayed
on the instrument panel. When you want to proceed through the intersection (for
example, the light turns green again), you must briefly press the accelerator pedal.
NOTE: If the tra
c light changes after you've confirmed that you want to proceed
(for example, a green tra
c light turns yellow), Model S may stop instead of
continuing, especially if Model S determines that it can safely stop before entering
the intersection.
NOTE: Model S is not designed to proceed through an intersection when the tra
c
light is red or if the light turns yellow in situations when there is adequate distance
to safely stop before entering the intersection.
NOTE: You can take over driving at any time by manually braking to cancel
Autosteer or Tra
c-aware Cruise Control.
98
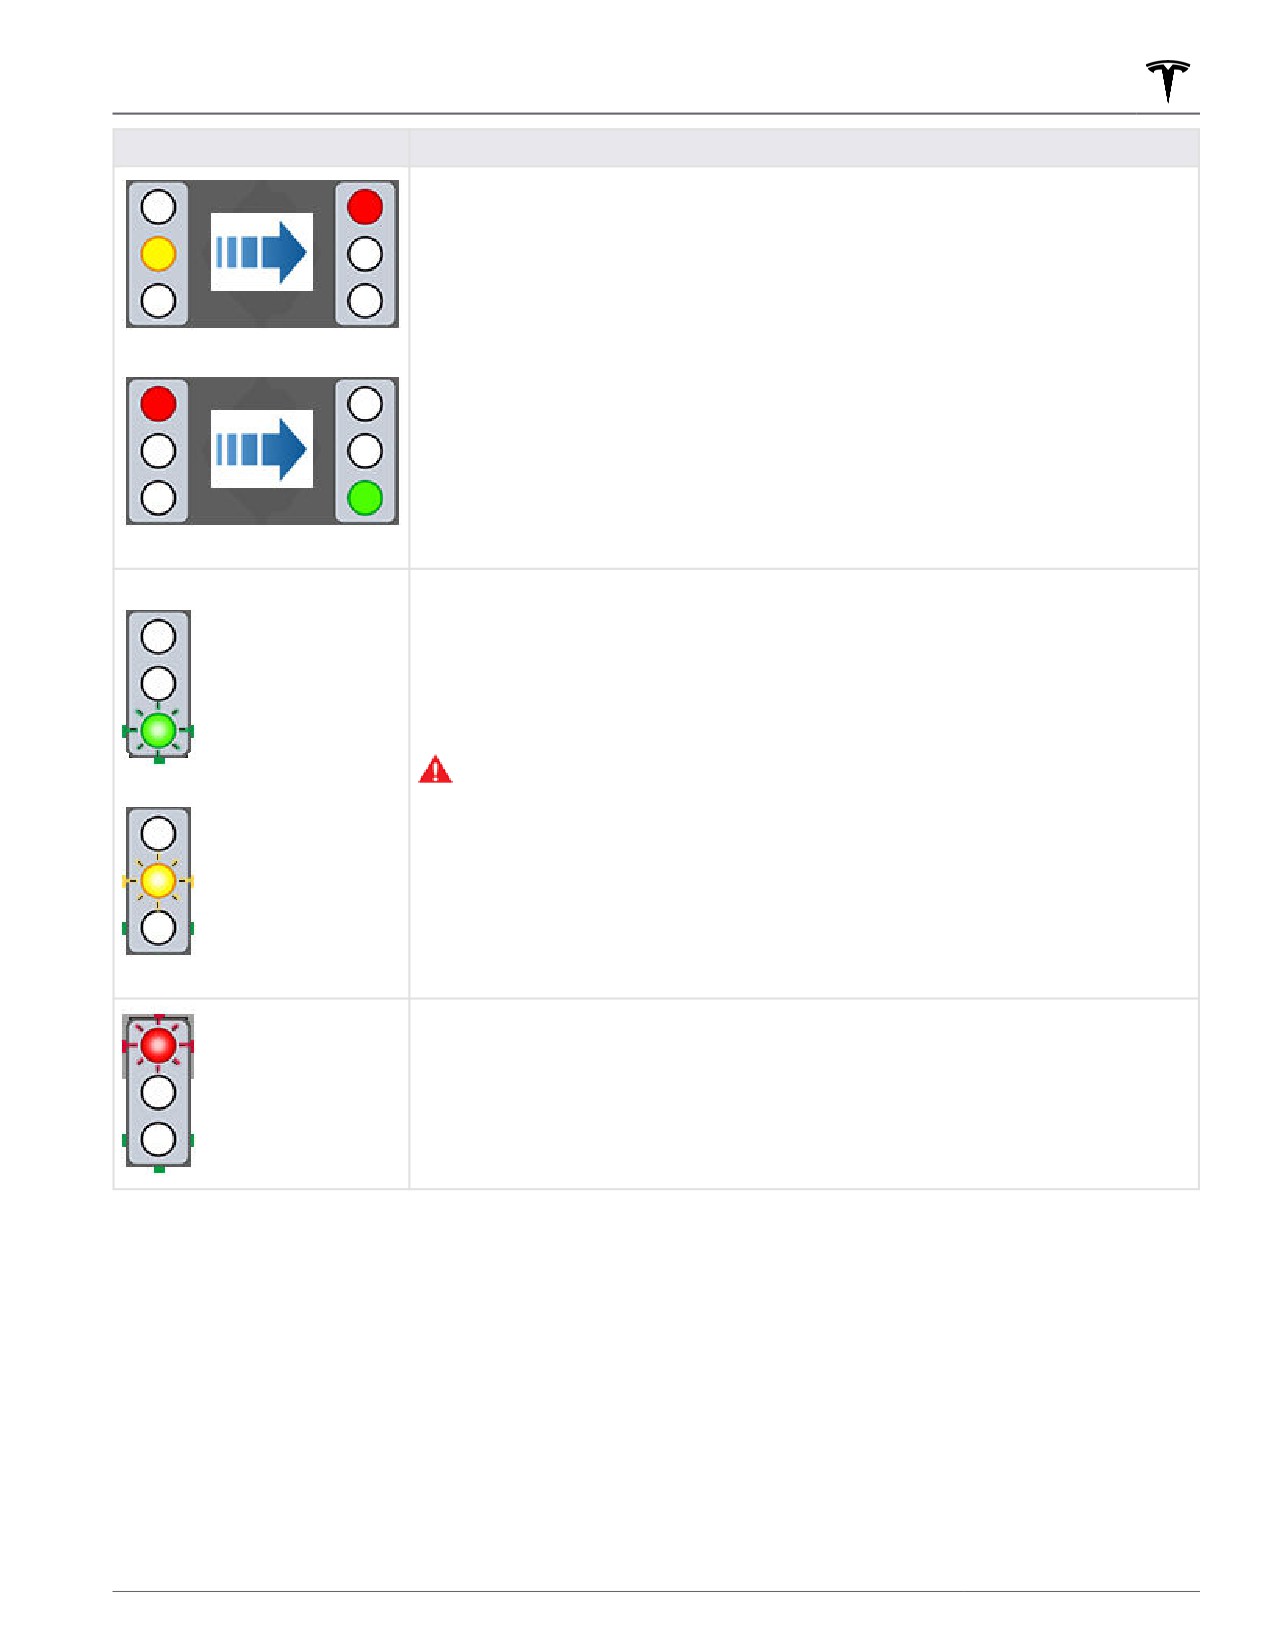
Tra
c Light and Stop Sign Control
Type of Tra
c Light
Vehicle Intended Response
Model S slows down. To proceed, you must briefly press the accelerator pedal. If
you don’t, Model S stops at the red stop line displayed on the instrument panel.
NOTE: To prevent Model S from stopping, and to minimize how much it slows
down as it approaches, you can confirm that you want to proceed by briefly
pressing the accelerator pedal at any time after the instrument panel displays the
red stop line. Model S resumes your set cruising speed immediately after you
confirm (taking into consideration the speed of a vehicle in front of you).
WARNING: Approach attentively and be prepared to press the brake pedal to
slow down or stop.
Model S slows down and comes to a complete stop at the red stop line displayed
on the instrument panel. When you want to proceed through the intersection (for
example, tra
c laws and conditions indicate it is safe and legal to proceed), you
must briefly press the accelerator pedal.
Autopilot
99