Dodge Challenger (2022 year). Manual in english - page 15
 

  Index      Manuals     Dodge Challenger (2022 year). Manual in english


Search            copyright infringement  


Content      ..     13      14      15      16     ..


Dodge Challenger (2022 year). Manual in english - page 15


233

IN CASE OF EMERGENCY

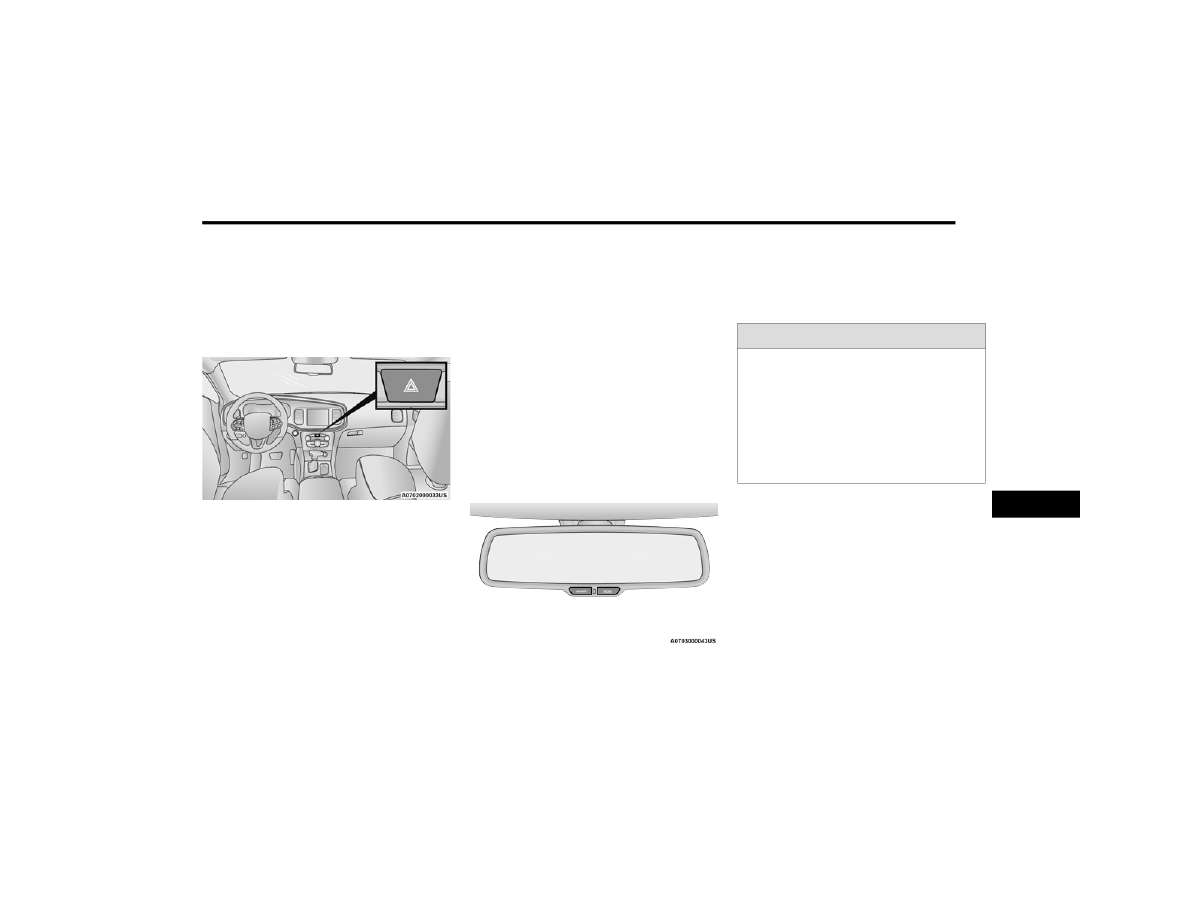
HAZARD WARNING FLASHERS  

The Hazard Warning Flashers button is located on 

the instrument panel, below the radio.

Hazard Warning Flashers Button

Push the button to turn on the Hazard Warning 

Flashers. When the button is activated, all 

directional turn signals will flash on and off to warn 

oncoming traffic of an emergency. Push the switch 

a second time to turn off the Hazard Warning 

Flashers.

This is an emergency warning system and it should 

not be used when the vehicle is in motion. Use it 

when your vehicle is disabled and it is creating a 

safety hazard for other motorists.
When you must leave the vehicle to seek 

assistance, the Hazard Warning Flashers will 

continue to operate even though the ignition is 

placed in the OFF position.

NOTE:

With extended use, the Hazard Warning Flashers 

may wear down your battery.

ASSIST AND SOS MIRROR — IF EQUIPPED

Assist And SOS Mirror

If equipped, the rearview mirror contains an 

ASSIST and a SOS button.

NOTE:

Your vehicle may be transmitting data as autho

-

rized by the subscriber  

Ú

page 322.

The SOS and ASSIST buttons will only function if 

you are connected to an operable LTE (voice/

data) or 4G (data) network. Other Uconnect 

services will only be operable if your SiriusXM 

Guardian™ service is active and you are 

connected to an operable LTE (voice/data) or 

4G (data) network.

WARNING!

ALWAYS obey traffic laws and pay attention to 

the road. ALWAYS drive safely with your hands on 

the steering wheel. You have full responsibility 

and assume all risks related to the use of the 

Uconnect and SiriusXM Guardian™ features and 

applications in this vehicle. Only use Uconnect 

features and SiriusXM Guardian™ services when 

it is safe to do so. Failure to do so may result in 

an accident involving serious injury or death.

7

234

IN CASE OF EMERGENCY


ASSIST Call
The ASSIST Button is used to automatically 

connect you to any one of the following support 

centers:

Roadside Assistance – If you get a flat tire, or 

need a tow, just push the ASSIST button and you 

will be connected to a representative for assis

-

tance. Roadside Assistance will know what 

vehicle you’re driving and its location. Additional 

fees may apply for roadside Assistance.

SiriusXM Guardian™ Customer Care – In-vehicle 

support for SiriusXM Guardian™.

Vehicle Customer Care – Total support for all 

other vehicle issues.

Uconnect Customer Care - Total support for 

Radio, Phone and NAV issues.

SOS Call
1. Push the SOS Call button on the Rearview 

Mirror.

NOTE:

In case the SOS Call button is pushed in error, 

there will be a 10 second delay before the SOS Call 

system initiates a call to a SOS operator. To cancel 

the SOS Call connection, push the SOS call button 

on the Rearview Mirror or press the cancellation 

button on the Device Screen. Termination of the 

SOS Call will turn off the green LED light on the 

Rearview Mirror.
2. The LED light located between the ASSIST and 

SOS buttons on the Rearview Mirror will turn 

green once a connection to a SOS operator has 

been made.

3. Once a connection between the vehicle and a 

SOS operator is made, the SOS Call system 

may transmit the following important vehicle 

information to a SOS operator: 

Indication that the occupant placed a SOS 

Call.

The vehicle brand.

The last known GPS coordinates of the 

vehicle.

4. You should be able to speak with the SOS 

operator through the vehicle audio system to 

determine if additional help is needed.

NOTE:

Your vehicle may be transmitting data as 

authorized by the subscriber.

Once a connection is made between the 

vehicle’s SOS Call system and the SOS oper

-

ator, the SOS operator may be able to open 

a voice connection with the vehicle to deter

-

mine if additional help is needed. Once the 

SOS operator opens a voice connection with 

the vehicle’s SOS Call system, the operator 

should be able to speak with you or other 

vehicle occupants and hear sounds occur

-

ring in the vehicle. The vehicle’s SOS Call 

system will attempt to remain connected 

with the SOS operator until the SOS oper

-

ator terminates the connection.

WARNING!

ALWAYS obey traffic laws and pay attention to 

the road. ALWAYS drive safely with your hands on 

the steering wheel. You have full responsibility 

and assume all risks related to the use of the 

Uconnect and SiriusXM Guardian™ features and 

applications in this vehicle. Only use Uconnect 

features and SiriusXM Guardian™ services when 

it is safe to do so. Failure to do so may result in 

an accident involving serious injury or death.

IN CASE OF EMERGENCY

235

(Continued)

5. The SOS operator may attempt to contact 

appropriate emergency responders and 

provide them with important vehicle 

information and GPS coordinates.

SOS Call System Limitations
Vehicles sold in Mexico DO NOT have SOS Call 

system capabilities.
SOS or other emergency line operators in Mexico 

may not answer or respond to SOS system calls.
If the SOS Call system detects a malfunction, any 

of the following may occur at the time the 

malfunction is detected, and at the beginning of 

each ignition cycle:

The Rearview Mirror light located between the 

ASSIST and SOS buttons will continuously

illuminate red.

The Device Screen will display the following 

message “Vehicle device requires service”. 

Please contact an authorized dealer.

An In-Vehicle Audio message will state “Vehicle 

device requires service”. Please contact an 

authorized dealer.

WARNING!

If anyone in the vehicle could be in danger 

(e.g., fire or smoke is visible, dangerous road 

conditions or location), do not wait for voice 

contact from an Emergency Services Agent. All 

occupants should exit the vehicle immediately 

and move to a safe location.

Never place anything on or near the vehicle’s 

operable network and GPS antennas. You 

could prevent operable network and GPS 

signal reception, which can prevent your 

vehicle from placing an emergency call. An 

operable network and GPS signal reception is 

required for the SOS Call system to function 

properly.

The SOS Call system is embedded into the 

vehicle’s electrical system. Do not add after

-

market electrical equipment to the vehicle’s 

electrical system. This may prevent your 

vehicle from sending a signal to initiate an 

emergency call. To avoid interference that can 

cause the SOS Call system to fail, never add 

aftermarket equipment (e.g., two-way mobile 

radio, CB radio, data recorder, etc.) to your 

vehicle’s electrical system or modify the 

antennas on your vehicle. IF YOUR VEHICLE 

LOSES BATTERY POWER FOR ANY REASON 

(INCLUDING DURING OR AFTER AN ACCI

-

DENT), THE UCONNECT FEATURES, APPS AND 

SERVICES, AMONG OTHERS, WILL NOT 

OPERATE.

Modifications to any part of the SOS Call 

system could cause the air bag system to fail 

when you need it. You could be injured if the 

air bag system is not there to help protect you.

WARNING!

7

236

IN CASE OF EMERGENCY


Even if the SOS Call system is fully functional, 

factors beyond FCA US LLC’s control may prevent 

or stop the SOS Call system operation. These 

include, but are not limited to, the following 

factors:

The ignition is in the OFF position.

The vehicle’s electrical systems are not intact.

The SOS Call system software and/or hardware 

are damaged during a crash.

The vehicle battery loses power or becomes 

disconnected during a vehicle crash.

LTE (voice/data) or 4G (data) network and/or 

Global Positioning Satellite signals are unavail

-

able or obstructed.

Equipment malfunction at the SOS operator 

facility.

Operator error by the SOS operator.

LTE (voice/data) or 4G (data) network conges

-

tion.

Weather.

Buildings, structures, geographic terrain, or 

tunnels.

NOTE:

Your vehicle may be transmitting data as autho

-

rized by the subscriber.

Never place anything on or near the vehicle’s 

LTE (voice/data) or 4G (data) and GPS 

antennas. You could prevent LTE (voice/data) or 

4G (data) and GPS signal reception, which can 

prevent your vehicle from placing an emergency 

call. An operable LTE (voice/data) or 4G (data) 

network connection and a GPS signal is 

required for the SOS Call system to function 

properly.

NOTE:

Changes or modifications not expressly approved 

by the party responsible for compliance could void 

the user's authority to operate the equipment.

Automatic SOS — If Equipped
Automatic SOS is a hands-free safety service that 

can immediately connect you with help in the event 

that your vehicle’s airbags deploy. Please refer to 

your provided radio supplement for complete 

information.

WARNING!

Ignoring the Rearview Mirror light could mean 

you will not have SOS Call services. If the Rear

-

view Mirror light is illuminated, have an autho

-

rized dealer service the SOS Call system 

immediately.

The Occupant Restraint Control module turns 

on the air bag Warning Light on the instrument 

panel if a malfunction in any part of the 

system is detected. If the Air Bag Warning 

Light is illuminated, have an authorized dealer 

service the Occupant Restraint Control system 

immediately.

WARNING!

ALWAYS obey traffic laws and pay attention to 

the road. ALWAYS drive safely with your hands on 

the steering wheel. You have full responsibility 

and assume all risks related to the use of the 

Uconnect and SiriusXM Guardian™ features and 

applications in this vehicle. Only use Uconnect 

features and SiriusXM Guardian™ services when 

it is safe to do so. Failure to do so may result in 

an accident involving serious injury or death.

CAUTION!

To avoid damage to the mirror during cleaning, 

never spray any cleaning solution directly onto 

the mirror. Apply the solution onto a clean cloth 

and wipe the mirror clean.

IN CASE OF EMERGENCY

237

JACKING AND TIRE CHANGING

P

REPARATIONS

 F

OR

 J

ACKING


1. Park the vehicle on a firm, level surface as far 

from the edge of the roadway as possible. 

Avoid icy or slippery areas.

2. Turn on the Hazard Warning Flashers.
3. Apply the parking brake.
4. Place the gear selector into PARK (automatic 

transmission) or FIRST gear (manual 

transmission).

5. Turn the ignition OFF.
6. Block both the front and rear of the wheel 

diagonally opposite the jacking position. For 

example, if the driver’s front wheel is being 

changed, block the passenger’s rear wheel.

Wheel Blocked

NOTE:

Passengers should not remain in the vehicle when 

the vehicle is being lifted or raised.

J

ACK

 L

OCATION

/S

PARE

 T

IRE

 S

TOWAGE


The jack and spare tire are both stowed under an 

access cover in the trunk. Follow these steps to 

access the jack and spare tire.

NOTE:

The spare tire must be removed in order to access 

the jack.

WARNING!

Do not attempt to change a tire on the side of 

the vehicle close to moving traffic. Pull far 

enough off the road to avoid the danger of 

being hit when operating the jack or changing 

the wheel.

Being under a jacked-up vehicle is dangerous. 

The vehicle could slip off the jack and fall on 

you. You could be crushed. Never put any part 

of your body under a vehicle that is on a jack. 

If you need to get under a raised vehicle, take 

it to a service center where it can be raised on 

a lift.

Never start or run the engine while the vehicle 

is on a jack.

The jack is designed to be used as a tool for 

changing tires only. The jack should not be 

used to lift the vehicle for service purposes. 

The vehicle should be jacked on a firm level 

surface only. Avoid ice or slippery areas.

WARNING!

Do not attempt to change a tire on the side of 

the vehicle close to moving traffic, pull far 

enough off the road to avoid being hit when 

operating the jack or changing the wheel.

7

238

IN CASE OF EMERGENCY


(Continued)

1. Open the trunk.
2. Lift the access cover using the pull strap.
3. Rotate the fastener securing the spare tire 

counterclockwise to remove it.

Removing Tire Fastener

4. Remove the spare tire.
5. Rotate the fastener securing the jack counter

-

clockwise to remove it.

Removing Jack Fastener

6. Remove the jack and lug wrench assembly 

from under the spare tire. Turn the jack screw 

to the left to loosen the lug wrench, and 

remove the wrench from the jack assembly.

J

ACKING

 A

ND

 C

HANGING

 A T

IRE


WARNING!

A loose tire or jack thrown forward in a collision 

or hard stop could endanger the occupants of 

the vehicle. Always stow the jack parts and the 

spare tire in the places provided. Have the 

deflated (flat) tire repaired or replaced 

immediately.

WARNING!

Carefully follow these tire changing warnings to 

help prevent personal injury or damage to your 

vehicle:

Always park on a firm, level surface as far from 

the edge of the roadway as possible before 

raising the vehicle.

Turn on the Hazard Warning Flashers.

Apply the parking brake firmly and place an 

automatic transmission in PARK; a manual 

transmission in REVERSE or FIRST gear.

Block the wheel diagonally opposite the wheel 

to be raised.

Never start or run the engine with the vehicle 

on a jack.

Do not let anyone sit in the vehicle when it is 

on a jack.

IN CASE OF EMERGENCY

239

Jack Warning Label

1. Remove the spare tire, jack, and lug wrench.
2. If equipped with aluminum wheels where the 

center cap covers the lug nuts, use the lug 

wrench to pry the center cap off carefully 

before raising the vehicle.

NOTE:

When the following label is present, the spare tire 

must be used for the rear wheel(s) only. For a flat 

front tire, you must first install the spare on one of 

the rear tires. Then, follow the jacking instructions 

for front tire replacement and replace the front 

road wheel with the wheel removed from the rear 

of the vehicle.

Spare Tire Label

3. Before raising the vehicle, use the lug wrench 

to loosen, but not remove, the lug nuts on the 

wheel with the flat tire. Turn the lug nuts 

counterclockwise one turn while the wheel is 

still on the ground.
Placement for the front and rear jacking loca

-

tions are critical. See the following images for 

proper jacking locations.

Jack Engagement Locations

Do not get under the vehicle when it is on a 

jack. If you need to get under a raised vehicle, 

take it to a service center where it can be 

raised on a lift.

Only use the jack in the positions indicated 

and for lifting this vehicle during a tire change.

If working on or near a roadway, be extremely 

careful of motor traffic.

CAUTION!

Do not attempt to raise the vehicle by jacking on 

locations other than those indicated in the 

Jacking Instructions for this vehicle.

WARNING!

7

240

IN CASE OF EMERGENCY


4. Place the jack underneath the lift area that is 

closest to the flat tire. Turn the jack screw 

clockwise to firmly engage the jack saddle with 

the lift area of the sill flange.

NOTE:

If the vehicle is too low for jack placement, slide 

the jack on its side and rotate it up into position.

Front Lifting Point

Front Jacking Location

Rear Lifting Point

Rear Jacking Location

5. Raise the vehicle just enough to remove the 

flat tire and install the spare tire.

WARNING!

Raising the vehicle higher than necessary can 

make the vehicle less stable. It could slip off the 

jack and hurt someone near it. Raise the vehicle 

only enough to remove the tire.

IN CASE OF EMERGENCY

241

6. Remove the lug nuts and tire.
7. Mount the spare tire.

Mounting Spare Tire

NOTE:

For vehicles so equipped, do not attempt to install 

a center cap or wheel cover on the compact spare  

Ú

page 302.

8. Install the lug nuts with the cone shaped end 

of the lug nut toward the wheel. Lightly tighten 

the lug nuts.

9. Lower the vehicle to the ground by turning the 

jack handle counterclockwise.

10. Finish tightening the wheel bolts. Push down 

on the wrench while at the end of the handle 

for increased leverage. Tighten the wheel bolts 

in a star pattern until each wheel bolt has been 

tightened twice  

Ú

page 311. If in doubt about 

the correct tightness, have them checked with 

a torque wrench by an authorized dealer or at 

a service station.

11. Stow the jack, tools and flat tire. Make sure the 

base of the jack faces the front of the vehicle 

before tightening down the fastener.

TIRE SERVICE KIT — IF EQUIPPED

Small punctures up to 1/4 inch (6 mm) in the tire 

tread can be sealed with Tire Service Kit. Foreign 

objects (e.g., screws or nails) should not be 

removed from the tire. Tire Service Kit can be used 

in outside temperatures down to approximately 

-4°F (-20°C).
This kit will provide a temporary tire seal, allowing 

you to drive your vehicle up to 100 miles (160 km) 

with a maximum speed of 50 mph (80 km/h).

T

IRE

 S

ERVICE

 K

IT

 S

TORAGE

The Tire Service Kit is located in the trunk.

Tire Service Kit Location

CAUTION!

Be sure to mount the spare tire with the valve 

stem facing outward. The vehicle could be 

damaged if the spare tire is mounted incorrectly.

WARNING!

To avoid the risk of forcing the vehicle off the 

jack, do not tighten the wheel nuts fully until the 

vehicle has been lowered. Failure to follow this 

warning may result in serious injury.

WARNING!

A loose tire or jack thrown forward in a collision 

or hard stop could endanger the occupants of 

the vehicle. Always stow the jack parts and the 

spare tire in the places provided. Have the 

deflated (flat) tire repaired or replaced 

immediately.

7

242

IN CASE OF EMERGENCY


T

IRE

 S

ERVICE

 K

IT

 C

OMPONENTS

 A

ND


O

PERATION

Tire Service Kit Components

Using The Mode Select Knob And Hoses

Your Tire Service Kit is equipped with the following 

symbols to indicate the air or sealant mode.

Selecting Air Mode 

Push in the Mode Select Knob (6) and 

turn to this position for air pump oper

-

ation only. Use the Black Air Pump 

Hose (8) when selecting this mode.

Selecting Sealant Mode 

Push in the Mode Select Knob (6) and 

turn to this position to inject the Tire 

Service Kit Sealant and to inflate the 

tire. Use the Sealant Hose (clear hose) 

(4) when selecting this mode.

Using The Power Button 

Push and release the Power Button (3) 

once to turn on the Tire Service Kit. 

Push and release the Power Button (3) 

again to turn Off the Tire Service Kit.

Using The Deflation Button 

Push the Deflation Button (2) to 

reduce the air pressure in the tire if it 

becomes overinflated.

T

IRE

 S

ERVICE

 K

IT

 U

SAGE

 P

RECAUTIONS

Replace the Tire Service Kit Sealant Bottle (1) 

and Sealant Hose (4) prior to the expiration date 

(printed at the upper left hand corner on the 

bottle label) to assure optimum operation of the 

system  

Ú

page 246.

Tire Service Kit Expiration Date Location

The Sealant Bottle (1) and Sealant Hose (4) are 

a one tire application use and need to be 

replaced after each use. Always replace these 

components immediately at your original equip

-

ment vehicle dealer.

1 — Sealant Bottle
2 — Deflation Button
3 — Power Button
4 — Sealant Hose (Clear)
5 — Pressure Gauge
6 — Mode Select Knob
7 — Power Plug (located on the bottom side of the 

Tire Service Kit)
8 — Air Pump Hose (Black)

IN CASE OF EMERGENCY

243

(Continued)

When the Tire Service Kit sealant is in a liquid 

form, clean water and a damp cloth will remove 

the material from the vehicle or tire and wheel 

components. Once the sealant dries, it can 

easily be peeled off and properly discarded.

For optimum performance, make sure the valve 

stem on the wheel is free of debris before 

connecting the Tire Service Kit.

You can use the Tire Service Kit air pump to 

inflate bicycle tires. The kit also comes with two 

needles, located in the Accessory Storage 

Compartment (on the bottom of the air pump) 

for inflating sport balls, rafts, or similar inflat

-

able items. However, use only the Air Pump 

Hose (8) and make sure the Mode Select Knob 

(6) is in the Air Mode when inflating such items 

to avoid injecting sealant into them. The Tire 

Service Kit Sealant is only intended to seal 

punctures less than 1/4 inch (6 mm) diameter 

in the tread of your tire.

Do not lift or carry the Tire Service Kit by the 

hoses.

WARNING!

Do not attempt to seal a tire on the side of the 

vehicle closest to traffic. Pull far enough off 

the road to avoid the danger of being hit when 

using the Tire Service Kit.

Do not use Tire Service Kit or drive the vehicle 

under the following circumstances:

If the puncture in the tire tread is approxi

-

mately 1/4 inch (6 mm) or larger.

If the tire has any sidewall damage.

If the tire has any damage from driving 

with extremely low tire pressure.

If the tire has any damage from driving on 

a flat tire.

If the wheel has any damage.

If you are unsure of the condition of the 

tire or the wheel.

Keep Tire Service Kit away from open flames 

or heat source.

A loose Tire Service Kit thrown forward in a 

collision or hard stop could endanger the 

occupants of the vehicle. Always stow the Tire 

Service Kit in the place provided. Failure to 

follow these warnings can result in injuries 

that are serious or fatal to you, your passen

-

gers, and others around you.

Take care not to allow the contents of Tire 

Service Kit to come in contact with hair, eyes, 

or clothing. Tire Service Kit sealant is harmful 

if inhaled, swallowed, or absorbed through the 

skin. It causes skin, eye, and respiratory irrita

-

tion. Flush immediately with plenty of water if 

there is any contact with eyes or skin. Change 

clothing as soon as possible, if there is any 

contact with clothing.

Tire Service Kit Sealant solution contains 

latex. In case of an allergic reaction or rash, 

consult a physician immediately. Keep Tire 

Service Kit out of reach of children. If swal

-

lowed, rinse mouth immediately with plenty of 

water and drink plenty of water. Do not induce 

vomiting! Consult a physician immediately.

WARNING!

7

244

IN CASE OF EMERGENCY


S

EALING

 A T

IRE

 W

ITH

 T

IRE

 S

ERVICE

 K

IT

(A) Whenever You Stop To Use Tire Service 

Kit:

1. Pull over to a safe location and turn on the 

vehicle’s Hazard Warning Flashers.

2. Verify that the valve stem (on the wheel with 

the deflated tire) is in a position that is near to 

the ground. This will allow the Tire Service Kit 

Hoses (4) and (8) to reach the valve stem and 

keep the Tire Service Kit flat on the ground. 

This will provide the best positioning of the kit 

when injecting the sealant into the deflated 

tire and running the air pump. Move the 

vehicle as necessary to place the valve stem in 

this position before proceeding.

3. Place the transmission in PARK (auto 

transmission) or in Gear (manual 

transmission) and place the ignition in the OFF 

position.

4. Apply the parking brake.

(B) Setting Up To Use Tire Service Kit:

1. Push in the Mode Select Knob (6) and turn to 

the Sealant Mode position.

2. Uncoil the Sealant Hose (4) and then remove 

the cap from the fitting at the end of the hose.

3. Place the Tire Service Kit flat on the ground 

next to the deflated tire.

4. Remove the cap from the valve stem and then 

screw the fitting at the end of the Sealant Hose 

(4) onto the valve stem.

5. Uncoil the Power Plug (7) and insert the plug 

into the vehicle’s 12 Volt power outlet.

NOTE:

Do not remove foreign objects (e.g., screws or 

nails) from the tire.

(C) Injecting Tire Service Kit Sealant Into 

The Deflated Tire:

Always start the engine before turning ON the 

Tire Service Kit.

NOTE:

Manual transmission vehicles must have the 

parking brake engaged and the gear selector in 

NEUTRAL.

After pushing the Power Button (3), the sealant 

(white fluid) will flow from the Sealant Bottle (1) 

through the Sealant Hose (4) and into the tire.

NOTE:

Sealant may leak out through the puncture in the 

tire.
If the sealant (white fluid) does not flow within 0 – 

10 seconds through the Sealant Hose :
1. Push the Power Button (3) to turn Off the Tire 

Service Kit. Disconnect the Sealant Hose (4) 

from the valve stem. Make sure the valve 

stem is free of debris. Reconnect the Sealant 

Hose (4) to the valve stem. Check that the 

Mode Select Knob (6) is in the Sealant Mode 

position and not Air Mode. Push the Power 

Button (3) to turn On the Tire Service Kit.

2. Connect the Power Plug (7) to a different 12 

Volt power outlet in your vehicle or another 

vehicle, if available. Make sure the engine is 

running before turning ON the Tire Service Kit.

3. The Sealant Bottle (1) may be empty due to 

previous use. Call for assistance.

NOTE:

If the Mode Select Knob (6) is on Air Mode and the 

pump is operating, air will dispense from the Air 

Pump Hose (8) only, not the Sealant Hose (4).

IN CASE OF EMERGENCY

245

If the sealant (white fluid) does flow through the 

Sealant Hose :
1. Continue to operate the pump until sealant is 

no longer flowing through the hose (typically 

takes 30 - 70 seconds). As the sealant flows 

through the Sealant Hose (4), the Pressure 

Gauge (5) can read as high as 70 psi

(4.8 Bar). The Pressure Gauge (5) will 

decrease quickly from approximately 70 psi 

(4.8 Bar) to the actual tire pressure when the 

Sealant Bottle (1) is empty.

2. The pump will start to inject air into the tire 

immediately after the Sealant Bottle (1) is 

empty. Continue to operate the pump and 

inflate the tire to the pressure indicated on the 

tire pressure label on the driver-side latch 

pillar (recommended pressure). Check the tire 

pressure by looking at the Pressure Gauge (5).

If the tire does not inflate to at least 26 psi (1.8 

Bar) pressure within 15 minutes:

The tire is too badly damaged. Do not attempt to 

drive the vehicle further. Call for assistance.

NOTE:

If the tire becomes overinflated, push the Deflation 

Button (2) to reduce the tire pressure to the recom

-

mended inflation pressure before continuing.

If the tire inflates to the recommended pressure or 

is at least 26 psi (1.8 Bar) pressure within 

15 minutes:
1. Push the Power Button (3) to turn off the Tire 

Service Kit.

2. Remove the Speed Limit sticker from the top of 

the Sealant Bottle (1) and place the sticker on 

the instrument panel.

3. Immediately disconnect the Sealant Hose (4) 

from the valve stem, reinstall the cap on the 

fitting at the end of the hose, and place the Tire 

Service Kit in the vehicle storage location.

(D) Drive Vehicle:

Immediately after injecting sealant and inflating the 

tire, drive the vehicle 5 miles (8 km) or 10 minutes to 

ensure distribution of the Tire Service Kit Sealant 

within the tire. Do not exceed 50 mph (80 km/h).

(E) After Driving:

Pull over to a safe location before continuing  

Ú

page 244.

1. Push in the Mode Select Knob (6) and turn to the 

Air Mode position.

2. Uncoil the power plug and insert the plug into the 

vehicle's 12 Volt power outlet.

3. Uncoil the Air Pump Hose (8) (black in color) and 

screw the fitting at the end of hose on to the valve 

stem.

4. Check the pressure in the tire by reading the 

Pressure Gauge (5).

CAUTION!

The metal end fitting from Power Plug (7) may 

get hot after use, so it should be handled care

-

fully.

Failure to reinstall the cap on the fitting at the 

end of the Sealant Hose (4) can result in 

sealant contacting your skin, clothing, and the 

vehicle’s interior. It can also result in sealant 

contacting internal Tire Service Kit compo

-

nents which may cause permanent damage to 

the kit.

WARNING!

Tire Service Kit is not a permanent flat tire 

repair. Have the tire inspected and repaired or 

replaced after using Tire Service Kit. Do not 

exceed 50 mph (80 km/h) until the tire is 

repaired or replaced. Failure to follow this 

warning can result in injuries that are serious or 

fatal to you, your passengers, and others around 

you.

7

246

IN CASE OF EMERGENCY


If tire pressure is less than 19 psi (1.3 Bar):
The tire is too badly damaged. Do not attempt to drive 

the vehicle further. Call for assistance.
If the tire pressure is 19 psi (1.3 Bar) or higher:
1. Push the Power Button (3) to turn on Tire Service 

Kit and inflate the tire to the pressure indicated 

on the tire and loading information label on the 

driver-side door opening.

NOTE:

If the tire becomes overinflated, push the Deflation 

Button (2) to reduce the tire pressure to the recom

-

mended inflation pressure before continuing.
2. Disconnect the Tire Service Kit from the valve 

stem, reinstall the cap on the valve stem and 

unplug from 12 Volt outlet.

3. Place the Tire Service Kit in its proper storage 

area in the vehicle.

4. Have the tire inspected and repaired or replaced 

at the earliest opportunity at an authorized 

dealer or tire service center.

5. Remove the Speed Limit sticker from the 

instrument panel after the tire has been 

repaired.

6. Replace the Sealant Bottle (1) and Sealant Hose 

(4) assembly at an authorized dealer as soon as 

possible.

NOTE:

When having the tire serviced, advise the authorized 

dealer or service center that the tire has been sealed 

using the Tire Service Kit.

(F) Sealant Bottle And Hose Replacement:

1. Uncoil the Sealant Hose (4) (clear in color).
2. Locate the round Sealant Bottle release button 

in the recessed area under the sealant bottle.

3. Push the Sealant Bottle release button. The 

Sealant Bottle (1) will pop up. Remove the 

bottle and dispose of it accordingly.

4. Clean any remaining sealant from the Tire 

Service Kit housing.

5. Position the new Sealant Bottle (1) in the 

housing so that the Sealant Hose (4) aligns 

with the hose slot in the front of the housing. 

Push the bottle into the housing. An audible 

click will be heard indicating the bottle is 

locked into place.

6. Verify that the cap is installed on the fitting at 

the end of the Sealant Hose (4) and return the 

hose to its storage area (located on the bottom 

of the air pump).

7. Return the Tire Service Kit to its storage 

location in the vehicle.

JUMP STARTING 

If your vehicle has a discharged battery, it can be 

jump started using a set of jumper cables and a 

battery in another vehicle, or by using a portable 

battery booster pack. Jump starting can be 

dangerous if done improperly, so please follow the 

procedures in this section carefully.

NOTE:

When using a portable battery booster pack, follow 

the manufacturer's operating instructions and 

precautions.

WARNING!

Do not attempt jump starting if the battery is 

frozen. It could rupture or explode and cause 

personal injury.

CAUTION!

Do not use a portable battery booster pack or 

any other booster source with a system voltage 

greater than 12 Volts or damage to the battery, 

starter motor, alternator or electrical system may 

occur.

IN CASE OF EMERGENCY

247

(Continued)

P

REPARATIONS

 F

OR

 J

UMP

 S

TART

The battery is stored under an access cover in the 

trunk. Remote battery posts are located on the 

right side of the engine compartment for jump 

starting.

Remote Jump Starting Post Locations

NOTE:

The remote battery posts are viewed by standing 

on the right side of the vehicle looking over the 

fender. The positive battery post may be covered 

with a protective cap. Lift up on the cap to gain 

access to the positive battery post. Do not jump off 

fuses. Only jump directly off positive post which 

has a positive (+) symbol on or around the post.

See below steps to prepare for jump starting:
1. Apply the parking brake, shift into PARK 

(automatic transmission) or FIRST gear 

(manual transmission) and cycle the ignition 

to OFF.

2. Turn off the heater, radio, and all electrical 

accessories.

3. Pull upward and remove the protective cover 

over the remote positive (+) battery post.

4. If using another vehicle to jump start the 

battery, park the vehicle within the jumper 

cable’s reach, apply the parking brake and 

make sure the ignition is OFF.

J

UMP

 S

TARTING

 P

ROCEDURE

Remote Positive (+) Post
Remote Negative (-) Post

WARNING!

Do not allow vehicles to touch each other as this 

could establish a ground connection and 

personal injury could result.

WARNING!

Take care to avoid the radiator cooling fan 

whenever the hood is raised. It can start 

anytime the ignition switch is ON. You can be 

injured by moving fan blades.

Remove any metal jewelry such as rings, 

watch bands and bracelets that could make 

an inadvertent electrical contact. You could be 

seriously injured.

Batteries contain sulfuric acid that can burn 

your skin or eyes and generate hydrogen gas 

which is flammable and explosive. Keep open 

flames or sparks away from the battery.

WARNING!

Failure to follow this jump starting procedure 

could result in personal injury or property 

damage due to battery explosion.

CAUTION!

Failure to follow these procedures could result in 

damage to the charging system of the booster 

vehicle or the discharged vehicle.

WARNING!

7

248

IN CASE OF EMERGENCY


1. Connect the positive (+) end of the jumper 

cable to the remote positive (+) post of the 

vehicle with the discharged battery.

2. Connect the opposite end of the positive (+) 

jumper cable to the positive (+) post of the 

booster battery.

3. Connect the negative (-) end of the jumper 

cable to the negative (-) post of the booster 

battery.

4. Connect the opposite end of the negative (-) 

jumper cable to the remote negative (-) post 

(exposed metallic/unpainted post of the 

discharge vehicle) located directly behind the 

under-hood fuse box.

5. Start the engine in the vehicle that has the 

booster battery, let the engine idle a few 

minutes, and then start the engine in the 

vehicle with the discharged battery.

6. Once the engine is started, follow the discon

-

nection procedure below.

Disconnecting The Jumper Cables
1. Disconnect the negative (-) end of the jumper 

cable from the remote negative (-) post of the 

vehicle with the discharged battery.

2. Disconnect the opposite end of the negative (-) 

jumper cable from the negative (-) post of the 

booster battery.

3. Disconnect the positive (+) end of the jumper 

cable from the positive (+) post of the booster 

battery.

4. Disconnect the opposite end of the positive (+) 

jumper cable from the remote positive (+) post 

of the vehicle with the discharged battery, and 

reinstall the protective cap.

If frequent jump starting is required to start your 

vehicle you should have the battery and charging 

system inspected at an authorized dealer.

IF YOUR ENGINE OVERHEATS 

If the vehicle is overheating, it will need to be 

serviced by an authorized dealer.
In any of the following situations, you can reduce 

the potential for overheating by taking the 

appropriate action.

On the highways — slow down.

In city traffic — while stopped, place the trans

-

mission in NEUTRAL (N), but do not increase the 

engine idle speed while preventing vehicle 

motion with the brakes.

WARNING!

Do not connect the jumper cable to the negative 

(-) post of the discharged battery. The resulting 

electrical spark could cause the battery to 

explode and could result in personal injury.

CAUTION!

Do not run the booster vehicle engine above

2,000 RPM since it provides no charging benefit, 

wastes fuel, and can damage booster vehicle 

engine.

CAUTION!

Accessories plugged into the vehicle power 

outlets draw power from the vehicle’s battery, 

even when not in use (i.e., cellular devices, etc.). 

Eventually, if plugged in long enough without 

engine operation, the vehicle’s battery will 

discharge sufficiently to degrade battery life 

and/or prevent the engine from starting.


Content      ..     13      14      15      16     ..