Lincoln Continental (2019 year). Manual - part 6
Note: If you press any adjustment or
memory button when in easy exit mode, the
system cancels the operation.
Note: Depending on your vehicle, the column
may move up and in.
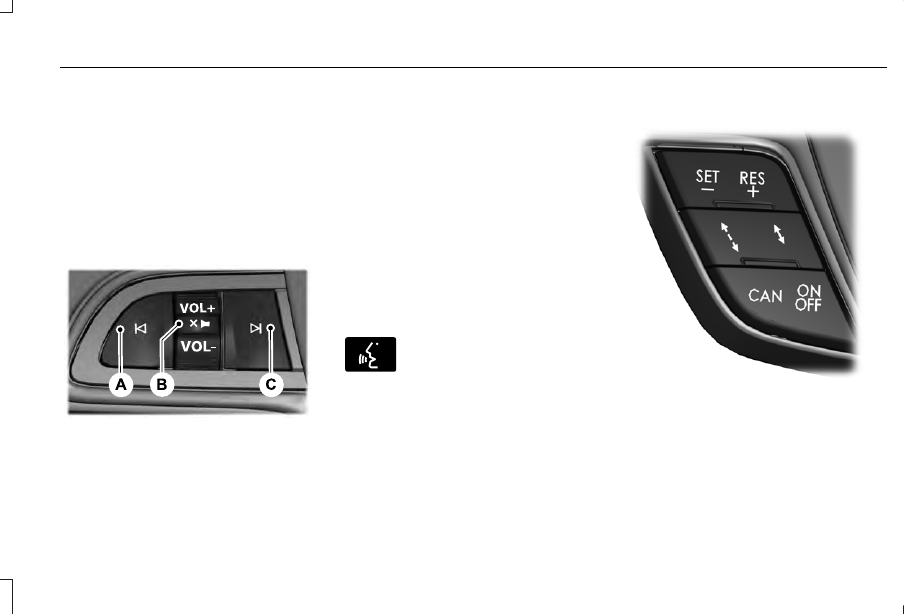
AUDIO CONTROL
You can operate the following functions with
the control:
E221073
Seek down or previous.
A
Volume up or down and mute.
B
Seek up or next.
C
Seek, Next or Previous
Press the seek button to:
•
Tune the radio to the next or previous
stored preset.
•
Play the next or the previous track.
Press and hold the seek button to:
•
Tune the radio to the next station up or
down the frequency band.
•
Seek through a track.
VOICE CONTROL
The controls are on the steering wheel.
E142599
Press and release to activate voice
recognition.
CRUISE CONTROL
E223599
See Using Adaptive Cruise Control (page
234).
87
Continental (CPL) Canada/United States of America, enUSA, Edition date: 201807, Second-Printing
Steering Wheel