Dodge 1500 (2012 year). Manual - part 37


  Index      Dodge     Dodge 1500 (2012 year) - manual in english


Search            copyright infringement  


Content      ..     35      36      37      38     ..


Dodge 1500 (2012 year). Manual - part 37


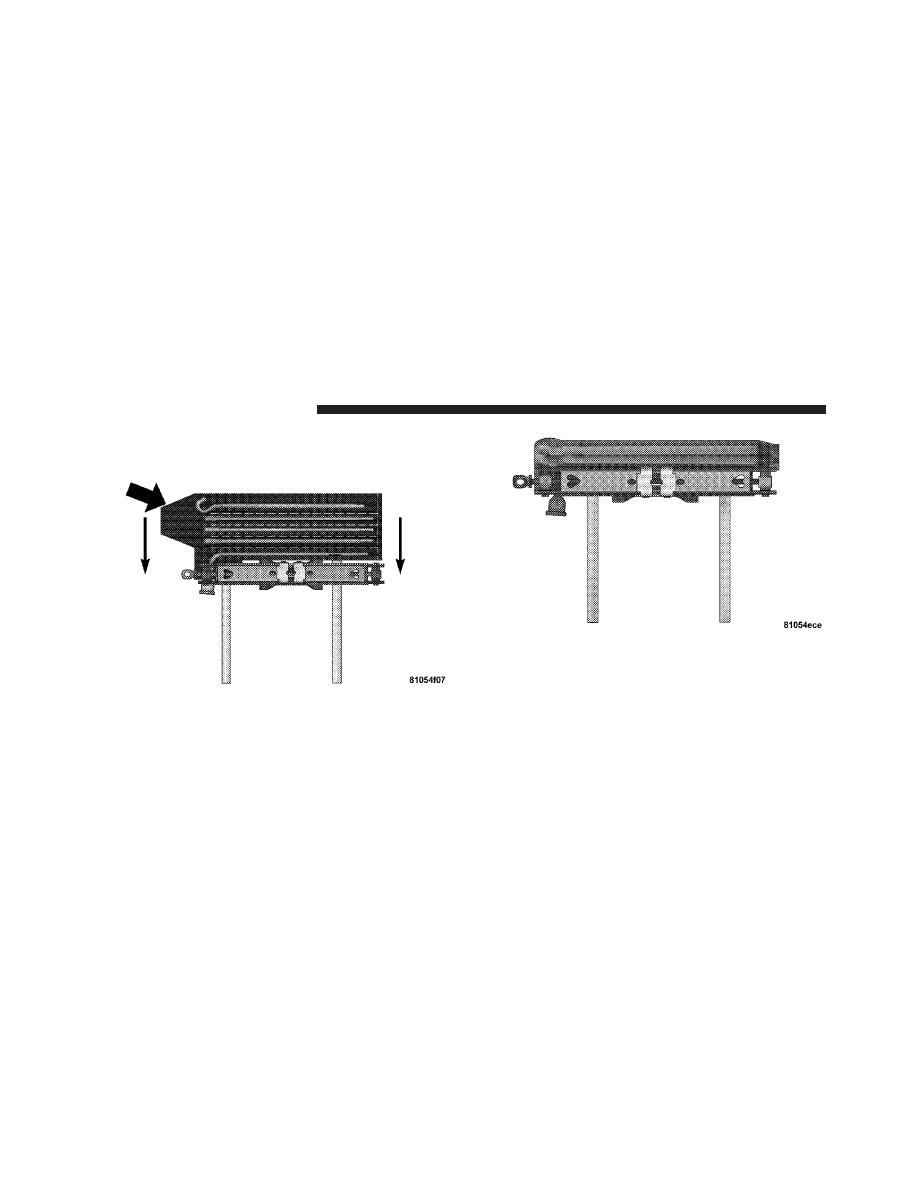
3. Fold the flap and roll the jack tool kit into a cylindrical
package (in direction of arrows) and tie to the jack using
the tie straps.

Folding Flap And Rolling Bag

Tying Bag To Jack With Straps

588

WHAT TO DO IN EMERGENCIES

4. Place the jack and tools in the storage position holding
the jack by the jack turn-screw, slip the jack and tools
under the seat so that the bottom slot engages into the
fastener on the floor, and then secure to the floor pan
using the wing bolt. Reinstall the plastic cover.

Jack And Tools Tied

Jack And Tools (1500 Series)

6

WHAT TO DO IN EMERGENCIES

589

Removing The Spare Tire

Remove the spare tire before attempting to jack up the
truck. Attach the wheel wrench to the jack extension tube.
Insert the tube through the access hole between the lower
tailgate and the top of the bumper and into the winch
mechanism tube. Rotate the wheel wrench handle coun-
terclockwise until the spare tire is on the ground with
enough cable slack to allow you to pull it out from under
the vehicle. When the spare is clear, tilt the retainer at the
end of the cable and pull it through the center of the
wheel.

NOTE:

Always stow the spare tire with the valve stem

facing the ground.

Jack And Tools (2500/3500 Series)

590

WHAT TO DO IN EMERGENCIES

It is recommended that you stow the flat or spare to
avoid tangling the loose cable.

NOTE:

The winch mechanism is designed for use with

the jack extension tube only. Use of an air wrench or other
power tools is not recommended and can damage the
winch.

Preparations

1. Park the vehicle on a firm, level surface. Avoid ice or
slippery areas.

WARNING!

Do not attempt to change a tire on the side of the
vehicle close to moving traffic, pull far enough off
the road to avoid the danger of being hit when
operating the jack or changing the wheel.

2. Turn on the Hazard Warning flasher.

3. Set the parking brake.

Removing The Spare Tire

1 — Wheel Wrench
2 — Spare Tire

6

WHAT TO DO IN EMERGENCIES

591

4. Place the shift lever into PARK. On four-wheel drive
vehicles, shift the transfer case to the 4L position.

5. Turn the ignition OFF.

6. Block both the front and rear of the
wheel diagonally opposite the jacking
position. For example, if the right front
wheel is being changed, block the left
rear wheel.

NOTE:

Passengers should not remain in the vehicle

when the vehicle is being jacked.

Instructions

WARNING!

Carefully follow these tire changing warnings to
help prevent personal injury or damage to your
vehicle:
• Always park on a firm, level surface as far from

the edge of the roadway as possible before raising
the vehicle.

• Turn on the Hazard Warning flasher.

• Block the wheel diagonally opposite the wheel to

be raised.

• Set the parking brake firmly and set an automatic

transmission in PARK; a manual transmission in
REVERSE.

• Never start or run the engine with the vehicle on a

jack.

(Continued)

592

WHAT TO DO IN EMERGENCIES

WARNING! (Continued)

• Do not let anyone sit in the vehicle when it is on a

jack.

• Do not get under the vehicle when it is on a jack.

• Only use the jack in the positions indicated and

for lifting this vehicle during a tire change.

• If working on or near a roadway, be extremely

careful of motor traffic.

• To assure that spare tires, flat or inflated, are

securely stowed, spares must be stowed with the
valve stem facing the ground.

CAUTION!

Do not attempt to raise the vehicle by jacking on
locations other than those indicated in the Jacking
Instructions for this vehicle.

1. Remove the spare wheel, jack, and tools from storage.

2. Using the wheel wrench, loosen, but do not remove,
the wheel nuts by turning them counterclockwise one
turn while the wheel is still on the ground.

3. Placement of the jack:

Jack Warning Label

6

WHAT TO DO IN EMERGENCIES

593

• 1500 Series Trucks
When changing a front wheel, place the scissors jack
under the rear portion of the lower control arm as shown
below.

Operate the jack using the jack drive tube and the wheel
wrench. The tube extension may be used but is not
required.

4X2 Jacking Location

4X4 Jacking Location

594

WHAT TO DO IN EMERGENCIES

For 4x2 and 4x4 trucks, when changing a rear wheel,
assemble the jack drive tube to the jack and connect the
drive tube to the extension tube. Place the jack under the
axle between the wheel and the shock bracket with the
drive tubes extending to the rear.

Connect the jack tube extension and wheel wrench.

CAUTION!

Before raising the wheel off the ground, make sure
that the jack will not damage surrounding truck parts
and adjust the jack position as required.

Rear Jacking Location

6

WHAT TO DO IN EMERGENCIES

595

• 2500/3500 Series Trucks
For 2500/3500 4x2 series trucks, when changing a front
wheel, place the bottle jack under the frame rail behind
the wheel. Locate the jack as far forward as possible on
the straight part of the frame.

Operate the jack using the jack drive tube and the wheel
wrench. The tube extension, may be used, but is not
required.

For 2500/3500 4x4 series trucks, when changing the front
wheel, assemble the jack drive tube to the jack and
connect the drive tube to the extension tube. Place the
jack under the axle as close to the tire as possible with the
drive tubes extending to the front. Connect the jack tube
extension and wheel wrench.

4x2 Jacking Location

596

WHAT TO DO IN EMERGENCIES

For 4x2 and 4x4 trucks, when changing a rear wheel,
assemble the jack drive tube to the jack and connect the
drive tube to the extension tube. Place the jack under the
axle between the spring and the shock absorber with the
drive tubes extending to the rear.

Connect the jack tube extension and wheel wrench.

4x4 Jacking Location

Rear Jacking Location (All)

6

WHAT TO DO IN EMERGENCIES

597

CAUTION!

Before raising the wheel off the ground, make sure
that the jack will not damage surrounding truck parts
and adjust the jack position as required.

NOTE:

If the bottle jack will not lower by turning the

dial (thumbwheel) by hand, it may be necessary to use
the jack drive tube in order to lower the jack.

4. By rotating the wheel wrench clockwise, raise the
vehicle until the wheel just clears the surface.

WARNING!

Raising the vehicle higher than necessary can make
the vehicle unstable and cause a collision. It could
slip off the jack and hurt someone near it. Raise the
vehicle only enough to remove the tire.

5. Remove the wheel nuts and pull the wheel off. On
single rear-wheel (SRW) trucks, install the spare wheel
and wheel nuts with the cone shaped end of the wheel
nuts toward the wheel. On 3500 dual rear-wheel models
(DRW) the wheel nuts are a two-piece assembly with a
flat face. Lightly tighten the wheel nuts. To avoid the risk
of forcing the vehicle off the jack, do not fully tighten the
wheel nuts until the vehicle has been lowered.

6. Using the wheel wrench, finish tightening the wheel
nuts using a crisscross pattern. The correct wheel nut
tightness is 130 ft lbs (177 N·m) torque (1500 Series), 135 ft
lbs (183 N·m) torque for 2500/3500 single-rear wheel
(SRW) models, and 145 ft lbs (197 N·m) for 3500 dual
rear-wheel models. If in doubt about the correct tight-
ness, have them checked with a torque wrench by your
authorized dealer or at a service station.

598

WHAT TO DO IN EMERGENCIES

WARNING!

A loose tire or jack thrown forward in a collision or
hard stop could injure someone in the vehicle. Al-
ways stow the jack parts and the extra tire and wheel
in the places provided.

7. Install the wheel center cap and remove the wheel
blocks. Do not install chrome or aluminum wheel center
caps on the spare wheel. This may result in cap damage.

8. Lower the jack to its fully closed position. If the bottle
jack will not lower by turning the dial (thumbwheel) by
hand, it may be necessary to use the jack drive tube in
order to lower the jack. Stow the replaced tire, jack, and
tools as previously described.

9. Adjust the tire pressure when possible.

NOTE:

Do not oil wheel studs. For chrome wheels, do

not substitute with chrome plated wheel nuts.

Hub Caps/Wheel Covers — If Equipped

The hub caps must be removed before raising the vehicle
off the ground.

For 2500/3500 single rear-wheel (SRW) models, use the
blade on the end of the lug wrench to pry the hub cap off.
Insert the blade end into the pry-off notch and carefully
pop off the hub cap with a back-and-forth motion.

On 3500 models with dual rear wheels (DRW), you must
first remove the hub caps. The jack handle driver has a
hook at one end that will fit in the pry off notch of the
rear hub caps. Position the hook and pull out on the
ratchet firmly. The hub cap should pop off. The wheel
skins can now be removed. For the front hub cap on 3500
models use the blade on the end of the lug wrench to pry
the caps off. The wheel skin can now be removed.

6

WHAT TO DO IN EMERGENCIES

599

CAUTION!

• Use a back-and-forth motion to remove the hub

cap. Do not use a twisting motion when removing
the hub cap, damage to the hub cap finish may
occur.

• The rear hub caps on the dual rear wheel has two

pry-off notches. Make sure that the hook of the
jack handle driver is located squarely in the cap
notch before attempting to pull off.

You must use the flat end of the lug wrench to pry off the
wheel skins. Insert the flat tip completely and using a
back-and-forth motion, loosen the wheel skin. Repeat this
procedure around the tire until the skin pops off.

Replace the wheel skins first using a rubber mallet. When
replacing the hub caps, tilt the cap retainer over the lug

nut bolt circle and strike the high side down with a
rubber mallet. Be sure that the hub caps and wheel skins
are firmly seated around the wheel.

Wheel Nuts

All wheel nuts should be tightened occasionally to elimi-
nate the possibility of wheel studs being sheared or the
bolt holes in the wheels becoming elongated. This is
especially important during the first few hundred miles/
kilometers of operation to allow the wheel nuts to
become properly set. All wheel nuts should first be firmly
seated against the wheel. The wheel nuts should then be
tightened to recommended torque. Tighten the wheel
nuts to final torque in increments. Progress around the
bolt circle, tightening the wheel nut opposite to the wheel
nut just previously tightened until final torque is
achieved. Recommended torques are shown in the fol-
lowing chart.

600

WHAT TO DO IN EMERGENCIES

Disc Wheels

TypeNut

StudSize

Hex Size

TorqueFt Lbs

TorqueNewtonMeters

Cone

M14 x 1.5

22 mm

120-150

160-200

Flanged

M14 x 1.5

22 mm

130-160

190-220

8-Stud — Dual Rear Wheels
Dual wheels are flat-mounted and center-piloted. The lug
nuts are a two-piece assembly. When the tires are being
rotated or replaced, clean these lug nuts and add two
drops of oil at the interface between the hex and the
washer.

Oiling Location

6

WHAT TO DO IN EMERGENCIES

601

Slots in the wheels will assist in properly orienting the
inner and outer wheels. Align these slots when assem-
bling the wheels for best access to the tire valve on the
inner wheel. The tires of both dual wheels must be
completely off the ground when tightening, to ensure
wheel centering and maximum wheel clamping.

Dual wheel models require a special heavy-duty lug nut
tightening adapter (included with the vehicle) to cor-
rectly tighten the lug nuts. Also, when it is necessary to
remove and install dual rear wheels, use a proper vehicle
lifting device.

NOTE:

When installing a spare tire as part of a dual rear

wheel end combination, the tire diameter of the two
individual tires must be compared. If there is a significant
difference, the larger tire should be installed in a front
location. The correct direction of rotation for dual tire
installations must also be observed.

These dual rear wheels should be tightened as follows:

1. Tighten the wheel nuts in the numbered sequence to a
snug fit.

Tightening Pattern

602

WHAT TO DO IN EMERGENCIES

2. Retighten the wheel nuts in the same sequence to the
torques listed in the table. Go through the sequence a
second time to verify that specific torque has been
achieved. Retighten to specifications at 100 miles
(160 km) and after 500 miles (800 km).

It is recommended that wheel stud nuts be kept torqued
to specifications at all times. Torque wheel stud nuts to
specifications at each lubrication interval.

To Stow The Flat Or Spare

NOTE:

Vehicles equipped with aluminum wheels can-

not be stored under the vehicle because the wheel
retainer will not fit through the wheel pilot hole. Secure
the flat tire in the bed of the truck. Have the flat tire
repaired or replaced immediately.

WARNING!

A loose tire thrown forward in a collision or hard
stop could injure the occupants in the vehicle. Have
the deflated (flat) tire repaired or replaced immedi-
ately.

Turn the wheel so that the valve stem is down. Slide the
wheel retainer through the center of the wheel and
position it properly across the wheel opening.

For convenience in checking the spare tire inflation, stow
with the valve stem toward the rear of the vehicle.

Attach the wheel wrench to the extension tube. Rotate the
winch mechanism until the wheel is drawn into place
against the underside of the vehicle. Continue to rotate
until you feel the winch mechanism slip, or click three or
four times. It cannot be overtightened. Push against the
tire several times to be sure it is firmly in place.

6

WHAT TO DO IN EMERGENCIES

603


Content      ..     35      36      37      38     ..