Dodge 3500 Diesel (2008 year). Manual - part 13
 

  Index      Dodge     Dodge 3500 Diesel (2008 year) - manual in english


Search            copyright infringement  


Content      ..     11      12      13      14     ..


Dodge 3500 Diesel (2008 year). Manual - part 13


experience reduced performance, an elevated/rough idle
or engine stall and your vehicle may require towing. The
light will come on when the ignition is first turned on
and remain on for 15 seconds as a bulb check. If the light
does not come on during starting, have the system
checked by an authorized dealer.

22. SERV 4WD Indicator
The 4WD indicator will be illuminated whenever the
4WD mode is engaged for either the manual or electric
shift 4WD systems. The SERV 4WD indicator monitors
the electric shift 4WD system. If the SERV 4WD light
stays on or comes on during driving, it means that the
4WD system is not functioning properly and that service
is required.

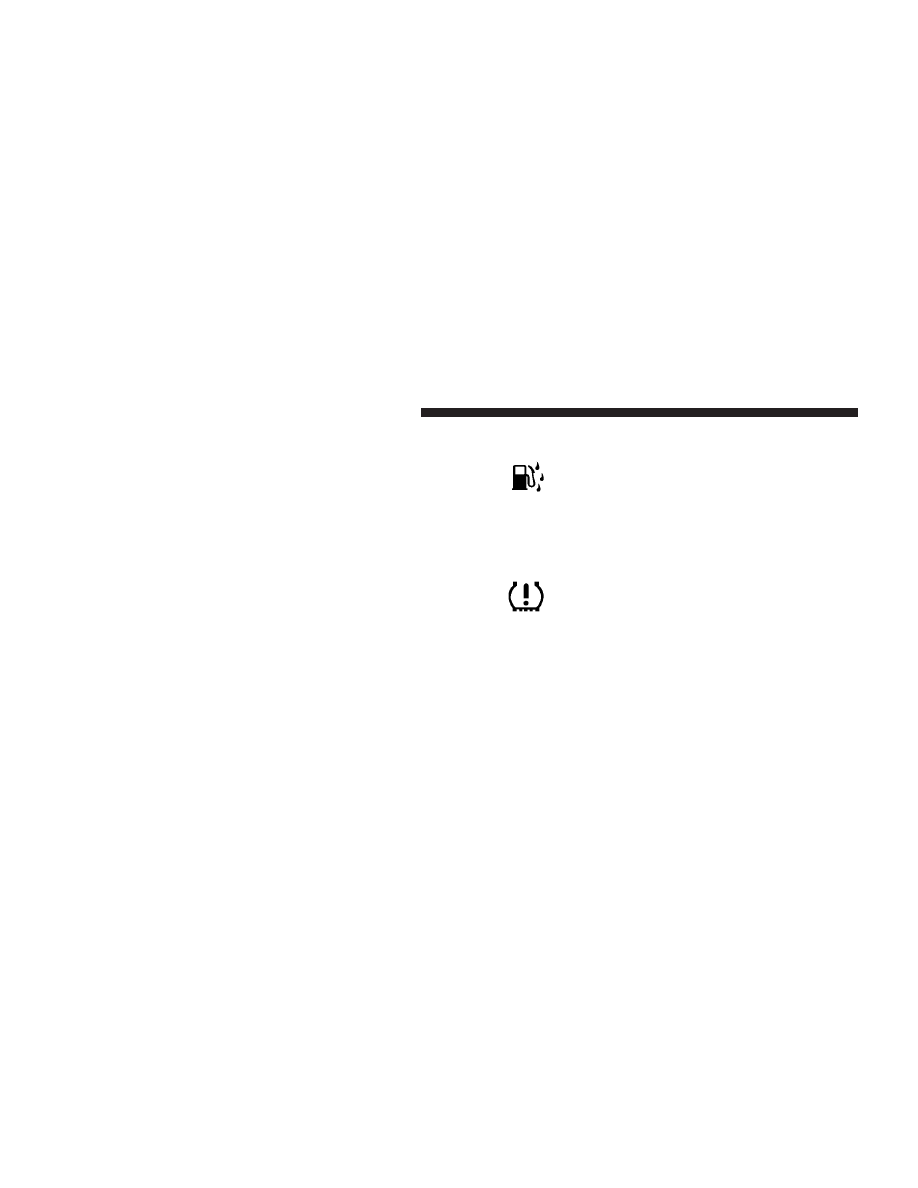
23. Water In Fuel Indicator

Indicates there is water detected in the fuel
filter. Refer to the Maintenance section, Drain-
ing Fuel/Water Separator Filter, for water
drain procedure.

24. Tire Pressure Monitoring Telltale Light — If
Equipped

Each tire, including the spare (if provided),
should be checked monthly when cold and
inflated to the inflation pressure recommended
by the vehicle manufacturer on the vehicle

placard or tire inflation pressure label. (If your vehicle
has tires of a different size than the size indicated on the
vehicle placard or tire inflation pressure label, you should
determine the proper tire inflation pressure for those
tires.)

196

UNDERSTANDING YOUR INSTRUMENT PANEL

As an added safety feature, your vehicle has been
equipped with a tire pressure monitoring system (TPMS)
that illuminates a low tire pressure telltale when one or
more of your tires is significantly under-inflated. Accord-
ingly, when the low tire pressure telltale illuminates, you
should stop and check your tires as soon as possible, and
inflate them to the proper pressure. Driving on a signifi-
cantly under-inflated tire causes the tire to overheat and
can lead to tire failure. Under-inflation also reduces fuel
efficiency and tire tread life, and may affect the vehicle’s
handling and stopping ability.

Please note that the TPMS is not a substitute for proper
tire maintenance, and it is the driver’s responsibility to
maintain correct tire pressure, even if under-inflation has
not reached the level to trigger illumination of the TPMS
low tire pressure telltale.

Your vehicle has also been equipped with a TPMS
malfunction indicator to indicate when the system is not
operating properly. The TPMS malfunction indicator is
combined with the low tire pressure telltale. When the
system detects a malfunction, the telltale will flash for
approximately one minute and then remain continuously
illuminated. This sequence will continue upon subse-
quent vehicle start-ups as long as the malfunction exists.
When the malfunction indicator is illuminated, the sys-
tem may not be able to detect or signal low tire pressure
as intended. TPMS malfunctions may occur for a variety
of reasons, including the installation of replacement or
alternate tires or wheels on the vehicle that prevent the
TPMS from functioning properly. Always check the
TPMS malfunction telltale after replacing one or more
tires or wheels on your vehicle to ensure that the replace-
ment or alternate tires and wheels allow the TPMS to
continue to function properly.

UNDERSTANDING YOUR INSTRUMENT PANEL

197

4

CAUTION!

The TPMS has been optimized for the original
equipment tires and wheels. TPMS pressures and
warning have been established for the tire size
equipped on your vehicle. Undesirable system opera-
tion or sensor damage may result when using re-
placement equipment that is not of the same size,
type, and/or style. Aftermarket wheels can cause
sensor damage. Do not use tire sealant from a can, or
balance beads if your vehicle is equipped with a
TPMS, as damage to the sensors may result.

TPMS “Light Load” Reset Switch – If Equipped

The TPMS ”Light Load” reset switch allows you to
choose between Light Load vehicle conditions and Max
Load vehicle conditions tire pressures and related TPMS
warning levels. The switch is located in the instrument

panel, below the climate control panel. For additional
information refer to “Tire Pressure Monitoring System
(TPMS) — If Equipped” in section 5 of this manual.

25. Transmission Oil Temperature Warning Light
(Automatic Transmissions Only)

This light indicates that there is excessive trans-
mission fluid temperature that might occur
with severe usage such as trailer towing. It may
also occur when operating the vehicle in a high

torque converter slip condition, such as 4-wheel drive
operation (e.g., snow plowing, off-road operation). If this
light comes on, stop the vehicle and run the engine at idle
or faster, with the transmission in NEUTRAL until the
light goes off.

26. Wait To Start Indicator

The Wait To Start indicator will illuminate when
the ignition is turned to the run position and the
intake manifold temperature is below 66°F (19°C).

198

UNDERSTANDING YOUR INSTRUMENT PANEL

Follow engine starting procedure for proper engine start-
ing and operating. Wait until the Wait To Start indicator
turns OFF, then start the vehicle.

NOTE:

The Wait To Start Indicator may not illuminate if

the engine coolant temperature is warm enough.

27. Odometer/Trip Odometer Button
Press this button to toggle between the odometer and the
trip odometer display. Holding the button in resets the
trip odometer reading when in trip mode.

28. Fuel Gauge
Shows level of fuel in tank when ignition switch is in the
ON position.

29. Low Fuel Warning Light

Glows when the pointer is between “E” and 1/8
indication mark (approximately 15% of tank vol-
ume) on the fuel gauge. When the fuel gauge
pointer is on “E” (equivalent to Distance To Empty

[DTE] = 0 on the overhead console, if so equipped) there
is reserve fuel capacity, which corresponds to approxi-
mately 8% of tank volume. This reserve capacity was put
in place to prevent the likelihood of customers running
out of fuel when operating at maximum load conditions
in areas where there aren’t many fuel stations.

Fuel tank volumes are as follows:

• 34 gal (128 L) - 2500/3500 short box models
• 35 gal (132 L) - 2500/3500 long box models

30. CRUISE Light
This indicator lights when the electronic speed control
system is turned on.

UNDERSTANDING YOUR INSTRUMENT PANEL

199

4

ELECTRONIC DIGITAL CLOCK

The clock and radio each use the display panel built into
the radio. A digital readout shows the frequency and/or
time in hours and minutes (depending on your radio
model) whenever the ignition switch is in the ON or ACC
position.

When the ignition switch is in the OFF position, or when
the radio frequency is being displayed, time keeping is
accurately maintained.

On the RAQ radio the time button alternates the location
of the time and frequency on the display. On the REF only
one of the two, time or frequency, is displayed at a time.

Clock Setting Procedure

1. Press and hold the time button until the hours blink.

2. Adjust the hours by turning the right side Tune/
Audio control.

3. After the hours are adjusted, press the right side
Tune/Audio control to set the minutes.

4. Adjust the minutes using the right side Tune/Audio
control.

5. To exit, press any button/knob or wait approximately
five seconds.

RADIO GENERAL INFORMATION

Radio Broadcast Signals

The radio will provide excellent reception under most
operating conditions. Like any system, however, automo-
tive radios have performance limitations, due to mobile
operation and natural phenomena, which might lead you
to believe your sound system is malfunctioning. To help
you understand and save you concern about these “ap-
parent” malfunctions, you must understand a point or
two about the transmission and reception of radio sig-
nals.

200

UNDERSTANDING YOUR INSTRUMENT PANEL

Two Types of Signals

There are two basic types of radio signals: AM or
Amplitude Modulation, in which the transmitted sound
causes the amplitude, or height, of the radio waves to
vary; and FM or Frequency Modulation, in which the
frequency of the wave is varied to carry the sound.

Electrical Disturbances

Radio waves may pick up electrical disturbances during
transmission. They mainly affect the wave amplitude,
and thus remain a part of the AM reception. They
interfere very little with the frequency variations that
carry the FM signal.

AM Reception

AM sound is based on wave amplitude, so AM reception
can be disrupted by such things as lightning, power lines
and neon signs.

FM Reception

Because FM transmission is based on frequency varia-
tions, interference that consists of amplitude variations
can be filtered out, leaving the reception relatively clear,
which is the major feature of FM radio.

NOTE:

The radio, steering wheel radio controls (if

equipped), and 6-disc CD/DVD changer (if equipped)
will remain active for up to 10 minutes after the ignition
switch has been turned OFF. Opening a vehicle front
door will cancel this feature.

UNDERSTANDING YOUR INSTRUMENT PANEL

201

4

SALES CODE REF — AM/FM/CD (SINGLE DISC)
RADIO WITH OPTIONAL SATELLITE RADIO AND
HANDS FREE PHONE CAPABILITY

NOTE:

The radio sales code is located on the lower right

side of your radio faceplate.

Operating Instructions - Radio Mode

NOTE:

The ignition switch must be in the ON or ACC

position to operate the radio.

Power Switch/Volume Control (Rotary)
Press the ON/VOL control to turn the radio ON. Press
the ON/VOL a second time to turn OFF the radio.

Electronic Volume Control
The electronic volume control turns continuously (360
degrees) in either direction without stopping. Turning the
volume control to the right increases the volume and to
the left decreases it.

When the audio system is turned on, the sound will be
set at the same volume level as last played.

For your convenience, the volume can be turned down,
but not up, when the audio system is off and the ignition
is ON.

REF Radio

202

UNDERSTANDING YOUR INSTRUMENT PANEL

Mode Button (Radio Mode)
Press the MODE button repeatedly to select between the
CD player and Satellite Radio (if equipped).

SEEK Button (Radio Mode)
Press and release the SEEK button to search for the next
listenable station in either AM/FM or Satellite (if
equipped) mode. Press the right side of the button to seek
up and the left side to seek down. The radio will remain
tuned to the new station until you make another selec-
tion. Holding the button will bypass stations without
stopping until you release it.

MUTE Button (Radio Mode)
Press the MUTE button to cancel the sound from the
speakers. MUTE will display. Press the MUTE button a
second time and the sound from the speakers will return.
Rotating the volume control, turning the radio ON/OFF,
or turning ON/OFF the ignition, will cancel the MUTE
feature.

NOTE:

In Hands-Free Phone (if equipped) mode, the

MUTE button mutes the microphone.

SCAN Button (Radio Mode)
Pressing the SCAN button causes the tuner to search for
the next listenable station in either, AM, FM, or Satellite
(if equipped) frequencies, pausing for five seconds at
each listenable station before continuing to the next. To
stop the search, press SCAN a second time.

PSCAN Button (Radio Mode)
Pressing the PSCAN button causes the tuner to scan
through preset stations in either, AM, FM, or Satellite (if
equipped) frequencies, pausing for five seconds at each
preset station before continuing to the next. To stop the
search, press PSCAN a second time.

TIME Button
Press the TIME button and the time of day will display
for five seconds.

UNDERSTANDING YOUR INSTRUMENT PANEL

203

4

Clock Setting Procedure

1. Press and hold the TIME button until the hours blink.

2. Adjust the hours by turning the TUNE/AUDIO con-
trol.

3. After the hours are adjusted, press the TUNE/AUDIO
control to set the minutes. The minutes will begin to
blink.

4. Adjust the minutes using the TUNE/AUDIO control.

5. To exit, press any button/knob or wait five seconds.

RW/FF (Radio Mode)
Pressing the Rewind/Fast Forward button causes the
tuner to search for the next frequency in the direction of
the arrows. This feature operates in either AM, FM or
Satellite (if equipped) frequencies.

TUNE Control (Radio Mode)
Turn the rotary TUNE control clockwise to increase or
counterclockwise to decrease the frequency.

AM/FM Button (Radio Mode)
Press the button to select AM or FM modes.

Setting the Tone, Balance, and Fade
Press the rotary TUNE control, and BASS will display.
Turn the TUNE control to the right or left to increase or
decrease the Bass tones.

Press the rotary TUNE control a second time and MID
will display. Turn the TUNE control to the right or left to
increase or decrease the Mid-Range tones.

Press the rotary TUNE control a third time and TREB will
display. Turn the TUNE control to the right or left to
increase or decrease the Treble tones.

204

UNDERSTANDING YOUR INSTRUMENT PANEL

Press the rotary TUNE control a fourth time and BAL will
display. Turn the TUNE control to the right or left to
adjust the sound level from the right or left side speakers.

Press the rotary TUNE control a fifth time and FADE will
display. Turn the TUNE control to the left or right to
adjust the sound level between the front and rear speak-
ers.

Press the tune control again or wait five seconds to exit
setting tone, balance, and fade.

RND/SET Button (Radio Mode) To Set The
Pushbutton Memory
When you are receiving a station that you wish to
commit to pushbutton memory, press the SET button.
The symbol SET 1 will now show in the display window.
Select the button (1-6) you wish to lock onto this station
and press and release that button. If a button is not

selected within five seconds after pressing the SET but-
ton, the station will continue to play but will not be
stored into pushbutton memory.

You may add a second station to each pushbutton by
repeating the above procedure with this exception: Press
the SET button twice and SET 2 will show in the display
window. Each button can be set for SET 1 and SET 2 in
both AM and FM. This allows a total of 12 AM, 12 FM,
and 12 Satellite (if equipped) stations to be stored into
pushbutton memory. The stations stored in SET 2
memory can be selected by pressing the pushbutton
twice.

Every time a preset button is used, a corresponding
button number will display.

Preset Buttons 1 - 6 (Radio Mode)
These buttons tune the Radio to the stations that you
commit to pushbutton memory, 12 AM, 12 FM, and 12
Satellite (if equipped) stations.

UNDERSTANDING YOUR INSTRUMENT PANEL

205

4

Operating Instructions - CD Mode

NOTE:

The ignition switch must be in the ON or ACC

position to operate the radio.

Inserting The Compact Disc (Single CD Player)
Gently insert one CD into the CD player with the CD
label facing up. The CD will automatically be pulled into
the CD Player and the CD icon will illuminate on the
radio display.

If the volume control is ON, the unit will switch to CD
mode and begin to play. The display will show the track
number and play time in minutes and seconds. Play will
begin at the start of track one.

NOTE:

• On some vehicles, you may insert or eject a disc with

the radio or ignition switch OFF.

• If you insert a disc with the ignition ON and the radio

OFF, the CD will automatically be pulled into the CD
player.

• This radio does not play discs with MP3 tracks.

SEEK Button (CD Mode)
Press the right side of the SEEK button for the next track
on the CD. Press the left side of the button to return to the
beginning of the current track, or return to the beginning
of the previous track if the CD is within the first 10
seconds of the current selection.

MUTE Button (CD Mode)
Press the MUTE button to cancel the sound from the
speakers.

9MUTE9 will display. Press the MUTE button a

second time and the sound from the speakers will return.
Rotating the volume control or turning OFF the ignition
will also return the sound from the speakers.

206

UNDERSTANDING YOUR INSTRUMENT PANEL

SCAN Button (CD Mode)
Press this button to play the first 10 seconds of each track.
To stop the scan function, press the button a second time.

EJECT Button (CD Mode)

Press this button and the disc will unload and
move to the entrance for easy removal. The
unit will switch to the last selected mode.

If you do not remove the disc within 15 seconds, it will be
reloaded. The radio mode will continue to appear.

TIME Button (CD Mode)
Press this button to change the display from elapsed CD
playing time to time of day. The time of day will display
for five seconds.

RW/FF (CD Mode)
Press and hold the FF (Fast Forward) and the CD player
will begin to fast forward until FF is released. The RW
(Reverse) button works in a similar manner.

Press and hold the FF button to fast forward through the
tracks. Release the FF button to stop the fast forward
feature. If the RW button is pressed, the current track will
reverse to the beginning of the track and begin playing.

RND/SET Button (Random Play Button) (CD
Mode)
Press this button while the CD is playing to activate
Random play. This feature plays the selections on the
compact disc in random order to provide an interesting
change of pace.

Press the SEEK button to move to the next randomly
selected track.

Press the RND button a second time to stop Random
play.

UNDERSTANDING YOUR INSTRUMENT PANEL

207

4

Operating Instructions - Auxiliary Mode

The auxiliary (AUX) jack is an audio input jack, which
allows the user to plug in a portable device such as an
MP3 player, cassette player, or microphone and utilize
the vehicle’s audio system to amplify the source and play
through the vehicle speakers.

The auxiliary mode becomes active when an electrical
device is plugged into the AUX jack using a standard 3.5
mm stereo audio cable and the user presses and releases
the MODE button until AUX appears on the display.

NOTE:

The radio will return to the last stored mode if

the ignition switch is turned from the OFF/LOCK posi-
tion to the ACC position, the radio is turned on, and the
radio was previously in the AUX mode.

SEEK Button (Auxiliary Mode)
No function.

MUTE Button (Auxiliary Mode)
Press the MUTE button to cancel the sound from the
speakers.

9MUTE9 will display. Press the MUTE button a

second time and the sound from the speakers will return.
Rotating the volume control or turning off the ignition
will also return the sound from the speakers.

SCAN Button (Auxiliary Mode)
No function.

EJECT Button (Auxiliary Mode)

No function.

PSCAN Button (Auxiliary Mode)
No function.

208

UNDERSTANDING YOUR INSTRUMENT PANEL

TIME Button (Auxiliary Mode)
Press this button to change the display from elapsed
playing time to time of day. The time of day will display
for five seconds.

RW/FF (Auxiliary Mode)
No function.

RND/SET Button (Auxiliary Mode)
No function.

Mode Button (Auxiliary Mode)
Press the MODE button repeatedly to select between the
CD player and Satellite Radio (if equipped).

Operating Instructions - Hands-Free Phone — If
Equipped

Refer to the “Hands-Free Phone (UConnect

t)” section of

this Owner’s Manual.

Operating Instructions - Satellite Radio — If
Equipped

Refer to the “Satellite Radio” section of this Owner’s
Manual.

UNDERSTANDING YOUR INSTRUMENT PANEL

209

4

SALES CODE RAQ – AM/FM/CD (6-DISC) RADIO
WITH OPTIONAL SATELLITE RADIO, HANDS-FREE
PHONE, AND VIDEO ENTERTAINMENT SYSTEMS
(VES™) CAPABILITIES

NOTE:

The radio sales code is located on the lower right

side of your radio faceplate.

Operating Instructions - Radio Mode

NOTE:

The ignition switch must be in the ON or ACC

position to operate the radio.

Power Switch/Volume Control (Rotary)
Press the ON/VOL control to turn the radio ON. Press
the ON/VOL a second time to turn off the radio.

Electronic Volume Control
The electronic volume control turns continuously (360
degrees) in either direction without stopping. Turning the
volume control to the right increases the volume and to
the left decreases it.

When the audio system is turned on, the sound will be
set at the same volume level as last played.

For your convenience, the volume can be turned down,
but not up, when the audio system is off and the ignition
is ON.

RAQ Radio

210

UNDERSTANDING YOUR INSTRUMENT PANEL

Mode Button (Radio Mode)
Press the MODE button repeatedly to select between the
CD player, Satellite Radio, or Video Entertainment Sys-
tem (VES)™ (if equipped).

SEEK Button (Radio Mode)
Press and release the SEEK button to search for the next
listenable station in either AM/FM or Satellite (if
equipped) mode. Press the right side of the button to seek
up and the left side to seek down. The radio will remain
tuned to the new station until you make another selec-
tion. Holding the button will bypass stations without
stopping until you release it.

MUTE Button (Radio Mode)
Press the MUTE button to cancel the sound from the
speakers.

9MUTE9 will be displayed. Press the MUTE

button a second time and the sound from the speakers

will return. Rotating the volume control, turning the
radio ON/OFF, or turning OFF the ignition will also
return the sound from the speakers

NOTE:

In Hands-Free Phone (if equipped) mode, the

MUTE button mutes the microphone.

SCAN Button (Radio Mode)
Pressing the SCAN button causes the tuner to search for
the next listenable station, in either AM, FM or Satellite (if
equipped) frequencies, pausing for five seconds at each
listenable station before continuing to the next. To stop
the search, press SCAN a second time.

MSG or INFO Button (Radio Mode)
Press the MSG or INFO button for an RBDS station (one
with call letters displayed). The radio will return a Radio
Text message broadcast from an FM station (FM mode
only).

UNDERSTANDING YOUR INSTRUMENT PANEL

211

4


Content      ..     11      12      13      14     ..