Dodge Viper SRT-10 (ZB). Manual - part 271
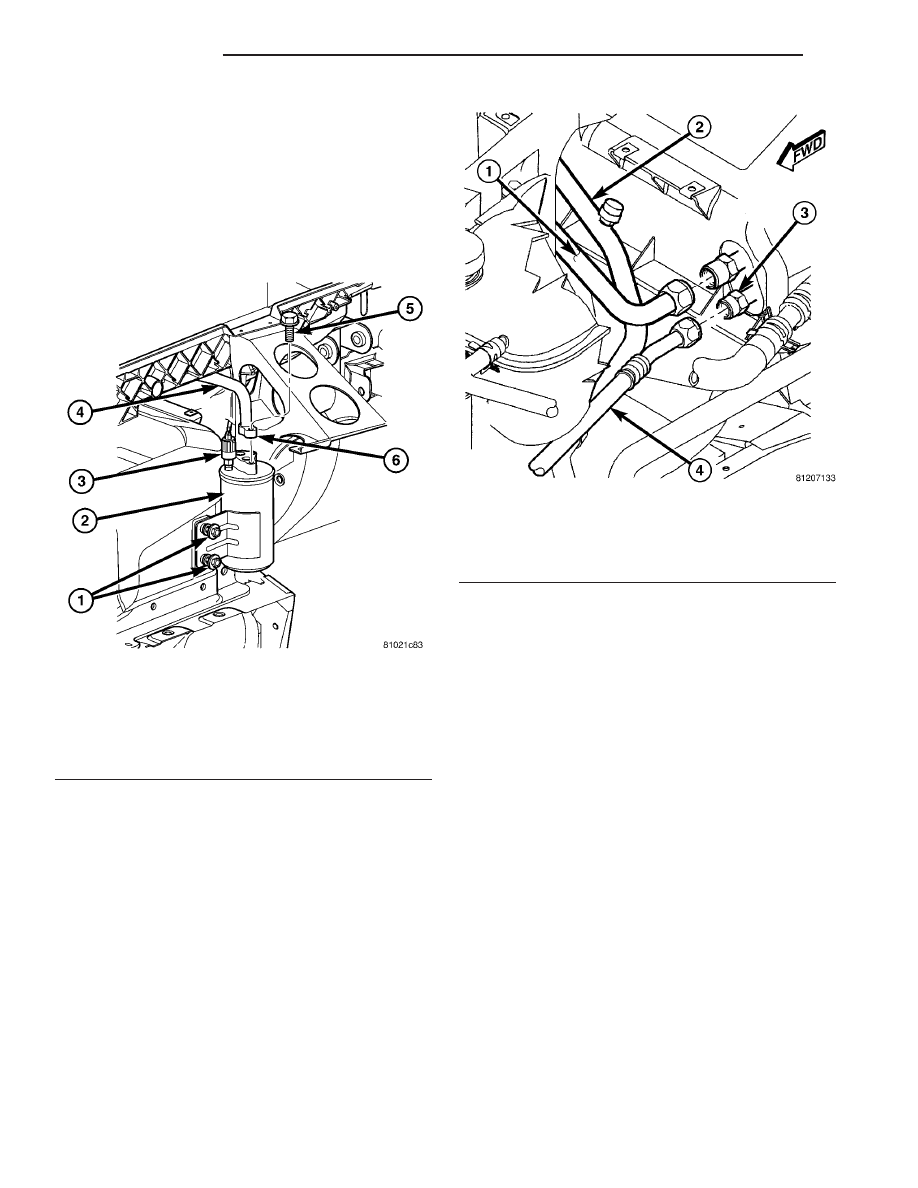
(11) Remove the bolt that secures the front section
of the suction line to the accumulator outlet port
(Fig. 25).
(12) Disconnect the suction line from the accumu-
lator and remove and discard the O-ring seal.
(13) Install plugs in, or tape over the opened suc-
tion line fitting and the accumulator port.
(14) Remove the front section of the suction line
from the engine compartment.
REAR SECTION
(1) Recover the refrigerant from the refrigerant
system (Refer to 24 - HEATING & AIR CONDITION-
ING/PLUMBING
-
STANDARD
PROCEDURE
-
REFRIGERANT SYSTEM RECOVERY).
(2) Disconnect and isolate the negative battery
cable.
(3) Loosen the nut that secures the suction line to
the evaporator (Fig. 26).
(4) Disconnect the suction line from the evaporator
and remove and discard the O-ring seal.
(5) Install plugs in, or tape over the opened suc-
tion line fitting and the evaporator outlet tube.
(6) Raise and support the vehicle.
(7) Remove the right front wheel (Refer to 22 -
TIRES/WHEELS - REMOVAL).
(8) Remove the right inner fender splash shield
(Refer to 23 - BODY/EXTERIOR/FRONT WHEEL-
HOUSE SPLASH SHIELD - REMOVAL).
(9) Remove the bolt that secures the rear section
of the suction line to the accumulator (Fig. 25).
(10) Disconnect the suction line from the accumu-
lator and remove and discard the O-ring seal.
(11) Install plugs in, or tape over the opened suc-
tion line fitting and the accumulator port.
(12) Remove the rear section of the suction line
from the engine compartment.
INSTALLATION
NOTE: The A/C suction line is serviced in two sec-
tions. The front section connects between the accu-
mulator and the A/C compressor. The rear section
connects between the evaporator and the accumu-
lator and includes the low side service port.
FRONT SECTION
(1) Position the front section of the suction line
into the engine compartment.
(2) Remove the tape or plugs from the suction line
fitting and the accumulator port.
(3) Lubricate a new rubber O-ring seal with clean
refrigerant oil and install it on the suction line fit-
ting. Use only the specified O-ring as it is made of a
special material for the R-134a system. Use only
Fig. 25 Suction Line - Accumulator
1 - NUT (2)
2 - ACCUMULATOR
3 - A/C LOW PRESSURE SWITCH
4 - SUCTION LINE
5 - BOLT
6 - SUCTION LINE FITTING
Fig. 26 Suction Line - Evaporator
1 - SUCTION LINE (REAR)
2 - SUCTION LINE (FRONT)
3 - A/C EVAPORATOR TUBES
4 - LIQUID LINE
24 - 58
PLUMBING
ZB
SUCTION LINE (Continued)