Dodge Ram Truck 1500-2500-3500. Manual - part 430
8. Reconnect the battery negative cable.
LAMP-HIGH MOUNTED STOP
REMOVAL
BULB
NOTE: The Center High Mounted Stop Lamp (CHMSL) houses three bulbs. The center bulb is the CHMSL
bulb and illuminates through a red lens, while the two outboard bulbs are for the cargo lamps and illumi-
nate through clear lenses. The bulb types and service procedures are identical for all three of these bulbs.
1. Disconnect and isolate the battery negative cable.
2. Remove the two screws that secure the CHMSL to
the rear cab roof header panel.
3. Pull the CHMSL lens and housing (1) away from
the header panel far enough to access the lamp
wiring and bulb sockets on the back of the lamp.
4. Firmly grasp the socket (3) on the back of the lamp
housing and rotate it counterclockwise about 30
degrees to unlock it.
5. Pull the socket and bulb straight out from the
keyed opening in the housing.
6. Pull the base of the bulb (2) straight out of the
socket.
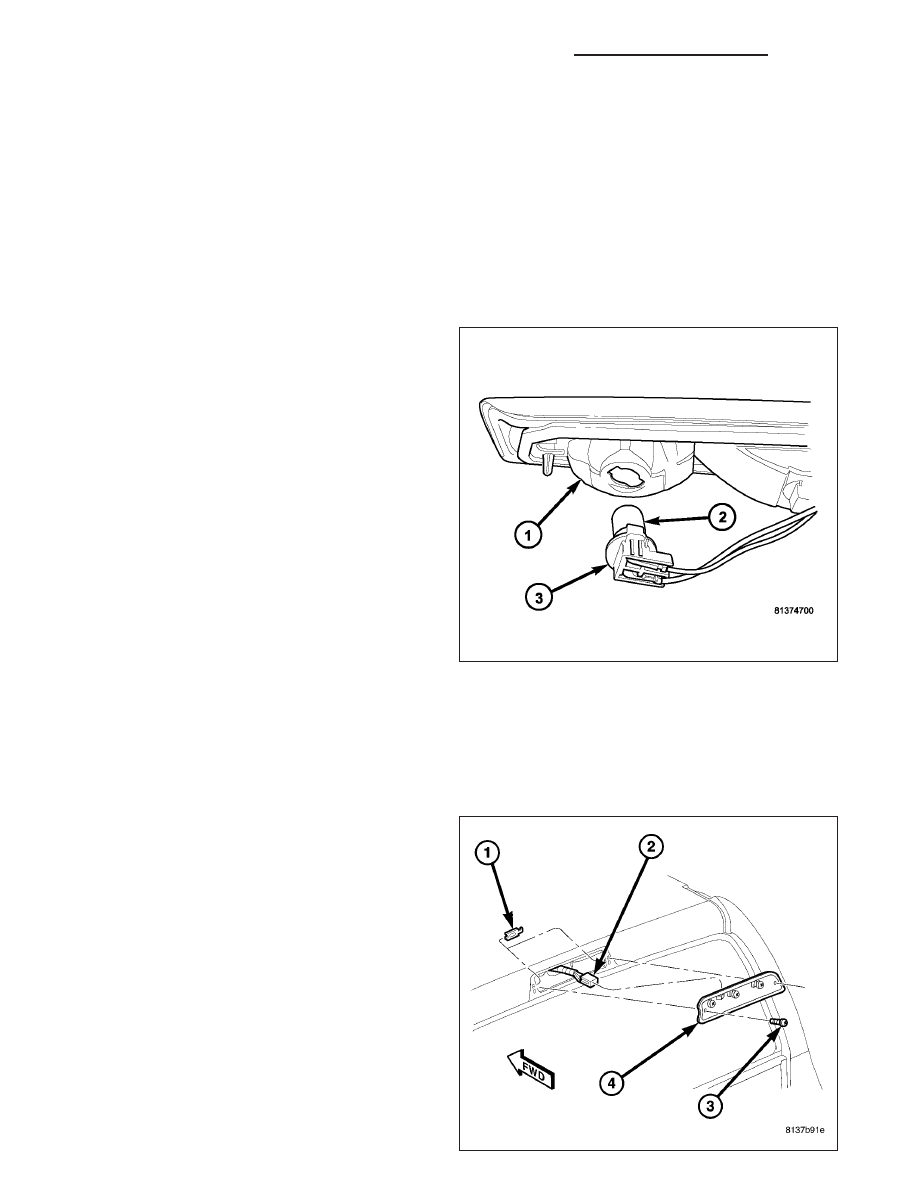
LAMP
NOTE: The Center High Mounted Stop Lamp (CHMSL) for this model incorporates two integral cargo lamps.
The center bulb is the CHMSL bulb and illuminates through a red lens, while the two outboard bulbs are for
the cargo lamps and illuminate through clear lenses.
1. Disconnect and isolate the battery negative cable.
2. Remove the two screws (3) that secure the Center
High Mounted Stop Lamp (CHMSL) (4) to the rear
roof header panel.
3. Pull the CHMSL away from the opening in the roof
header far enough to access and disconnect the
wire harness connector (2) from the pigtail connec-
tor on the back of the lamp housing.
4. Remove the CHMSL from the roof header.
8L - 126
LAMPS/LIGHTING - EXTERIOR - SERVICE INFORMATION
DR/DH