Content .. 1361 1362 1363 1364 ..
Dodge Ram Truck 1500-2500-3500. Manual - part 1363
INSTALLATION
CAUTION: The front crankshaft seal must be installed dry. Do not apply lubricant to sealing lip or to outer
edge.
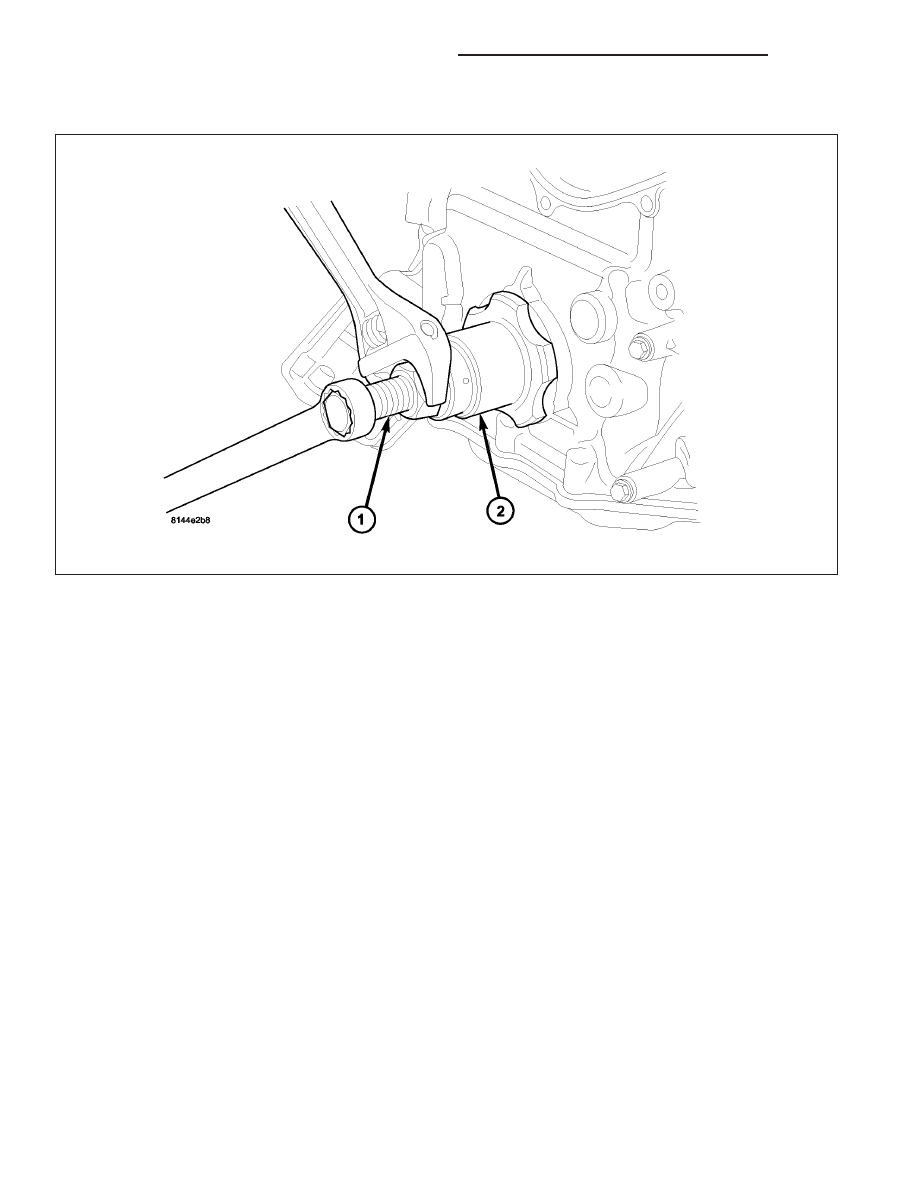
1. Using Special Tool 8348 and 8512A, install crankshaft front seal.
CAUTION: To prevent severe damage to the Crankshaft or Damper, thoroughly clean the damper bore and
the crankshaft nose before installing Damper.
2. Install vibration damper (Refer to 9 - ENGINE/ENGINE BLOCK/VIBRATION DAMPER - INSTALLATION).
3. Install radiator cooling fan and shroud (Refer to 7 - COOLING/ENGINE/RADIATOR FAN - INSTALLATION).
4. Install upper radiator hose.
5. Install accessory drive belt refer (Refer to 7 - COOLING/ACCESSORY DRIVE/DRIVE BELTS - INSTALLATION).
6. Refill cooling system (Refer to 7 - COOLING - STANDARD PROCEDURE).
7. Connect negative cable to battery.
SEAL - CRANKSHAFT OIL - REAR
DIAGNOSIS AND TESTING - REAR SEAL AREA LEAKS
Since it is sometimes difficult to determine the source of an oil leak in the rear seal area of the engine, a more
involved inspection is necessary. The following steps should be followed to help pinpoint the source of the leak.
If the leakage occurs at the crankshaft rear oil seal area:
1. Disconnect the battery.
2. Raise the vehicle.
3. Remove torque converter or clutch housing cover and inspect rear of block for evidence of oil. Use a black light
to check for the oil leak:
a. Circular spray pattern generally indicates seal leakage or crankshaft damage.
9 - 2374
ENGINE - 5.7L - SERVICE INFORMATION
DR/DH