Dodge Neon / Neon SRT-4. Manual - part 71
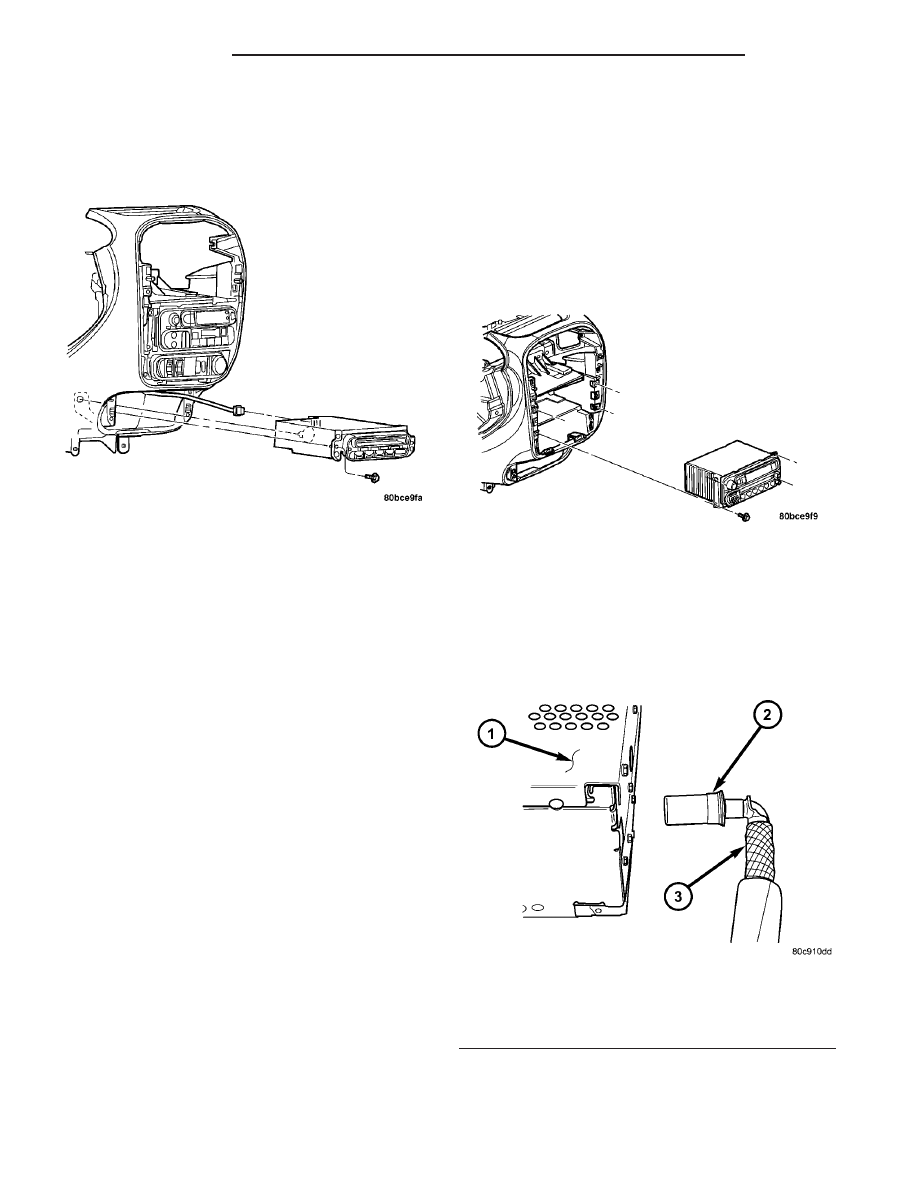
(3) Remove two retaining screws to CD changer
(Fig. 3).
(4) Pull CD changer out of instrument panel and
disconnect harness connector from rear of changer
(Fig. 3).
(5) Remove CD changer from vehicle.
INSTALLATION
(1) Connect harness connector to CD changer.
(2) Install CD changer to vehicle.
(3) Install retaining screws.
(4) Install CD changer bezel.
(5) Connect battery negative cable.
RADIO
DESCRIPTION
Available radios for this vehicle include:
• AM/FM/cassette with CD changer control fea-
ture (RBB sales code)
• AM/FM/CD with CD changer control feature
(RBK sales code)
• AM/FM/cassette/CD (RBY sales code) - export
only
• AM/FM/cassette/CD with CD changer control
feature (RAD sales code) - export only
OPERATION
The radio receiver operates on ignition switched
battery current that is available only when the igni-
tion switch is in the On or Accessory positions. The
electronic digital clock function of the radio operates
on fused battery current supplied through the IOD
fuse, regardless of the ignition switch position.
For more information on the features, setting pro-
cedures, and control functions for each of the avail-
able factory-installed radio receivers, refer to the
owner’s manual.
REMOVAL
(1) Disconnect and isolate the battery negative
cable.
(2) Remove instrument panel center bezel (Refer to
23 - BODY/INSTRUMENT PANEL/INSTRUMENT
PANEL CENTER BEZEL - REMOVAL).
(3) Remove four mounting screws on the radio and
pull out of instrument panel (Fig. 4).
CAUTION: Pulling the antenna cable straight out of
the radio without pulling on the locking antenna
connector could damage the cable or radio.
(4) Disconnect the antenna cable by pulling the
locking antenna connector away from the radio (Fig.
5).
(5)
Disconnect wire harness connector from radio.
(6) Remove radio from vehicle.
Fig. 3 CD Changer Remove/Install
Fig. 4 Radio Remove/Install
Fig. 5 ANTENNA TO RADIO
1 - RADIO
2 - LOCKING ANTENNA CONNECTOR
3 - INSTRUMENT PANEL ANTENNA CABLE
8A - 6
AUDIO/VIDEO
PL/SRT-4
CD CHANGER (Continued)