Index Dodge Dodge Durango (HB) - service repair manual 2005 year
Search
Content .. 456 457 458 459 ..
Dodge Durango (HB). Manual - part 458
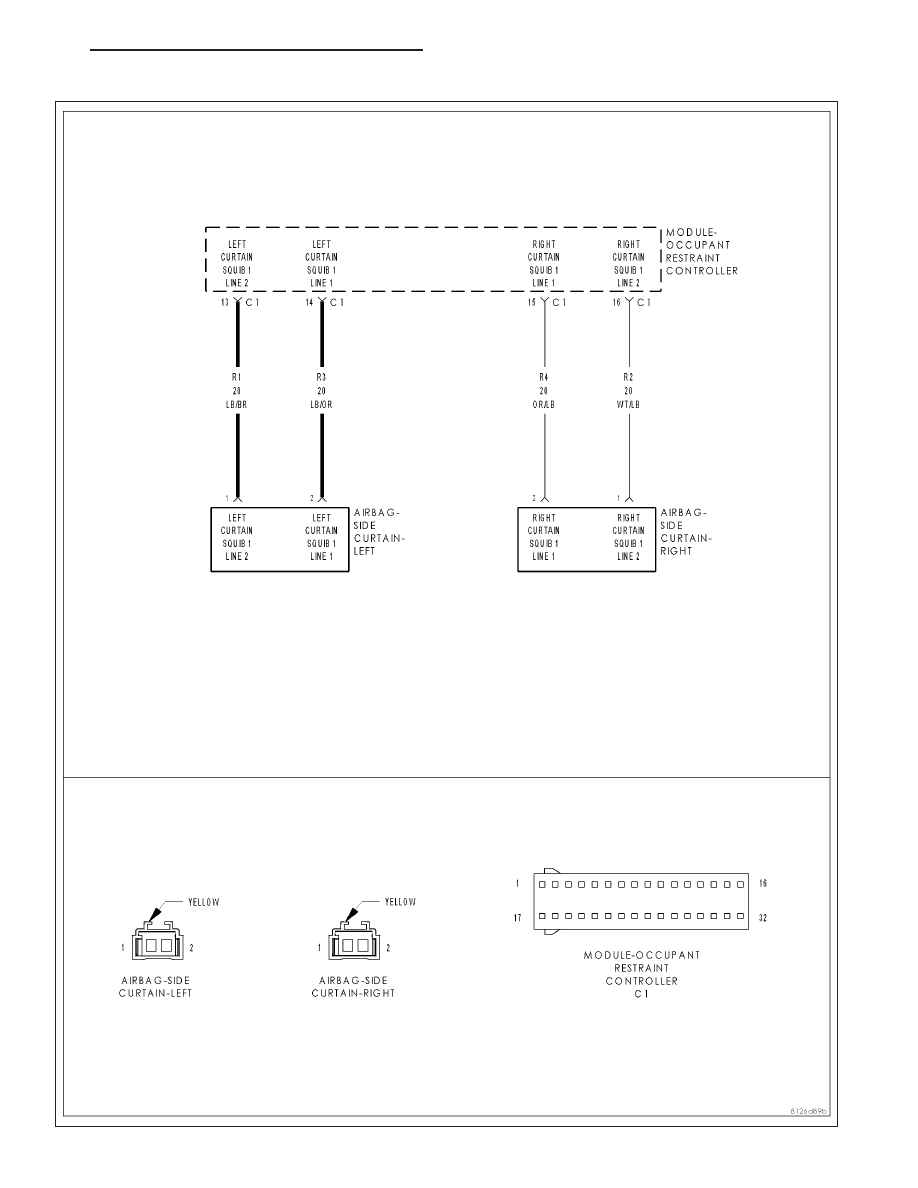
B1B19-DRIVER SIDE CURTAIN SQUIB 1 CIRCUIT HIGH
HB
RESTRAINTS - ELECTRICAL DIAGNOSTICS
8O - 101