Chrysler Le Baron, Dodge Dynasty, Plymouth Acclaim. Manual - part 337
EXTERIOR LAMPS—AC BODY
INDEX
page
page
. . . . . . . . . . . . . . . . . . . . . . 10
. . . . . . . . . . . . . . . . . . . 11
. . . . . . . . . . . . . . . 10
Center High Mounted Stop Lamp (CHMSL)
Center High-Mounted Stop Lamp (CHMSL) Bulb
. . . . . . . . . . . . . . . . . . 12
. . . . . . . . . . . . . . . . . . . . . 12
Front Side Marker Bulb—AC/C-Body
Front Side Marker Lamp—AC/C-Body
. . . . . . . . . . . . . . . . . . . . . . 10
Headlamp Sealed Beam—AC/C Body
. . . . . . . . . . . . . . . . . . . 13
Park/Turn Signal Lamp or Bulb—AC/C-Body
Park/Turn Signal Lamp or Bulb—AC/D-Body
Rear Side Marker Lamp Bulb—AC/C-Body
Rear Side Marker Lamp—AC/C-Body
Tail, Stop, Turn Signal, Back-Up and Side Marker
. . . . . . . . . . . . . . . . . . . . . . 12
Tail, Stop, Turn Signal, Back-Up Lamp—AC/C or
. . . . . . . . . . . . . . . . . . . . . . . . . . . . 12
HEADLAMP DIAGNOSIS
Refer to the Headlamp Diagnosis at the beginning of
this Group. Refer to Wiring Diagrams Manual for
circuit and component locations.
HEADLAMP SEALED BEAM—AC/C BODY
REMOVAL
(1) Turn the headlight switch ON.
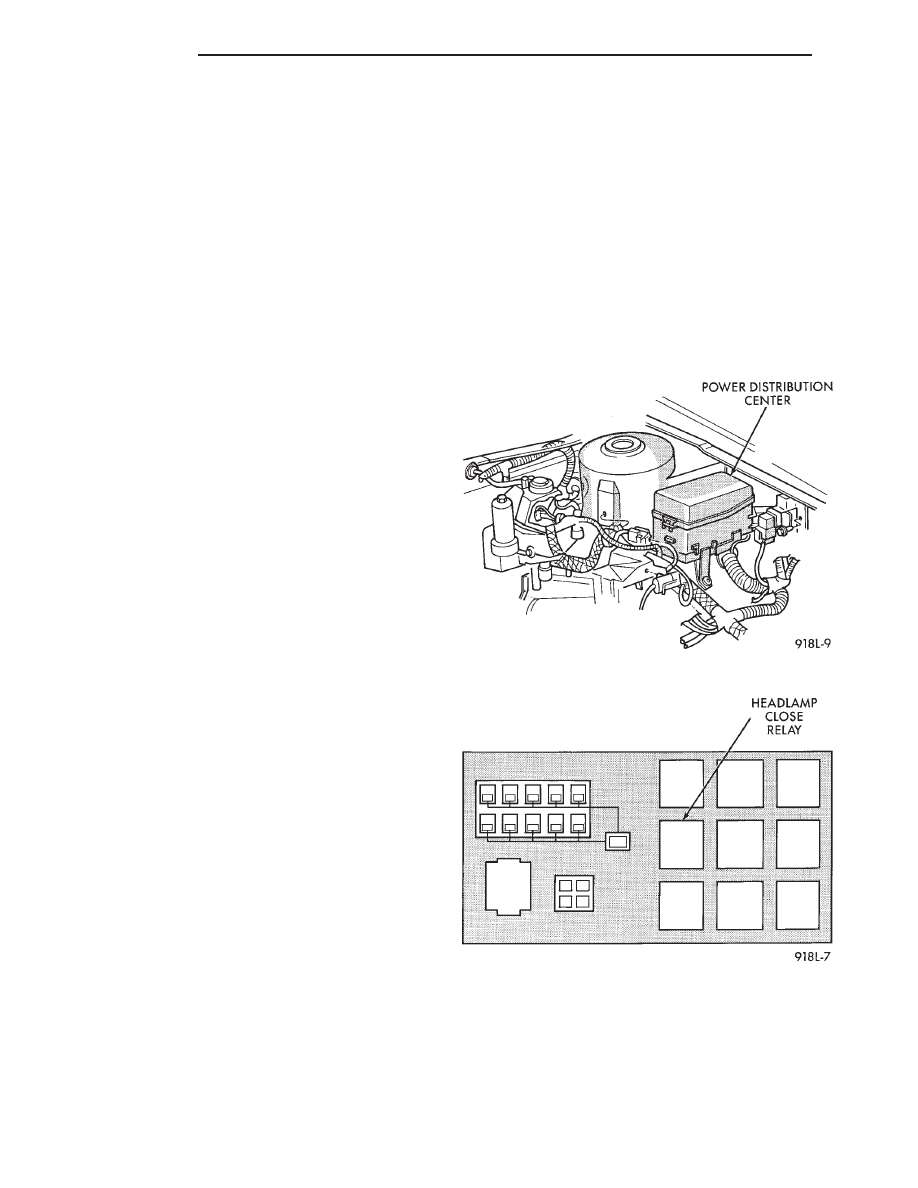
(2) Open the hood and locate the Power Distribution
Center forward of the left front suspension tower (Fig.
1). Remove the cover.
(3) Remove the Headlamp Close Relay (Fig. 2) to
prevent the headlamp doors from closing.
(4) Turn the headlight switch OFF.
(5) Remove screws from headlamp bezel and remove
bezel, if equipped.
(6) Remove screws from interior retaining ring (Fig.
3), and remove ring.
Do not disturb the headlamp adjusting screws.
(7) Pull out sealed beam unit and unplug connector.
INSTALLATION
Reverse the preceding operation.
AERO HEADLAMPS—AC/D-BODY
Lens fogging is a normal condition and does
not require service, as moisture will vent from
tubes behind the lens.
AERO HEADLAMP BULB
REMOVAL (FIG. 4)
(1) Locate and remove the wire connector behind the
headlamp assembly in the engine compartment.
CAUTION: Do not touch the bulb with fingers or any
possibly oily surface, reduced bulb life will result.
(2) Rotate the bulb retaining ring counterclockwise
one quarter turn and remove the ring, bulb and bulb
holder from the lens assembly. The bulb holder has
alignment notches.
INSTALLATION
Reverse the preceding operation.
Fig. 1 Power Distribution Center
Fig. 2 Headlamp Close Relay
8L - 10
LAMPS
Ä