Chrysler Le Baron, Dodge Dynasty, Plymouth Acclaim. Manual - part 223
removal will be necessary. Remove the shoe and lin-
ing assemblies (see Brake Shoe Removal).
Combined shoe and lining thickness should be
measured at the thinnest part of the assembly.
When a shoe and lining assembly is worn to a
thickness of approximately 7.0 mm (9/32 inch) it
should be replaced.
Replace both shoe assemblies (inboard and out-
board) on both wheels whenever shoe assemblies on
either side are replaced.
If a shoe assembly does not require replacement.
Reinstall it, making sure each shoe assembly is re-
turned to its original position on the wheel of the ve-
hicle from which it was removed. (See Brake Shoe
Installation).
SERVICE PRECAUTIONS
WARNING: DUST AND DIRT ON BRAKE PARTS
GENERATED DURING THE NORMAL USE AND
WEAR OF MOTOR VEHICLE BRAKE SYSTEMS CAN
CONTAIN ASBESTOS FIBERS. BREATHING EXCES-
SIVE CONCENTRATIONS OF ASBESTOS FIBERS
CAN CAUSE SERIOUS BODILY HARM, SUCH AS
ASBESTOSIS
AND
CANCER.
EXTREME
CARE
SHOULD
BE
EXERCISED
WHILE
SERVICING
BRAKE ASSEMBLIES OR COMPONENTS.
DO NOT CLEAN BRAKE ASSEMBLIES OR COM-
PONENTS WITH COMPRESSED AIR OR BY DRY
BRUSHING; USE A VACUUM CLEANER SPECIFI-
CALLY RECOMMENDED FOR USE WITH ASBES-
TOS FIBERS. IF A SUITABLE VACUUM CLEANER IS
NOT AVAILABLE, CLEANING SHOULD BE DONE
WET USING A WATER DAMPENED CLOTH.
DO NOT CREATE DUST BY SANDING, GRINDIN-
G,AND/OR SHAVING BRAKE LININGS OR PADS
UNLESS SUCH OPERATION IS DONE WHILE USING
PROPERLY EXHAUST VENTILATED EQUIPMENT.
DISPOSE OF ALL DUST AND DIRT SUSPECTED
TO CONTAIN ANY ASBESTOS FIBERS IN SEALED
BAGS OR CONTAINERS TO MINIMIZE DUST EXPO-
SURE TO YOURSELF AND OTHERS.
FOLLOW ALL RECOMMENDED PRACTICES PRE-
SCRIBED BY THE OCCUPATIONAL SAFETY AND
HEALTH ADMINISTRATION AND THE ENVIRON-
MENTAL PROTECTION AGENCY. FOR THE HAN-
DLING, PROCESSING, AND DISPOSITION OF DUST
OR DIRT WHICH MAY CONTAIN ASBESTOS FI-
BERS.
IT IS RECOMMENDED NOT TO BREATH ANY
TYPE OF BRAKE LINING MATERIAL DUST EVEN
ASBESTOS FREE, DUE TO THE FIBROUS NATURE
OF THE MATERIALS BEING USED.
Grease or any other foreign material must be kept
off the caliper assembly, surfaces of the braking disc
and external surfaces of the hub, during service pro-
cedures.
Handling the braking disc and caliper should be done
in such a way as to avoid deformation of the disc and
scratching or nicking the brake linings (pads).
During removal and installation of a wheel and tire
assembly, use care not to strike the caliper.
Before vehicle is moved after any brake service
work, be sure to obtain a firm brake pedal.
BRAKE SHOE REMOVAL
(1) Raise vehicle on jackstands or centered on a
hoist.
(2) Remove rear wheel and tire assemblies.
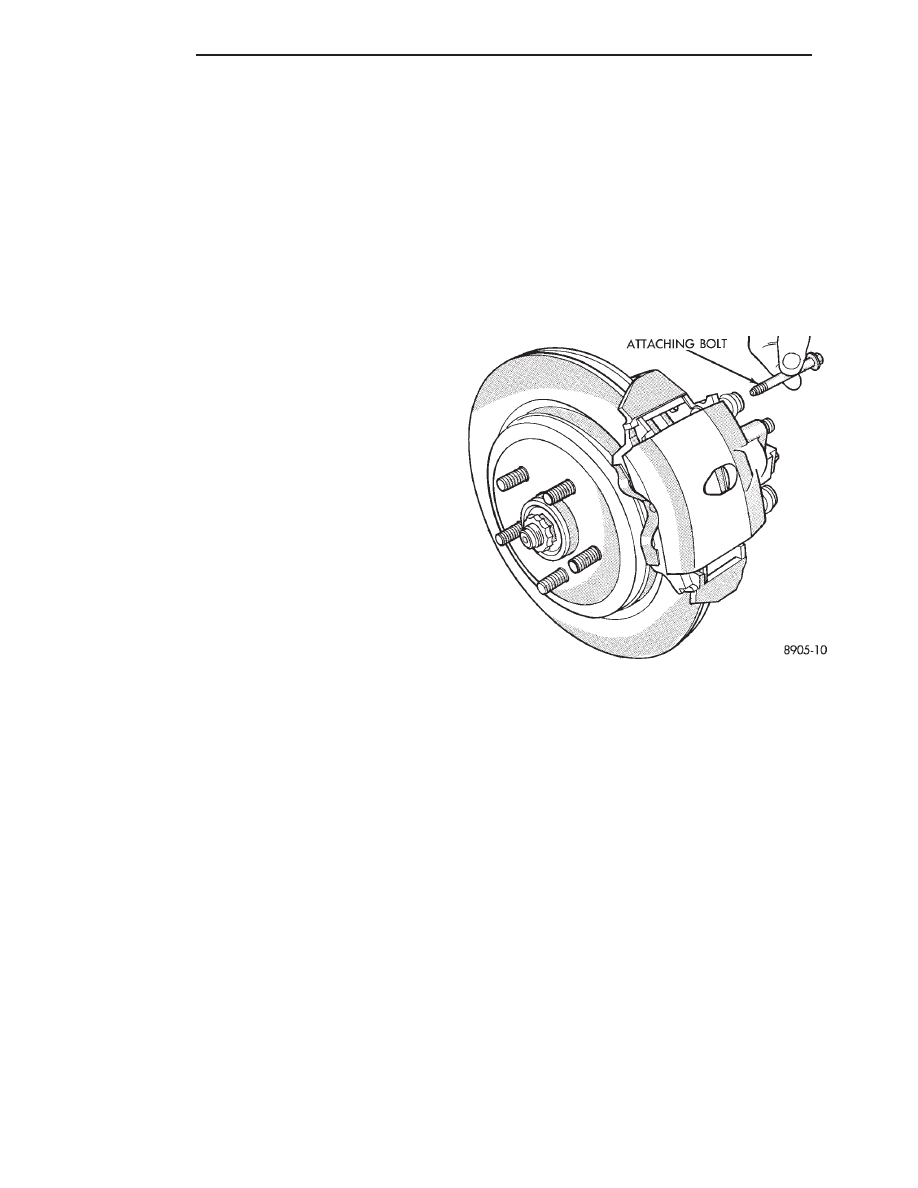
(3) Remove caliper attaching bolts (Fig. 2).
(4) Lift caliper away from adapter rails (Fig. 3).
(5) Remove outboard shoe. By prying the shoe re-
taining clip over the raised area on the caliper. Then
slide the shoe down and off the caliper (Fig. 4).
(6) Pull inboard shoe away from piston, until the
retaining clip is free from the cavity in the piston. (Fig.
5).
CLEANING AND INSPECTION
Check for piston seal leaks (brake fluid in and
around boot area and inboard lining) and for any
ruptures of piston dust boot. If the boot is damaged, or
fluid leak is visible, disassemble caliper assembly and
install a new seal and boot (and piston if scored). Refer
to procedure titled Disc Brake Caliper Disassembly.
BRAKE SHOE INSTALLATION
(1) Retract piston.
If the originally removed brake shoe assem-
blies are to be replaced back on vehicle. Be sure
Fig. 2 Removing Caliper Attaching Bolts
5 - 46
BRAKES
Ä