Chrysler Le Baron, Dodge Dynasty, Plymouth Acclaim. Manual - part 197
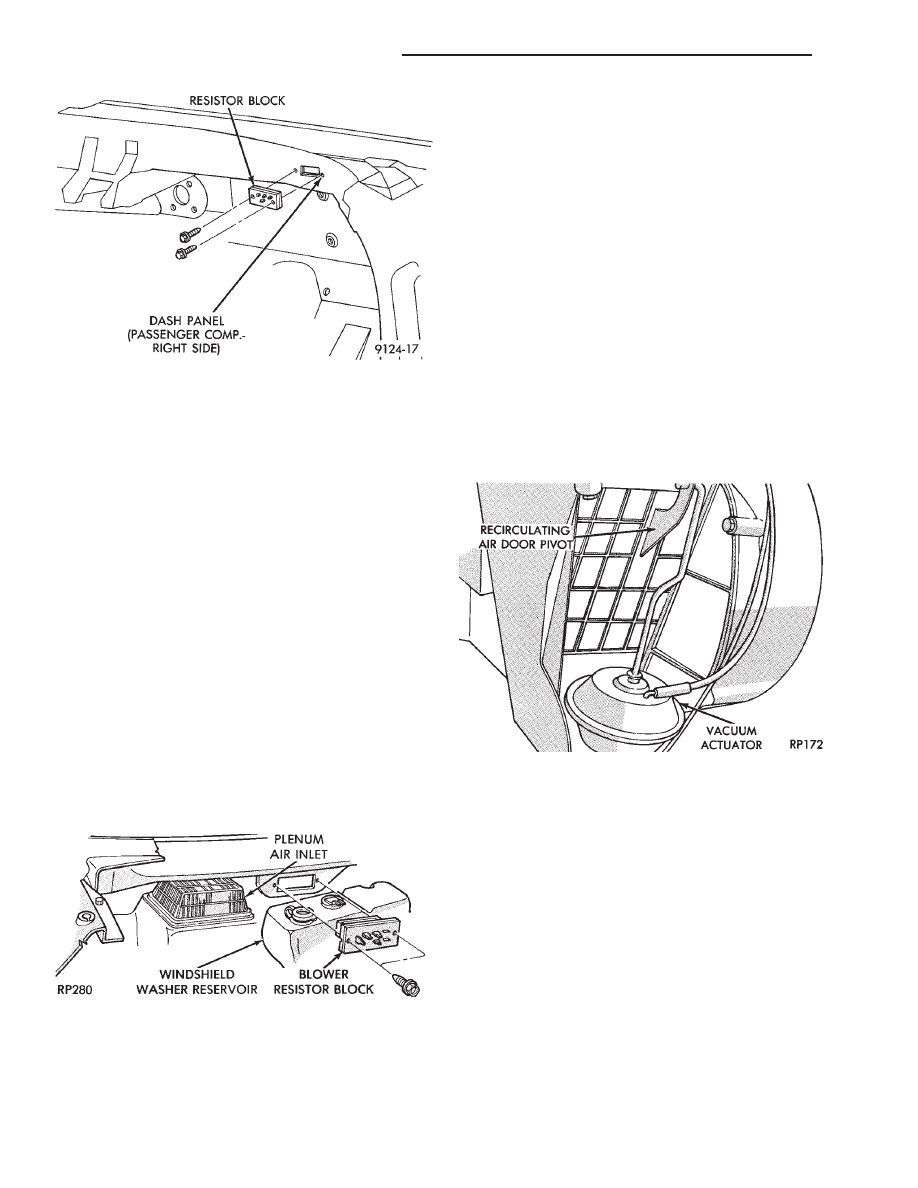
(5) Carefully pull the resistor block straight out
from the cowl plenum opening and remove the resis-
tor block from the vehicle.
To install, reverse the preceding operation. The
coils on the Resistor Block should not be contacting
one another. Before installation, gently separate the
coils (with fingers only) if one coil is contacting an-
other.
AA, AP, AY, AND AC BODY
(1) Raise the hood and remove the windshield
wiper arm assemblies.
(2) Remove
five
cowl-plenum
grille
attaching
screws and carefully lift the grille from the vehicle.
(3) (AA and AP): Locate and remove four air in-
take shield attaching screws and lift the shield from
the vehicle.
(4) (AC and AY): Remove two resistor block termi-
nal cover screws and remove cover.
(5) Disconnect the wire connector from the resistor
block located behind the windshield washer reservoir
(Fig. 7).
(6) Remove two blower resistor block attaching
screws. Then carefully pull the resistor block forward
until the coils clear the plenum and lift it from the
vehicle.
To install, reverse the preceding operation. The
coils on the Resistor Block should not be contacting
one another. Before installation, gently separate the
coils (with fingers only) if one coil is contacting an-
other.
VACUUM ACTUATOR—FRESH/RECIRC DOOR
This actuator is located on the passenger side of
the heater-A/C housing.
REMOVAL AND INSTALLATION
(1) AA, AC or AY Body: Remove silencer cover un-
der the instrument panel (below glove box).
(2) Remove glove box assembly. Refer to Group 8E,
Instrument Panel.
(3) Disconnect vacuum lines.
(4) Locate and remove the two vacuum actuator at-
taching screws.
(5) Disengage the actuator arm linkage from the
door pivot and remove the vacuum actuator (Fig. 8)
from vehicle.
To install, reverse the preceding operation.
AIR DISTRIBUTION DUCT
REMOVAL AND INSTALLATION
AA BODY
On AA Body the instrument panel must be rolled
down to service duct. Refer to Group 8E, Instrument
Panel.
AC, AP, AY BODY
(1) Remove lower instrument panel module. Refer
to Group 8E, Instrument Panel.
(2) Remove distribution duct attaching screws from
under the front edge of the instrument panel (Fig. 9).
(3) Slide duct downward and remove from vehicle.
To install, reverse the preceding operation.
Fig. 6 Blower Resistor Block Location—AJ and AG
Body
Fig. 7 Blower Resistor Block Location—AA, AP, AY
and AC Body
Fig. 8 Recirculating Air Door Vacuum
Actuator—Typical
24 - 50
HEATING AND AIR CONDITIONING
Ä