Chrysler Le Baron, Dodge Dynasty, Plymouth Acclaim. Manual - part 17
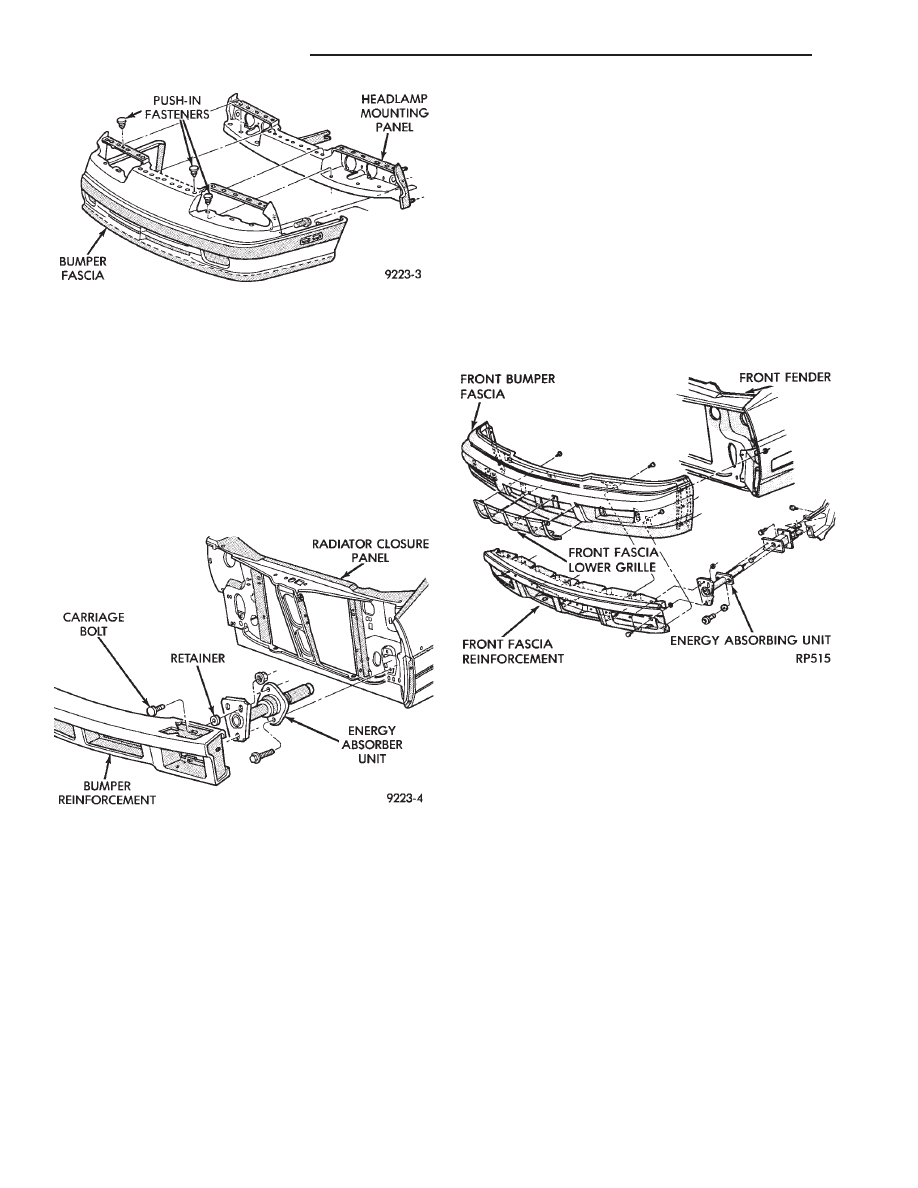
FRONT BUMPER REINFORCEMENT
REMOVAL—AG-VEHICLE (FIG. 8)
(1) Remove bumper fascia as necessary to gain
clearance to remove bumper reinforcement.
(2) Remove nuts holding bumper reinforcement to
energy absorber units.
(3) Separate bumper reinforcement from vehicle.
carriage
INSTALLATION
Reverse the preceding operation
FRONT BUMPER ENERGY ABSORBER
REMOVAL—AG-VEHICLE (FIG. 8)
(1) Remove front fascia and bumper reinforcement
as necessary to remove absorber unit.
(2) Remove bolts holding energy absorber unit to
front closure panel.
(3) Separate energy absorber from vehicle.
FRONT BUMPER ENERGY ABSORBER
INSTALLATION
Reverse the preceding operation.
AJ-VEHICLE FRONT BUMPER AND FASCIA
REMOVAL (FIG. 9)
(1) Remove socket and bulb from park and turn
lamp.
(2) Remove nuts holding fascia to fender, from be-
hind forward flange of fender.
(3) Support front bumper assembly on suitable lift-
ing device and remove bolts holding bumper rein-
forcement to energy absorber units.
INSTALLATION
Reverse the preceding operation. Align bumper
height to approximately 5 mm (0.200 in.) gap to bot-
tom of grille and flush to front fenders on the sides.
AP-VEHICLE FRONT BUMPER
REMOVAL (FIG. 10)
(1) Raise vehicle and support on safety stands.
(2) Disconnect front park and turn signal lamp
wire connector.
(3) Remove front side marker lamp socket from
lamp assembly and position socket out of the way.
(4) Remove bolt holding front bumper fascia to
wheelhouse splash shield.
(5) Remove nuts holding fascia to front fender.
(6) Support front bumper on lifting device.
(7) Remove bolts holding front bumper reinforce-
ment to energy absorber units.
(8) Separate front bumper from vehicle.
INSTALLATION
Reverse the preceding operation.
Fig. 7 Headlamp Mounting Panel—AG-Vehicle
Fig. 8 Front Bumper Reinforcement and Energy
Absorber Unit—
Fig. 9 Front Bumper and Fascia—AJ-Vehicle
13 - 4
FRAME AND BUMPERS
Ä