Daewoo Musso. Manual - part 328


  Index      Daewoo     Daewoo Musso - service repair manual


Search            


Content   ..  326  327  328  329   ..


Daewoo Musso. Manual - part 328


SUPPLEMENTAL RESTRAINT SYSTEM(SRS)  8B-17
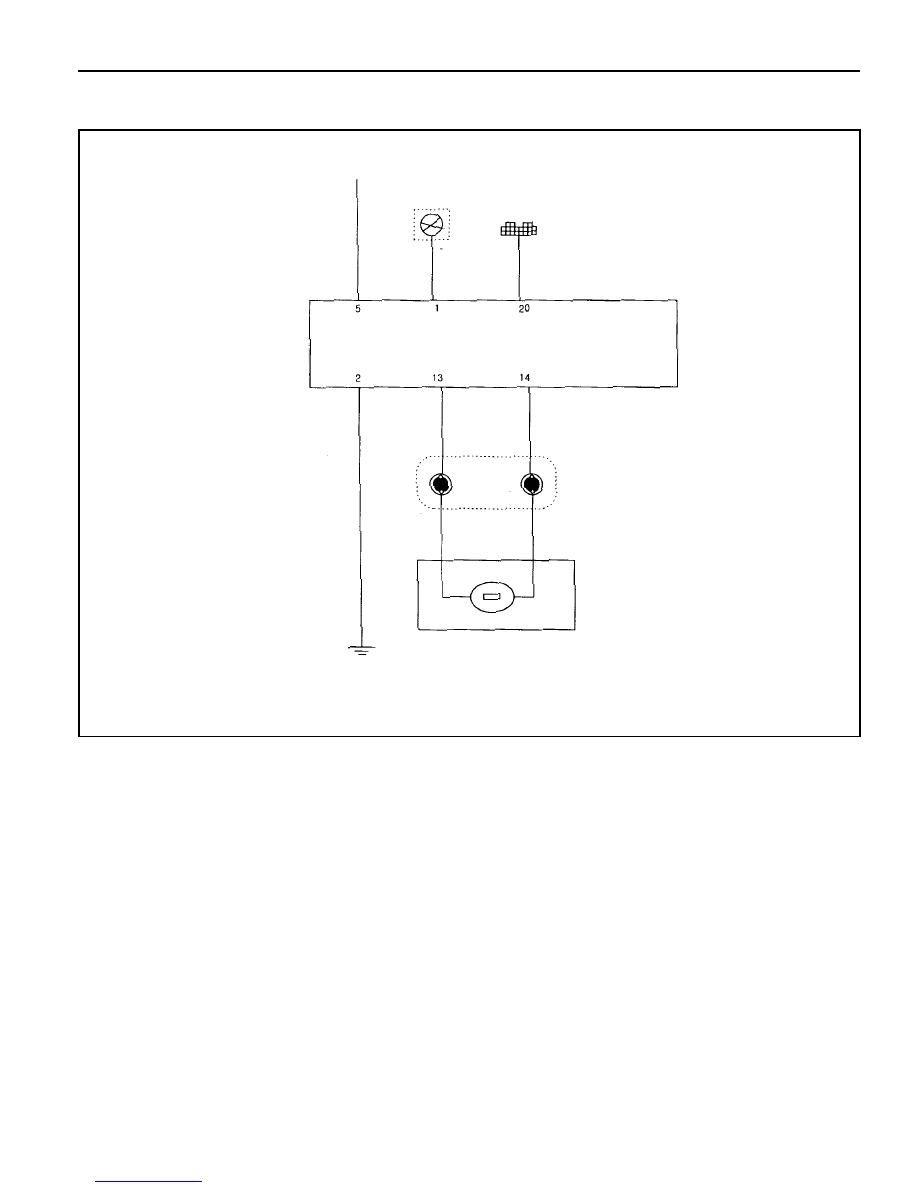
AIR BAG DIAGRAM

8B-18  SUPPLEMENTAL RESTRAINT SYSTEM(SRS)

MAINTENANCE AND REPAIR

ON-VEHICLE SERVICE

AIR BAG MODULE

Removal & Installation Procedure

1. Remove the steering wheel rid (LH,RH) with a screwdriver.

Installation Notice

Each position mark (LH,RH) is stamped on the inner surface
of the rids.

Tightening  Torque

7 - 11 Nm

3. Disconnect the connectors and remove the air bag module.

4. Installation should follow the removal procedure in the

reverse order.

2. Unscrew the bolts from both sides.

Installation Notice

SUPPLEMENTAL RESTRAINT SYSTEM(SRS)  8B-19

Air Bag

Horn (Relay)

Remote Control (Electronic Circuit)

CLOCK SPRING

General Specification

Voltage

Rating Operating Voltage

Current Rating

Air Bag Circuit Resistance

Isolating Resistance

Rotating Range

DC 12V

 DC 6 - 18V

10 - 30mA(6A,0.1second)

200 - 220mA

15mA

0.16 - 0.38

W

(-40°C - 85°C)

5M

W

2.7 - 3.1 Rotation from neutral

Position to Both Sides

Notice

l

Clock spring can not be repaired.

l

Do not disassemble or modify.

l

To adjust to the center position, rotate clockwise until it
stops and then rotate it counterclockwise 2.3 ± 0.2
revolutions and align marks. If not, airbag system can
not work normally and driver can be injured seriously.

8B-20  SUPPLEMENTAL RESTRAINT SYSTEM(SRS)

Removal & Installation Procedure

preceding work : removal of steering wheel

1. Turn the ignition switch to “OFF” position and disconnect

the battery negative cable. Start the procedure after waiting
over 3oseconds.

2. Unscrew 3 screws from lower cover on steering column shaft

and remove the lower cover.

3. Unscrew 4 screws from clock spring and remove the clock

spring

Installation Notice

l

Don’t try to repair and modify the clock spring.

l

When aligning the neutral position, turn to clockwise until it
stops, and turn to counter clockwise until the  marks are
aligned


Content   ..  326  327  328  329   ..