DAF CF65, CF75, CF85 Series . Manual - part 130
 

  Index      DAF     DAF CF65, CF75, CF85 Series - service repair manual


Search            


Content   ..  128  129  130  131   ..


DAF CF65, CF75, CF85 Series . Manual - part 130


©

 200346

4-35

Removal and installation

EXTERNAL CAB COMPONENTS

ΧΦ65/75/85 series

1

4

4.23 REMOVAL AND INSTALLATION, ANTI-WHISTLE WEATHERSTRIP

Removing anti-whistle weatherstrip
1.

Remove the door and place it on a suitable 
work bench.

2.

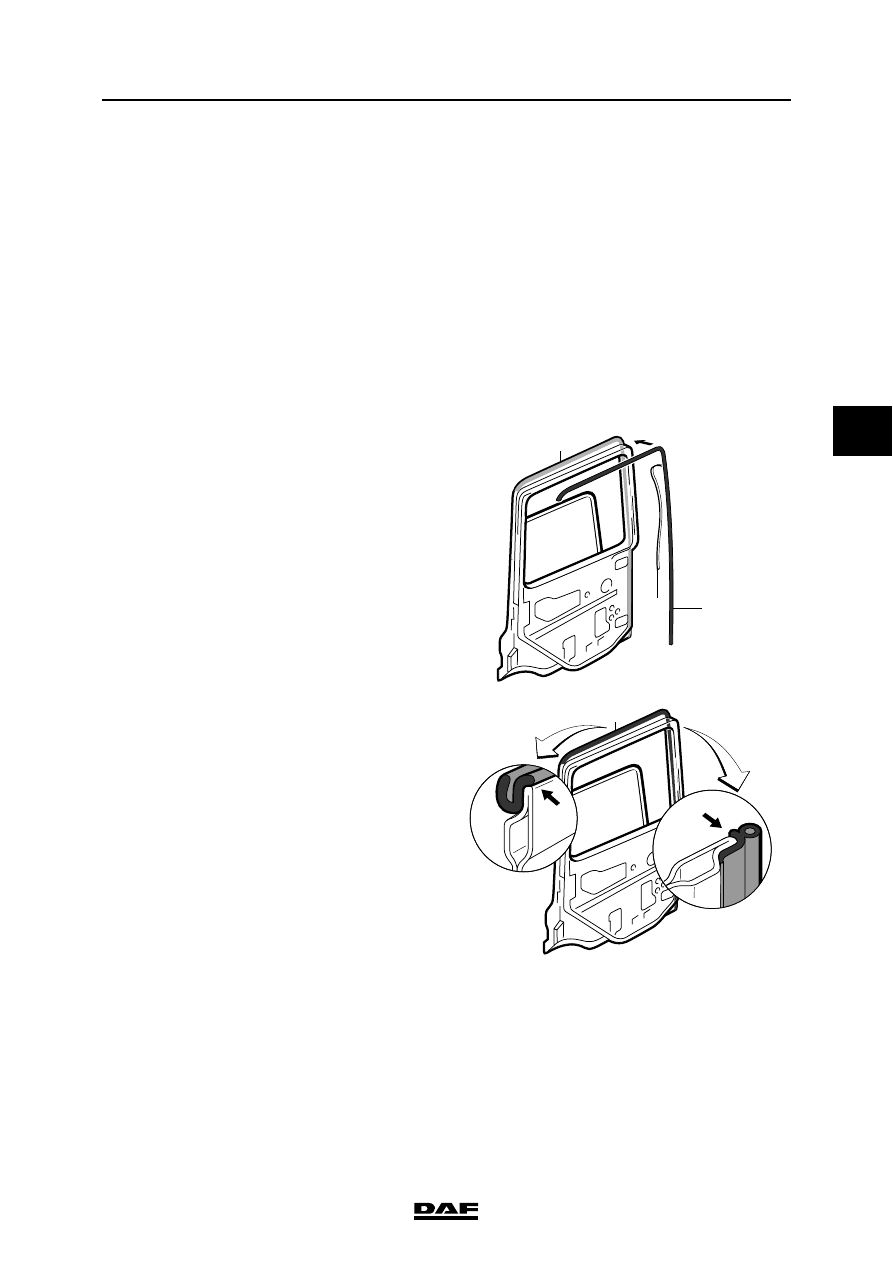
Remove the old anti-whistle weatherstrip 
and throw it away.

Note:
Avoid removing anti-whistle weatherstrips, if 
possible. Masking is preferred to removing!
If removal of the anti-whistle weatherstrip is 
unavoidable, proceed as follows:

Installing anti-whistle weatherstrip
1.

Clean the area to be glued (1) with the 
specified cleaning agent, see "Technical 
data".

2.

Lightly roughen the area to be glued with the 
specified abrasive, see "Technical data".

3.

After roughening the area, remove any dust 
and grease as quickly as possible using the 
specified cleaning agent, see "Technical 
data".

Note:
For proper adhesion, the temperature should 
be at least 15

|C. If necessary, this 

temperature can be obtained by using a blow 
drier.

4.

Pull the protective foil (2) from the new anti-
whistle weatherstrip (3) beginning by A to 
beyond B.

5.

Position the new anti-whistle weatherstrip (3) 
at the point marked B.

6.

Press the rubber, beginning with the point 
marked B. Make sure that the "nose" is fitted 
over the edge of the door. Remove the rest 
of the protective foil (2) and press the rest of 
the strip in place.

B

A

1

2

3

K1 00 694

3

B

K1 00 695

EXTERNAL CAB COMPONENTS

4-36

©

 200346

Removal and installation

4

ΧΦ65/75/85 series

1

7.

When the whole anti-whistle weatherstrip is 
in place, secure areas A, B and C by 
applying a drop of superfast adhesive, see 
"Technical data".

8.

Using a wallpaper roller for example, press 
the anti-whistle rubber over the whole glued 
area . Apply a force of approx. 7 kg manually.

9.

Install the door.

7 kg.

A

B

C

K1 00 696

©

 200346

4-37

Removal and installation

EXTERNAL CAB COMPONENTS

ΧΦ65/75/85 series

1

4

4.24 REMOVAL AND INSTALLATION, RAISED ROOF

Removing raised roof
1.

Remove the interior compartments and 
interior upholstery.

2.

Disconnect the electrical connections (wiring 
harnesses).

3.

Remove the electric roof hatch.

4.

Saw the polyester roof approximately 10 cm 
from the bottom. Remove the polyester roof 
from the cab.

5.

Remove the attachment bolts from the roof 
frame.

Notes
-

There is still a 10-cm polyester edge 
attached to the cab. Cut through the sealing 
compound between this edge and the cab.

-

After that, break off the polyester edge from 
the cab in pieces.

-

Cut away as much of the sealant remnants 
as you can from the roof edge. A thin layer 
may remain.

Important tips
-

Check that there is no gel coating on the 
inside of the polyester roof edge.

-

Check that there is no finishing coat or 
bitumen coating on the part to be glued.

-

Any damage to the paint on the frame should 
be repaired immediately with the right type of 
paint, well before the new raised roof is fitted.

-

Always work in a clean area.

-

Always used the specified cleaner, adhesive, 
activator and primer to glue the raised roof to 
the cab, see "Technical data". Note the 
drying, processing and curing times.

-

Wear industrial gloves or use a special hand 
cream.

-

Preferably use paper towels or tissues 
instead of cleaning rags.

-

Immediately remove any splashes or spilt 
activator or cleaner from painted areas using 
paper towels or tissues.

Pre-treating the polyester roof
1.

The pre-treatment described below 
guarantees that the entire surface which will 
come into contact with the adhesive will be 
covered with a suitable layer of primer. 

EXTERNAL CAB COMPONENTS

4-38

©

 200346

Removal and installation

4

ΧΦ65/75/85 series

1

2.

At places where adhesive is to be applied, 
the polyester roof is first cleaned with a ball 
of crumpled cleaning towels or tissues that 
has been thoroughly moistened with the 
specified cleaning agent, see "Technical 
data". 

3.

Lightly roughen the surface to be glued with 
the specified abrasive, see "Technical data".

4.

Clean the sanded surface once again using 
a ball of crumpled cleaning towels or tissues 
that has been thoroughly moistened with the 
specified cleaning agent, see "Technical 
data". Allow the clean surface to dry for the 
specified time, see "Technical data".

5.

Check that the surface is free of abrasives 
and other impurities. If necessary, repeat the 
cleaning operation.

6.

Next apply a single or at most two thin 
covering layers of the specified primer to the 
roughened surface (1) in accordance with 
the supplier's instructions. Allow this layer to 
dry for the specified time, see "Technical 
data".

Note:
Shake the can of primer well before use.

1

K1 01 072

1

K1 01 074


Content   ..  128  129  130  131   ..