Chery S11 / Chery QQ. Manual - part 93
 

  Index      Chery     Chery S11 / Chery QQ - service repair manual


Search            


Content   ..  91  92  93  94   ..


Chery S11 / Chery QQ. Manual - part 93


    Chery QQ Service Manual 


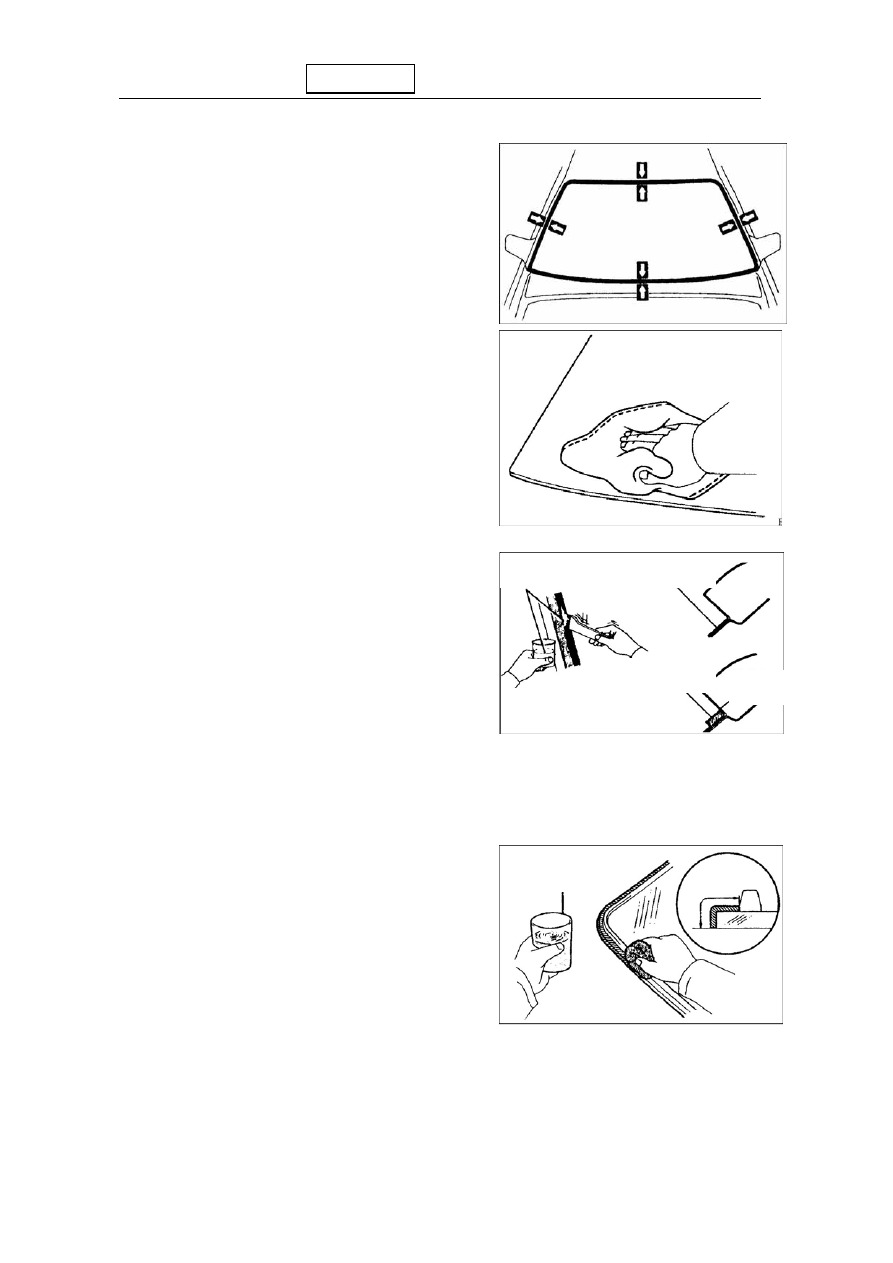
5. Position glass 

Put glass in right place 

Make reference marks on glass and car body 

Remove glass 


6. Clean the joint surface of glass 

Clean the black dirt with clean liquid 

on the joint surface of glass periphery   

AttentionDo not touch glass surface 

after cleaning


Coating a layer of base paint M 

on the joint surface of car body 

Brush a layer of base paint M 

onto the joint surface of car body 

AttentionLeave base coating layer dry 

  for 3 minutes at least 

No coating on bonding agent 

Never reserve unsealed base paint M for later use 


7. Coat a layer of base paint G on the joint 

  surface of glass 

Coat a layer of base paint G with brush or 

sponge on glass periphery and joint surface 

Clear base paint with a clean rag before drying 

AttentionLeave base paint layer dry for 

3 minutes at least 

No coating on bonding agent 


base paint M 

base paint M 

bonding agent

base paint M 

base paint G 


    Chery QQ Service Manual 

Never reserve unsealed base paint G for later use 


8. Mix bonding agent 

 Attention

Ensure the fixation of inlaid strip 

to finish within the applicable duration of 

bonding agent 

 Mixing bonding agent must be completed 

within 5 minutes 

 Clean glass plate and oil loam scraper 

thoroughly with solvent 

Fully mix 500g principal agent with 75g hardening agent with scraper   

on glass plate or similar object 

9. Applying bonding agent 

 Cut off the tip of tubular pot and fill bonding 

agent in the pot 

 Put the pot into sealing glue gun 

 Apply bonding agent on glass as showed 

in the drawing 

10.Install glass 

When installing windshield, align the 

reference marks on glass and car body, then 

gently press in glass towards periphery 

Smear glass at periphery with bonding agent 


using scraper 

Remove excess or spilled bonding agent with scraper   

Fasten glass until bonding agent hardened 

11. Water leakage checking and maintenance 

Water leakage test shall be conducted after curing time 

Block up water leaking places with sealant  


    Chery QQ Service Manual 

12. Fix lower outside filler strip on rear window 

Put inlaid strips on car body and tighten the strap by patting 

  Attach wire connector for defroster   


Install the following parts 

roof lining 

inner roof lateral ornament 

small rear seat illuminating light 

assistant grasp 

decorative board of glove compartment 

upper parking lamp 

speaker mesh guard 

back of rear seat 

Torque18 N.m185 kgf/cm13 lbf/in 

bolts on the lower end of rear seat belt 

Torque43 N.m440 kgf/cm32 lbf/in 

rear seat cushions 


When installing, the sequence is the reverse procedure of removal 


    Chery QQ Service Manual 


Chapter 15  Wiper 


Remove front windshield wiper assembly 

(1)  Pull out sealing strip 

(2)  Prize up decorative plate 

(3)Loosen set bolts and take down wiper arm 

( 4 ) Loosen ten fixing screws to get out      

decorative plate 

(5)Prize out link rod 

(6)Loosen six fixing nuts on the left and right 

          sides of link rod to take down link rod assembly 

(7)  Loosen four set bolts on wiper motor and take down the motor 


Remove blade 

Loosen seven set bolts and take down blade 


Remove rear window wiper assembly 


Content   ..  91  92  93  94   ..