Chery Fora (Elara A520). Manual - part 2
 

  Index      Chery     Chery Fora (Elara A520) - service repair manual


Search            


Content   ..  1  2  3   ..


Chery Fora (Elara A520). Manual - part 2


Chery Service Manual for A520                Body Dimension and Accessories


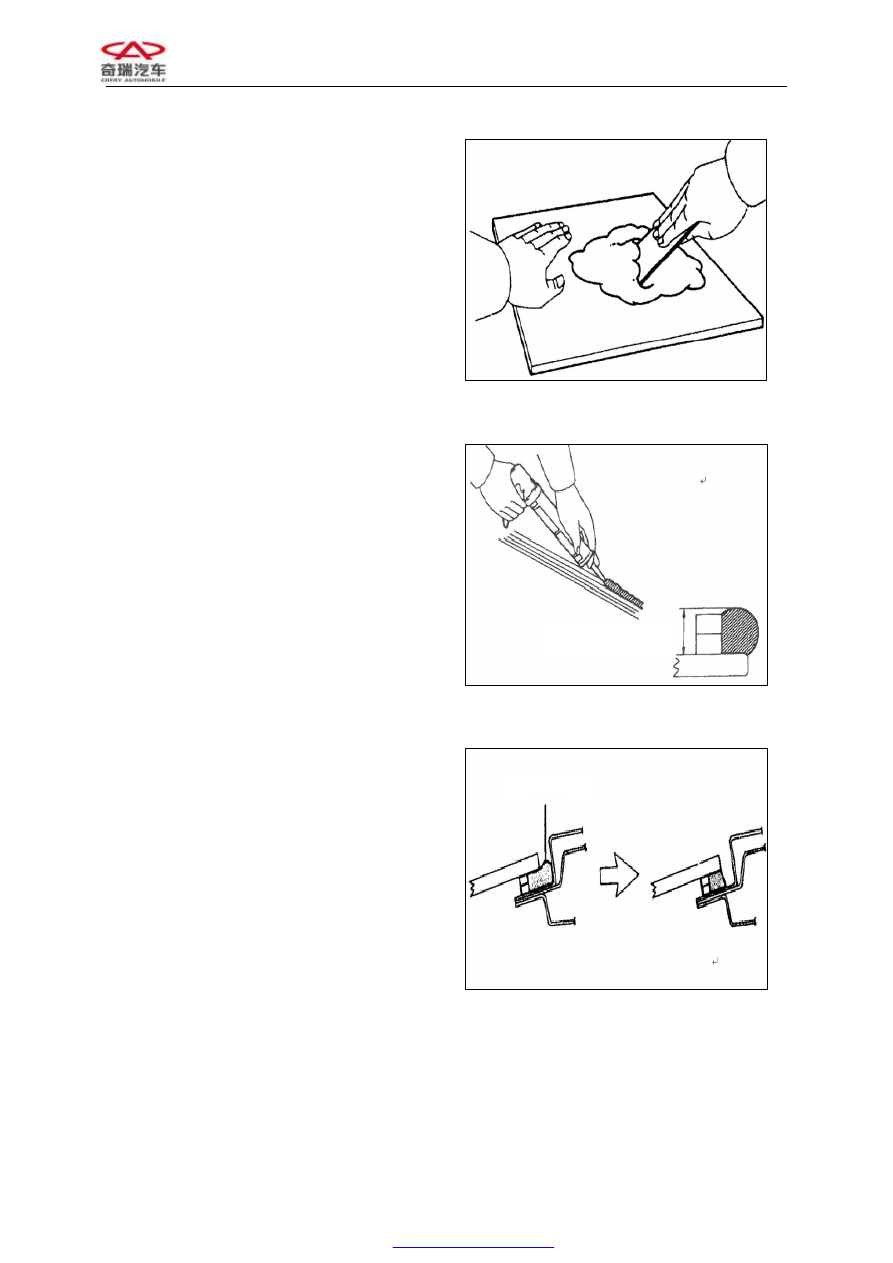
10.  Mixing the bonding agent; 

Note:  Make  sure  that  the  moulding  be 
installed  within  the  application  period  of  the 
bonding agent, and the bonding agent should 
be mixed within 5 minutes. 

①  Clean  the  glass  board  and  the  putty 

knife completely with solvent 

②  Mix  500  grams  host  crystal  with  75 

grams  hardener  completely  on  a  glass 
board or similar with a scraper 


Figure 159 

11.  Applying the bonding agent; 

①  Cut  off  the  pot  tip  and  fill  the  bonding 

agent into the pot 

②  Place the pot into the sealant gun 

③  Apply  the  bonding  agent on the  glass  as 
shown in the figure 


Figure 160 

12.  Installing the glass; 

Tip:  Make  sure  that  the  water  resistant  piece 
adhered to the panel of the body as shown  in 
the figure 


Figure 161 


10 mm (0.39 inch) 


Bonding agent 

Chery Service Manual for A520                Body Dimension and Accessories


Note:  ①


To  install  the  glass,  align  the 
reference  marks  on  the  glass  and 
the body and then lightly press the 
glass into from the edge. 


Apply the bonding agent on the edges of 
the glass with a scraper. 


Figure 162 


Clear  the  excessive  or  over  flown 
bonding agent with a scraper. 


Clamp  the  glass  until  the  bonding  agent 

is harden. 

Check for water leakage and repair it: 


Perform  the  leakage  test  after  the 
hardening period. 


Seal the leakage part with sealant 


Figure 163 

13.


Install  the  upper  moulding  of  the 
windshield; 

Install  the  upper  moulding  on  the  body  and 
tap it lightly to fasten it. 

Install the outer moulding 


Figure 164 


2.7 mm (0.11 inch) 

Chery Service Manual for A520                Body Dimension and Accessories


II.


DISASSEMBLING 

AND 

INSTALLING 

THE 

REAR 

WINDSHIELD 

1.


Lay  down  the  seat  back  and  remove  the 
coat track; 


Figure 165 

2.


Remove the lower moulding 

Cut off the double  face adhesive tape at both 
ends of the moulding with a scraper as shown 
in the figure; 

Tip:  Entangle  the  tip  of  the  scraper  with 
adhesive tape before starts. 


Figure 166 

3.


Remove the glass of the rear window 


Pull  the  piano  wire  through  between  the 
body  and  the  glass  from  inside  of  the 
vehicle 


Tie  both  ends  of  the  piano  wire  with 
wood block or similar 

Tip:  Use  adhesive  tape  on  the  outside  to 
prevent  the  external  surface  from  being 
scuffed. 


Figure 167 


Chery Service Manual for A520                Body Dimension and Accessories


Pull  the  piano  wire  along  the  bonding 
agent to cut it off. 

Tip:  Do  not  let  the  piano  wire  spoil  the  two 
stoppers. 


Remove  the  glass,  and  then  remove  the 
moulding of the rear window 

The  installing  steps  are  reverse  to  those  for 
removal. 


Figure 168 

INSTALLING  THE  GLASS  OF  THE 
REAR WINDOW 

1.


Fitting the rear window moulding 

Place the moulding around the glass and fit it 
manually. 

Tip:  Be  sure  to  remove  the  glass  of  the  rear 
window first before fitting the moulding 


Figure 169 

2.


Clean  and  finish  the  contact  surface  of 
the  body  and  cut  off  the  rough  parts  on 
the body; 

Tip:  Leave  bonding  agent  as  much  as 
possible  on  the  body  and  clean  the  cut 
surface  of  the  bonding  agent  with  a  rag 
soaked with washer fluid. 

Tip:  Even  if  the  entire  bonding  agent  has 
been cleared, you should also clean the body. 


Figure 170 


Stopper 


Bonding 

agent 


Content   ..  1  2  3   ..