Chery A11. Manual - part 141
 

  Index      Chery     Chery A11 - service repair manual


Search            copyright infringement  


Content   ..  139  140  141  142   ..


Chery A11. Manual - part 141


The rear housing can be repaired without removing the 

transmission from the car.   

Procedures of Dismantlement 

Put the car on a platform 

Remove the cable assy. of clutch.   

Remove the support of engine at side to transmission 

Lift the car 

Drain out the lubricant in transmission. 

Unscrew the fastening bolts of rear housing, and 

remove the rear housing.   

Procedures of Assembly   

Reverse to the above procedures of dismantlement 

Control arm of clutch, oil seal of separate shaft, 

dismantlement and assembly of separate shaft 

Procedures of dismantlement: when changing these 

parts, it is not necessary to remove the transmission 

assy.  

Put the car on a platform 

Remove the cable assy. of clutch.   

Remove the support of engine at side to transmission 

Lift the car 

Drain out the lubricant in transmission. 


Use deift punch to flush down the rear cover; pay 

attention not to damage the contact surface.   

Remove the fixing clip of separate finger, pull out the 

separate shaft of clutch and take out the finger and 

spring.  

The separate shaft of clutch can be taken down. 

Use deift punch to flush down the oil seal assy. of separate 

shaft, pay attention not to damage the contact surface.   

Procedures of Assembly: 

The assembly is reverse to dismantlement in procedures. 

Pay attention the following points: 

Apply grease onto the surface of oil seal and press the seal 

in with special tool.   


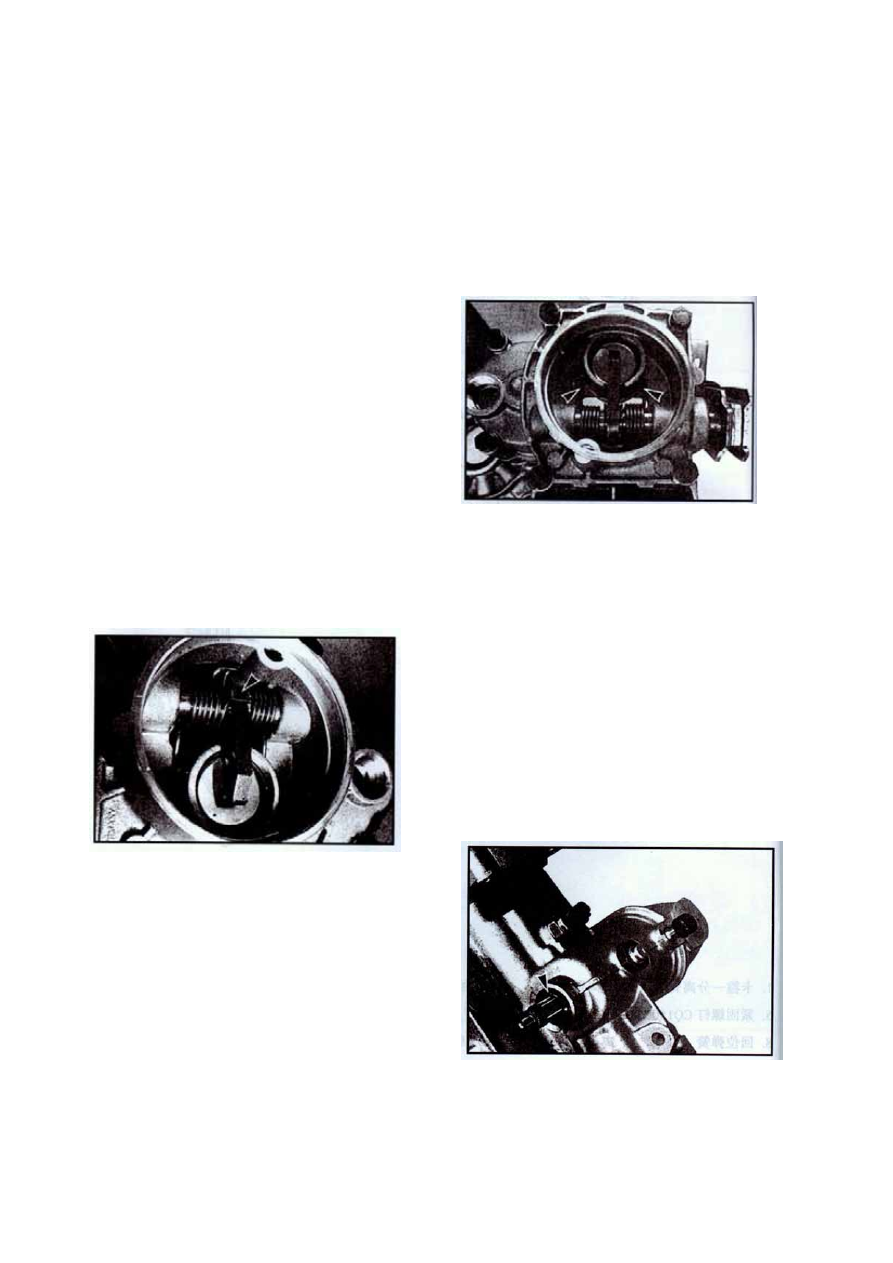
Mount the separate finger of clutch as indicated in figure, 

then mount the separate shaft, spring and clip. When 

mounting spring, notice the position in figure.   

Press the new rear cover onto its due position with special 

tool.  

If mounting on the complete car, follow the below 

procedures: 

Fill oil into transmission to the given level.   

Lower the car on the platform and connect the cables of 

clutch.  

Dismantlement and assembly of oil seal of shifting shaft 

The dismantlement and assembly of oil seal of shifting shaft 

can be done without dissembling the transmission assy.   

Dismantlement: 


Remove the oil seal of shifting shaft by grafter or deift 

punch.  


19

Assembly

Apply grease onto the lips of oil seal, and press the seal 

fully into transmission housing with special tool. 

Assembly:  Mount the bearing in the part of housing 

where the shifting shaft is contained. Press the bearing 

onto its due position with special tool.   

Afterwards, install the shifting shaft.   

Dismantlement and assembly of bearing of shifting 

shaft 


Dismantlement and assembly of needle roller bearing 

of output shaft 


Dismantlement: 


When changing the bearing of shifting shaft, it is needed 

to take out the shaft. Remove oil seal; put the special tool 

into the housing of shifting shaft, as indicated in figure, 

and knock until the bearing jumps out.   

Dismantlement:  


Flush down the needle roller bearing with special deift 

punch.  

Assembly:  press the needle roller bearing onto its due 

position with special tool.   

Special tool   

Special tool   

Special tool   

Special tool   

Special tool 

Special tool 

Special tool 


20

Dismantlement, Disassembly and Assembly of 

Shifting Shaft 

When doing this, it is not necessary to disassemble 

the transmission assy.   

Dismantlement:  


Put the assy. on the shelf or platform, with the gear at 

neutral position. (the shifting shaft should be able to 

move smoothly by arrow direction). Unscrew the 

shifting fixing-seat assy.   

Dismantlement: Press spring-1 by arrow direction to 

compress the spring inside. Keep it at the position until 

snap ring-2 is removed.   

Assembly: the procedures are reverse to the above.   

Note: be sure that the fork system is at neutral position. 


The torque of screw plug is 50Nm.   

The torque of shifting shaft fixing-seat is 40Nm.   


Unscrew the plug with special tool and take out 

shifting shaft.   


Dismantlement of clutch housing assy.   

After changing the clutch housing, it is necessary to 

readjust the output shaft and differential gear.   


Dismantlement and assembly of needle roller shaft of 

input shaft 

Dismantlement:  


Flush down the needle roller bearing with special deift 

punch.  

Special tool 

Special tool 

Special tool


21


Assembly  


Assembly 

As indicated, mount the needle roller bearing of input 

shaft with special deift punch and be sure it is pressed 

onto due position.   

Apply grease onto the lips of oil seal and press the oil 

seal onto its due position with special tool.   

Dismantlement and assembly of oil seal of input shaft 

Dismantlement:  When dismantling the oil seal of input 

shaft, it is not necessary to disassemble the transmission 

assy.  

Dismantlement and assembly of cone bearing   

They are intermediate bearings, and meant to the 

differential bearings that are respectively installed on the 

clutch housing and transmission housing. When 

mounting cone bearing, pay attention not to confuse, esp. 

never replace the outer and inner loops matched for the 

two same differential bearings. When changing the cone 

bearing, readjust the mounting positions of relevant 

shafts/bearings.  


Dismantle the oil seal of input shaft with special tool as 

indicated in figure.   


Special tool   

Special tool   

Special tool   

Special tool   


22


Content   ..  139  140  141  142   ..